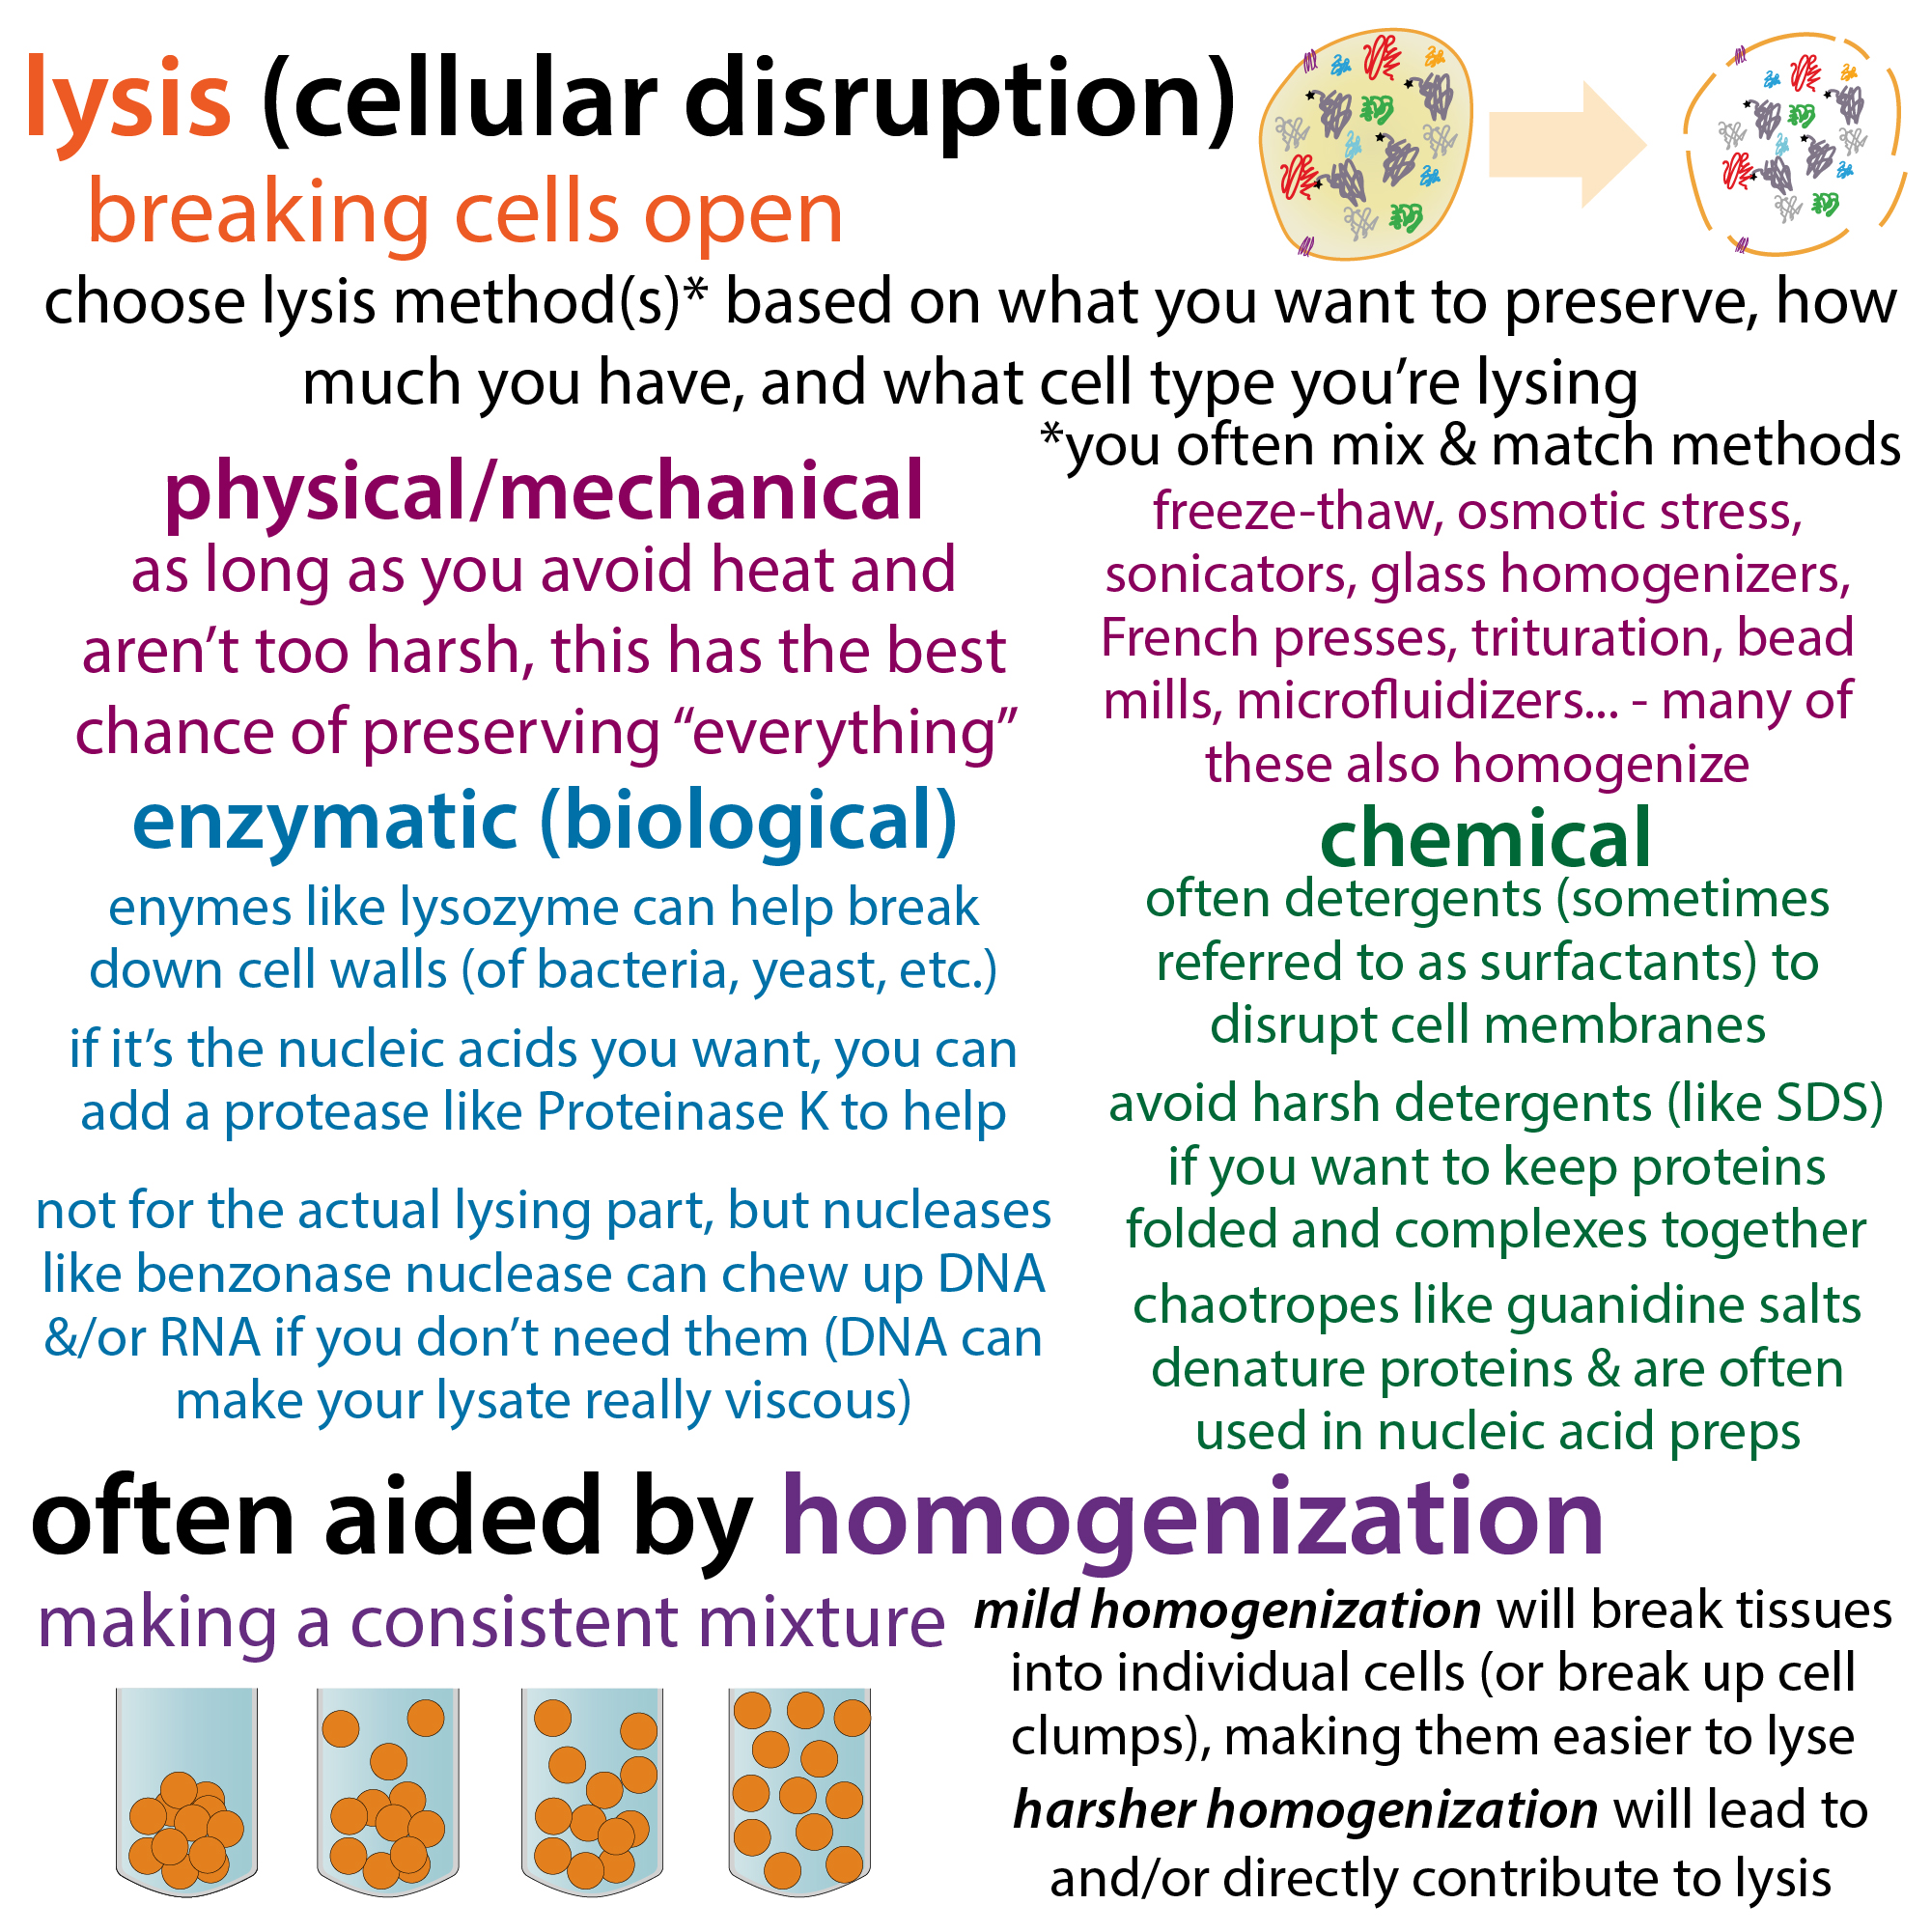
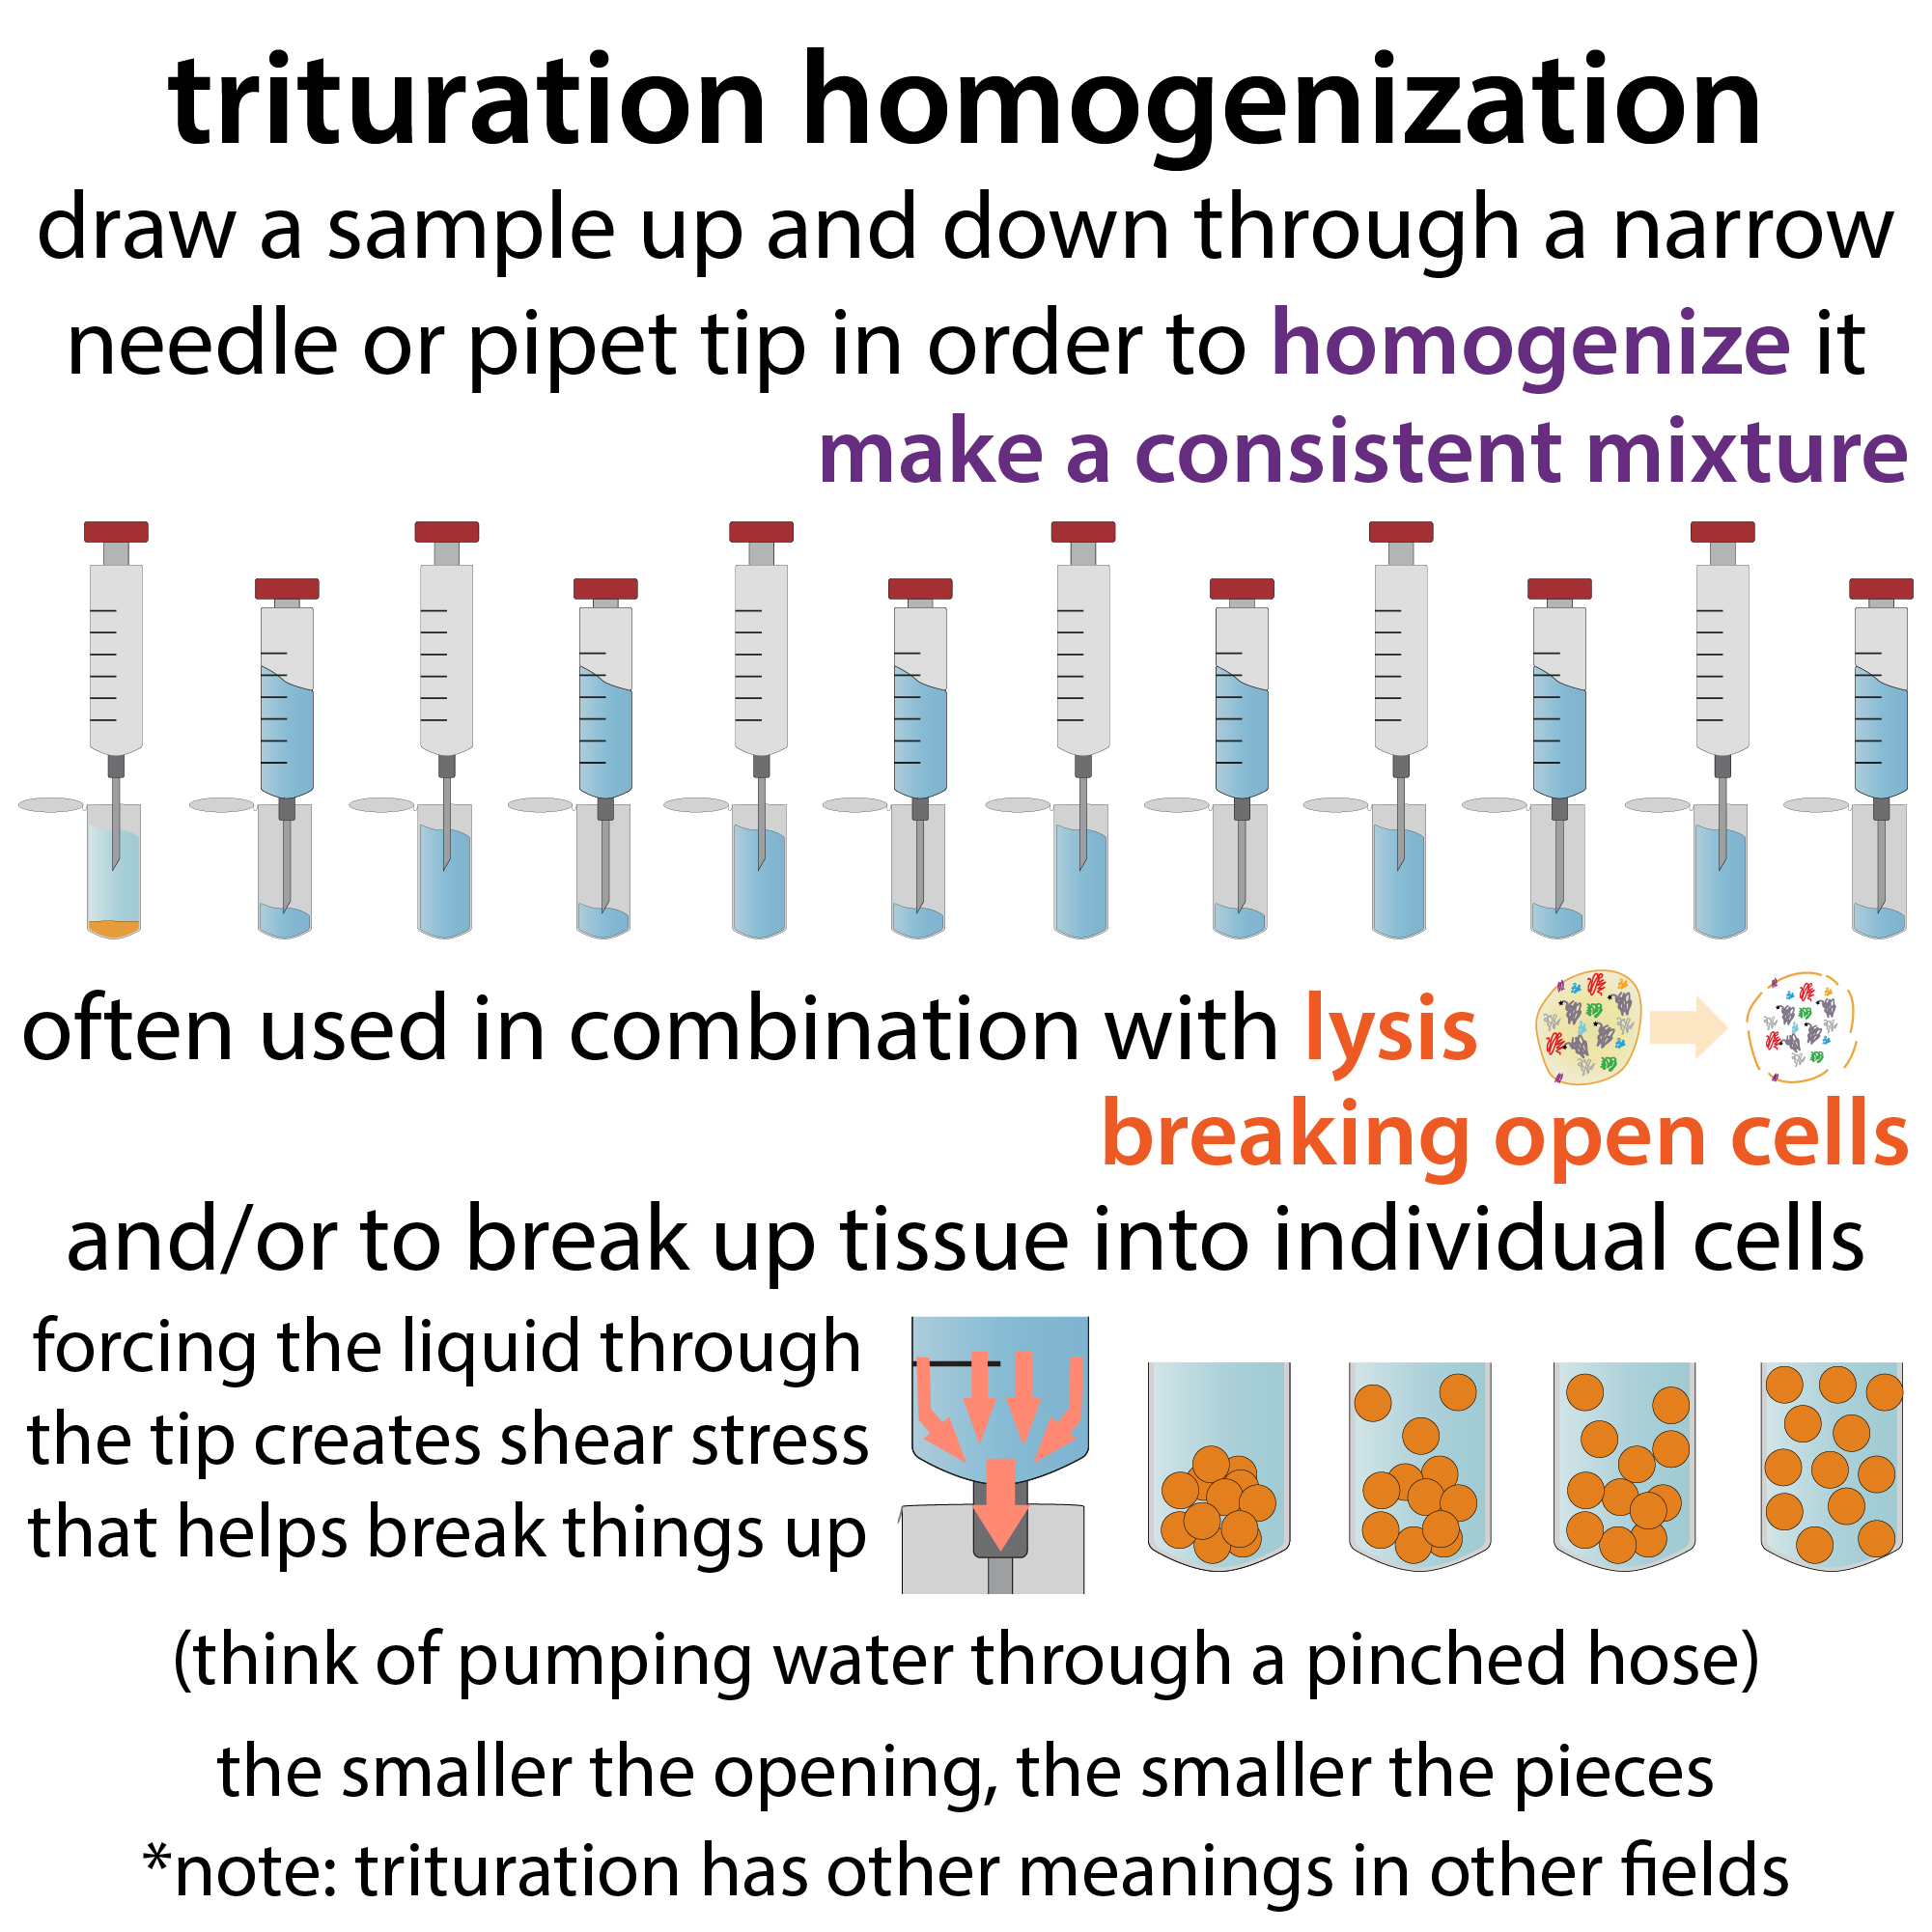
If we want to play with (er… I mean experiment with) stuff that’s inside of cells, we need to break those cells open – we call this lysis or “cellular disruption” and there are a variety of methods including physical/mechanical (grinding, shearing, beating, freeze-thawing, sonicating etc.); biological/enzymatic (adding things to break down cell walls, etc.); and chemical (adding detergents to weaken cell membranes, chaotropes like guanidium salts to denature (unfold) proteins, etc.). Often, we use this methods in combination with some form of homogenization, a method to make a mixture consistent throughout. Homogenization methods include trituration (drawing a sample up and down through a needle), grinding, the use of glass homogenizers (e.g. Dounce homogenizers), etc. and depending on how harsh you go, you can either just break up clumps, separate individual cells from one another, or actually break cells open.
There are lots of different methods for both lysis and homogenization and what you choose depends on:
- sample type (tissues will definitely need to be homogenized first)
- volume (e.g. trituration is great for small volumes, but not big ones)
- cell type (bacteria and yeast, which have cell walls, are harder to break open than animal cells, which just have membranes)
- what you want to preserve (e.g. if you care about keeping proteins folded, avoid harsh detergents; if you want to protect DNA and RNA from nucleases and don’t care about proteins, add a proteinase and/or chaotropic salts)
Typically, no matter what you choose to use, you want to work on ice – especially when doing physical disruption methods that will generate heat.
I give an overview of some of the key methods and things to keep in mind in the video, but it’s far from comprehensive. If you want more information, I highly recommend this guide from OPS Diagnostics I stumbled across: Guide to the disruption of biological samples – 2012, Version 1.1, David W. Burden, Ph.D. https://opsdiagnostics.com/applications/samplehomogenization/homogenizationguidepart1.html
As well as this review article: Shehadul Islam, M., Aryasomayajula, A., & Selvaganapathy, P. R. (2017). A Review on Macroscale and Microscale Cell Lysis Methods. Micromachines, 8(3), 83. https://doi.org/10.3390/mi8030083
And here’s a post I did previously on sonication: https://bit.ly/ultrasonicshearing; https://youtu.be/cmN9COt3ikM
8/2/323 addendum…
Look to your lysis pellet and supernatant to tell if your lysis strategy worked well! (better hope so or your protein is still trapped inside the cell! and therefore pellets out…)
YouTube: https://youtu.be/WomscPyIvjI
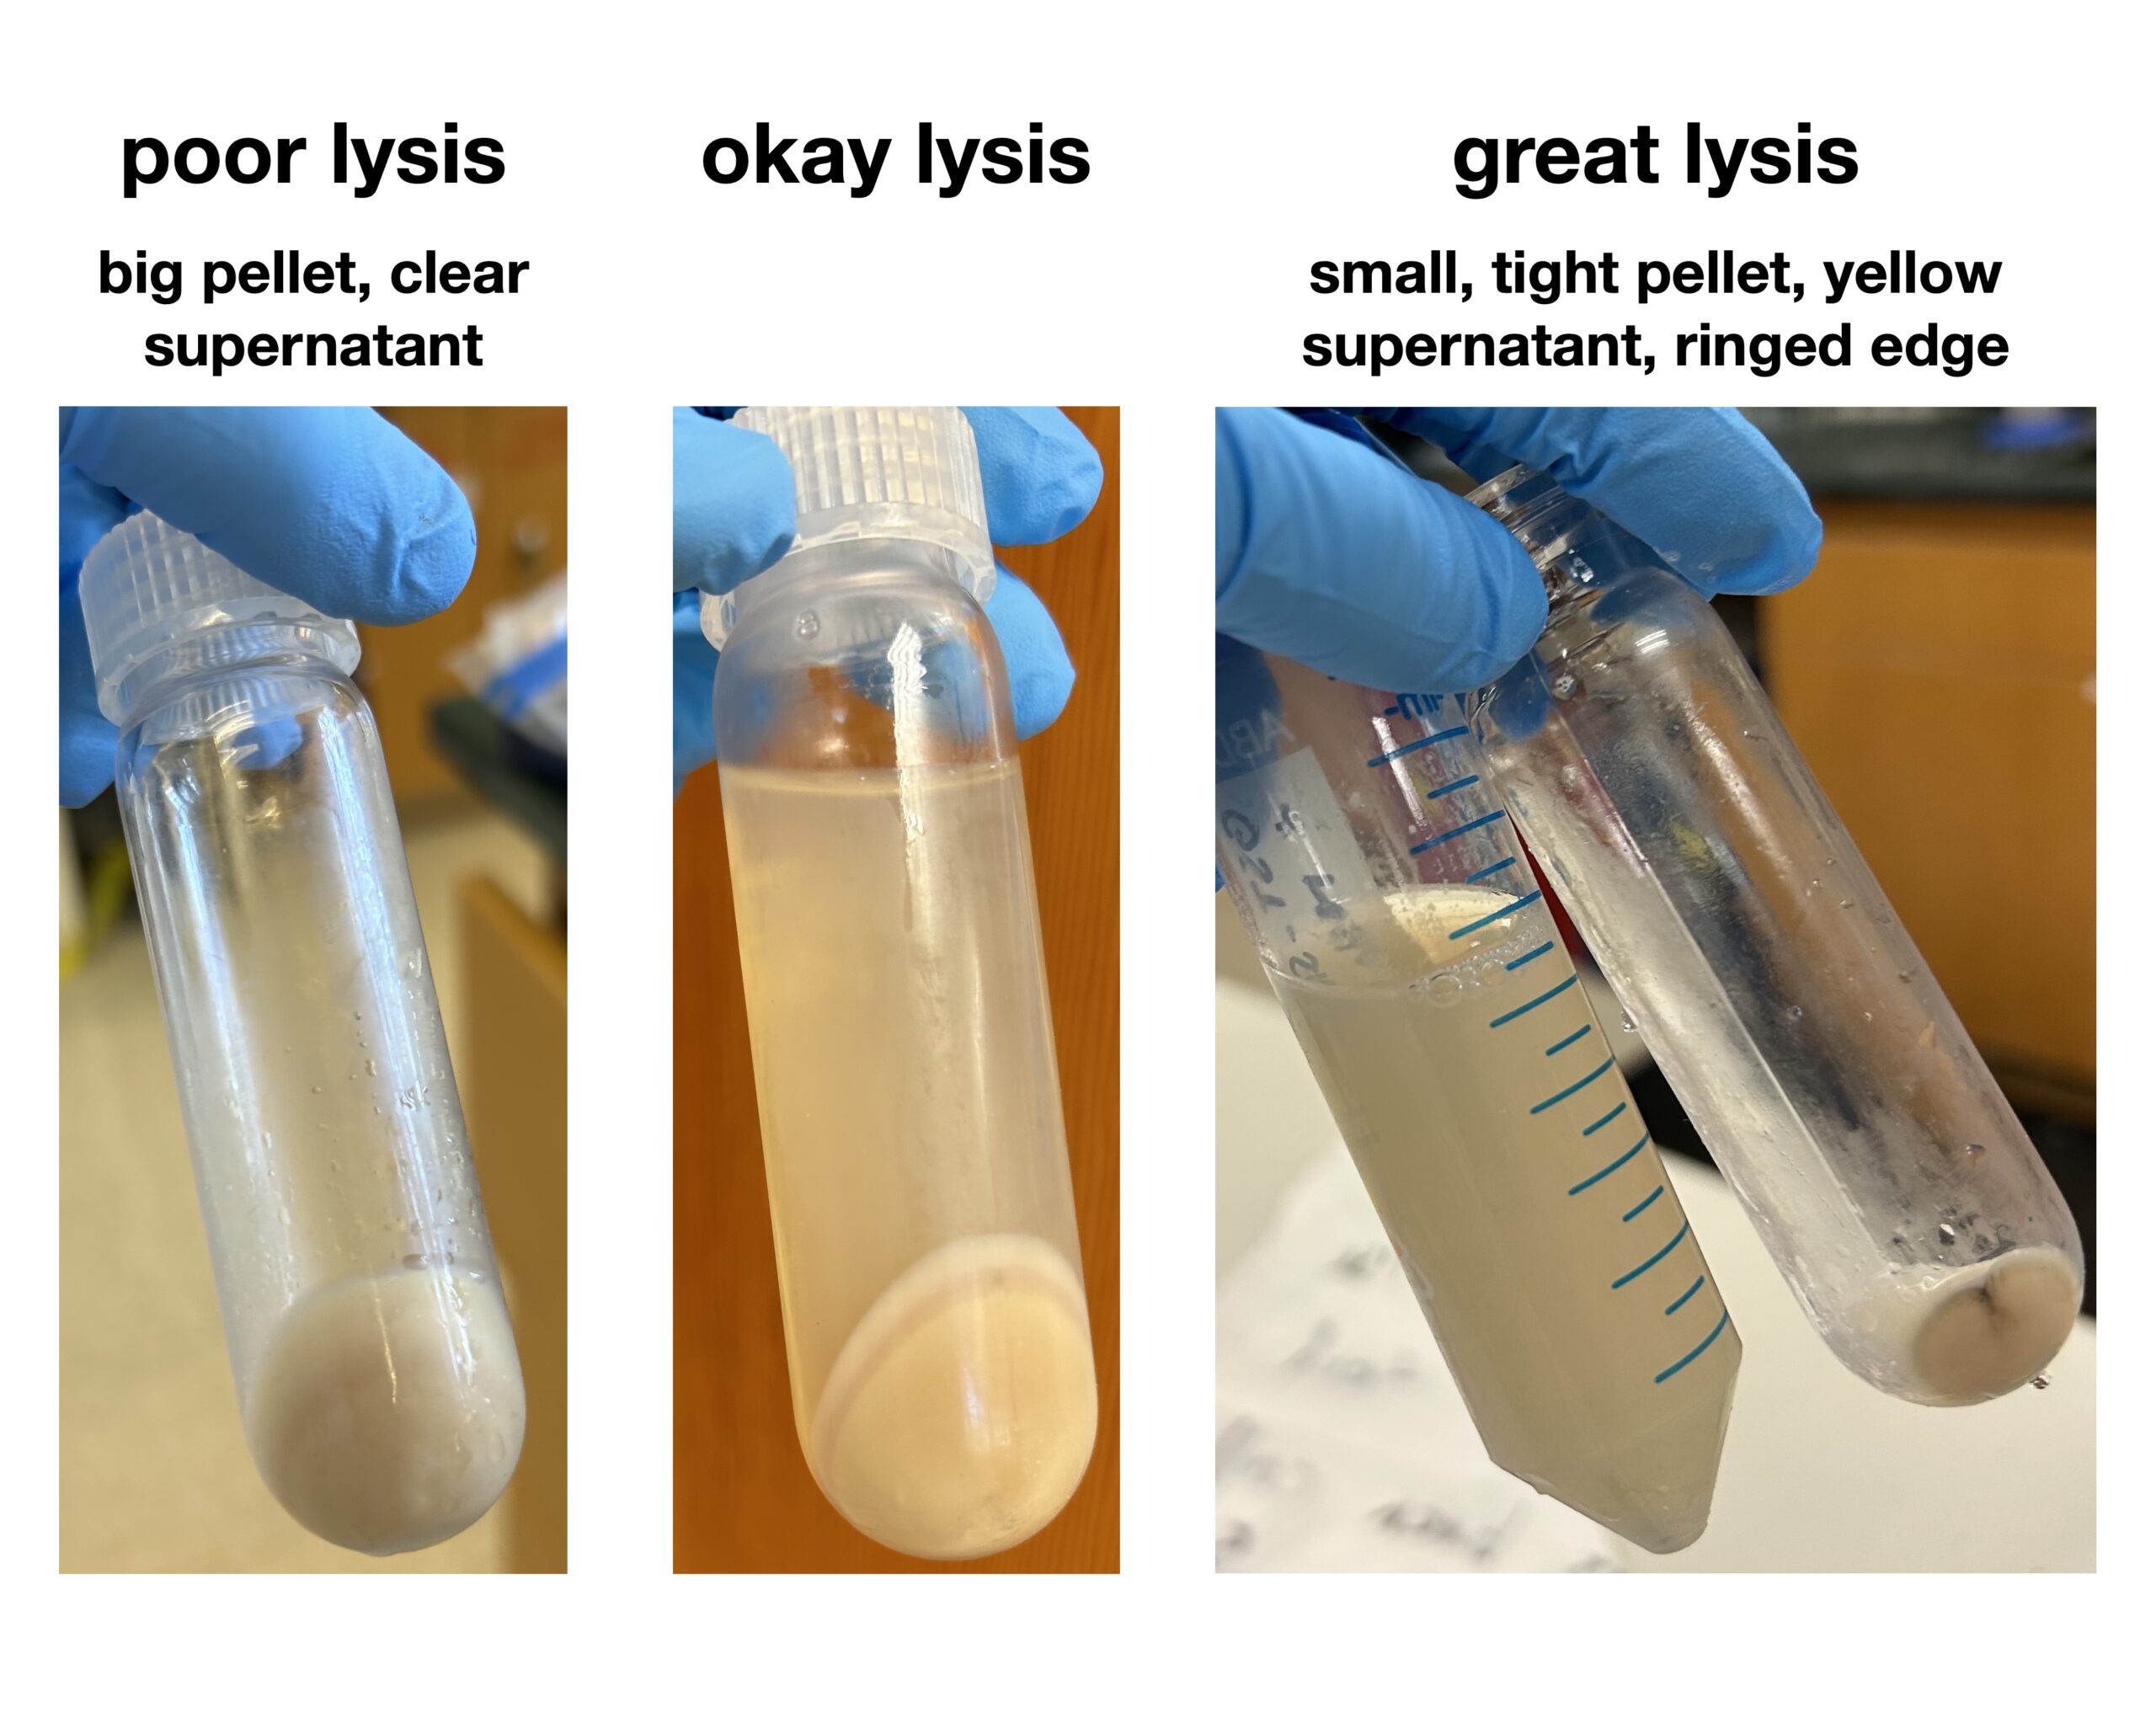
If your lysis went well, you should get a small, tight pellet, often with multicolored rings and a shiny edge ring. And the supernatant (liquid) should be yellowy
If your lysis didn’t go well, you will have a bigger, softer, pellet without those rings, and the supernatant will be super dilute & barely yellow (note: I labeled the picture “clear” but I meant “colorless,” sorry!)
To help ensure that your lysis went well *before* you spin things down, look at the lysate over the lysis process (e.g. in between sonication cycles) – you should see it go from a thick milky look to more of a skim milk or dirty water look. It won’t get clear, but it will clear up a bit. It’s sometimes easiest to see if you hold it up to the light.
Over time, you’ll get a sense of what to look for so that you lyse thoroughly, but not excessively. Too excessive sonication, etc. can cause the protein to denature (unfold) and stuff which is bad…
But too gentle of lysis and your protein will end up in the pellet (which you want to only contain membrane bits and insoluble stuff, *not* intact cells) – and then you can’t even tell if your protein was soluble or not.
Hope that helps – it’s a lot of trial, error, and optimization, especially since, as I’ve discovered, sonicator settings differ for different sonicators and are sometimes quite finicky!