A “pull-down” experiment is where we capture (usually bind to beads) a molecule of interest (often a protein) from a mixture and see what it’s bound to (often via western blot or mass-spectrometry). One of the most common forms of a pull-down is a co-immunoprecipitation (usually just called a co-IP). As the “immuno” part of the name suggests, in a co-IP we’re using antibodies to do that capture step. But other forms of pull-downs are basically the same, you’re just binding through non-antibody-based interactions with some unique thing about the molecule of interest, such as an affinity tag (I will get into this later).
link to videos in case embed isn’t working: https://youtu.be/Q0M64_jToVQ & https://youtu.be/JkceHf-nzbk https://youtu.be/0jLgCFJTpJQ & https://youtu.be/gQj2bG8G8lI
Speaking of that “molecule of interest,” it is frequently referred to as the “bait” which is a lot shorter to write than “molecule of interest” so I’m going to go with that! We’re interested in seeing what “prey” that bait is bound to, so we need to:
- capture the bait (and, indirectly, whatever it’s bound to)
- Wash off non-bound stuff (under conditions harsh enough to remove the loosely-associated stuff (the wanna-be prey) but gentle enough to preserve the stronger interactions (the true prey))
- Release the bait/prey complex
- Figure out what’s there
Let’s go step by step…
1. Capture
The key things here are that:
- We only want to capture the true bait. So we need our capture method to be very specific
- We want to capture as much of the bait as possible, so we want this binding to be strong (high affinity)
- We need to actually be able to isolate the bait, not just bind it to something
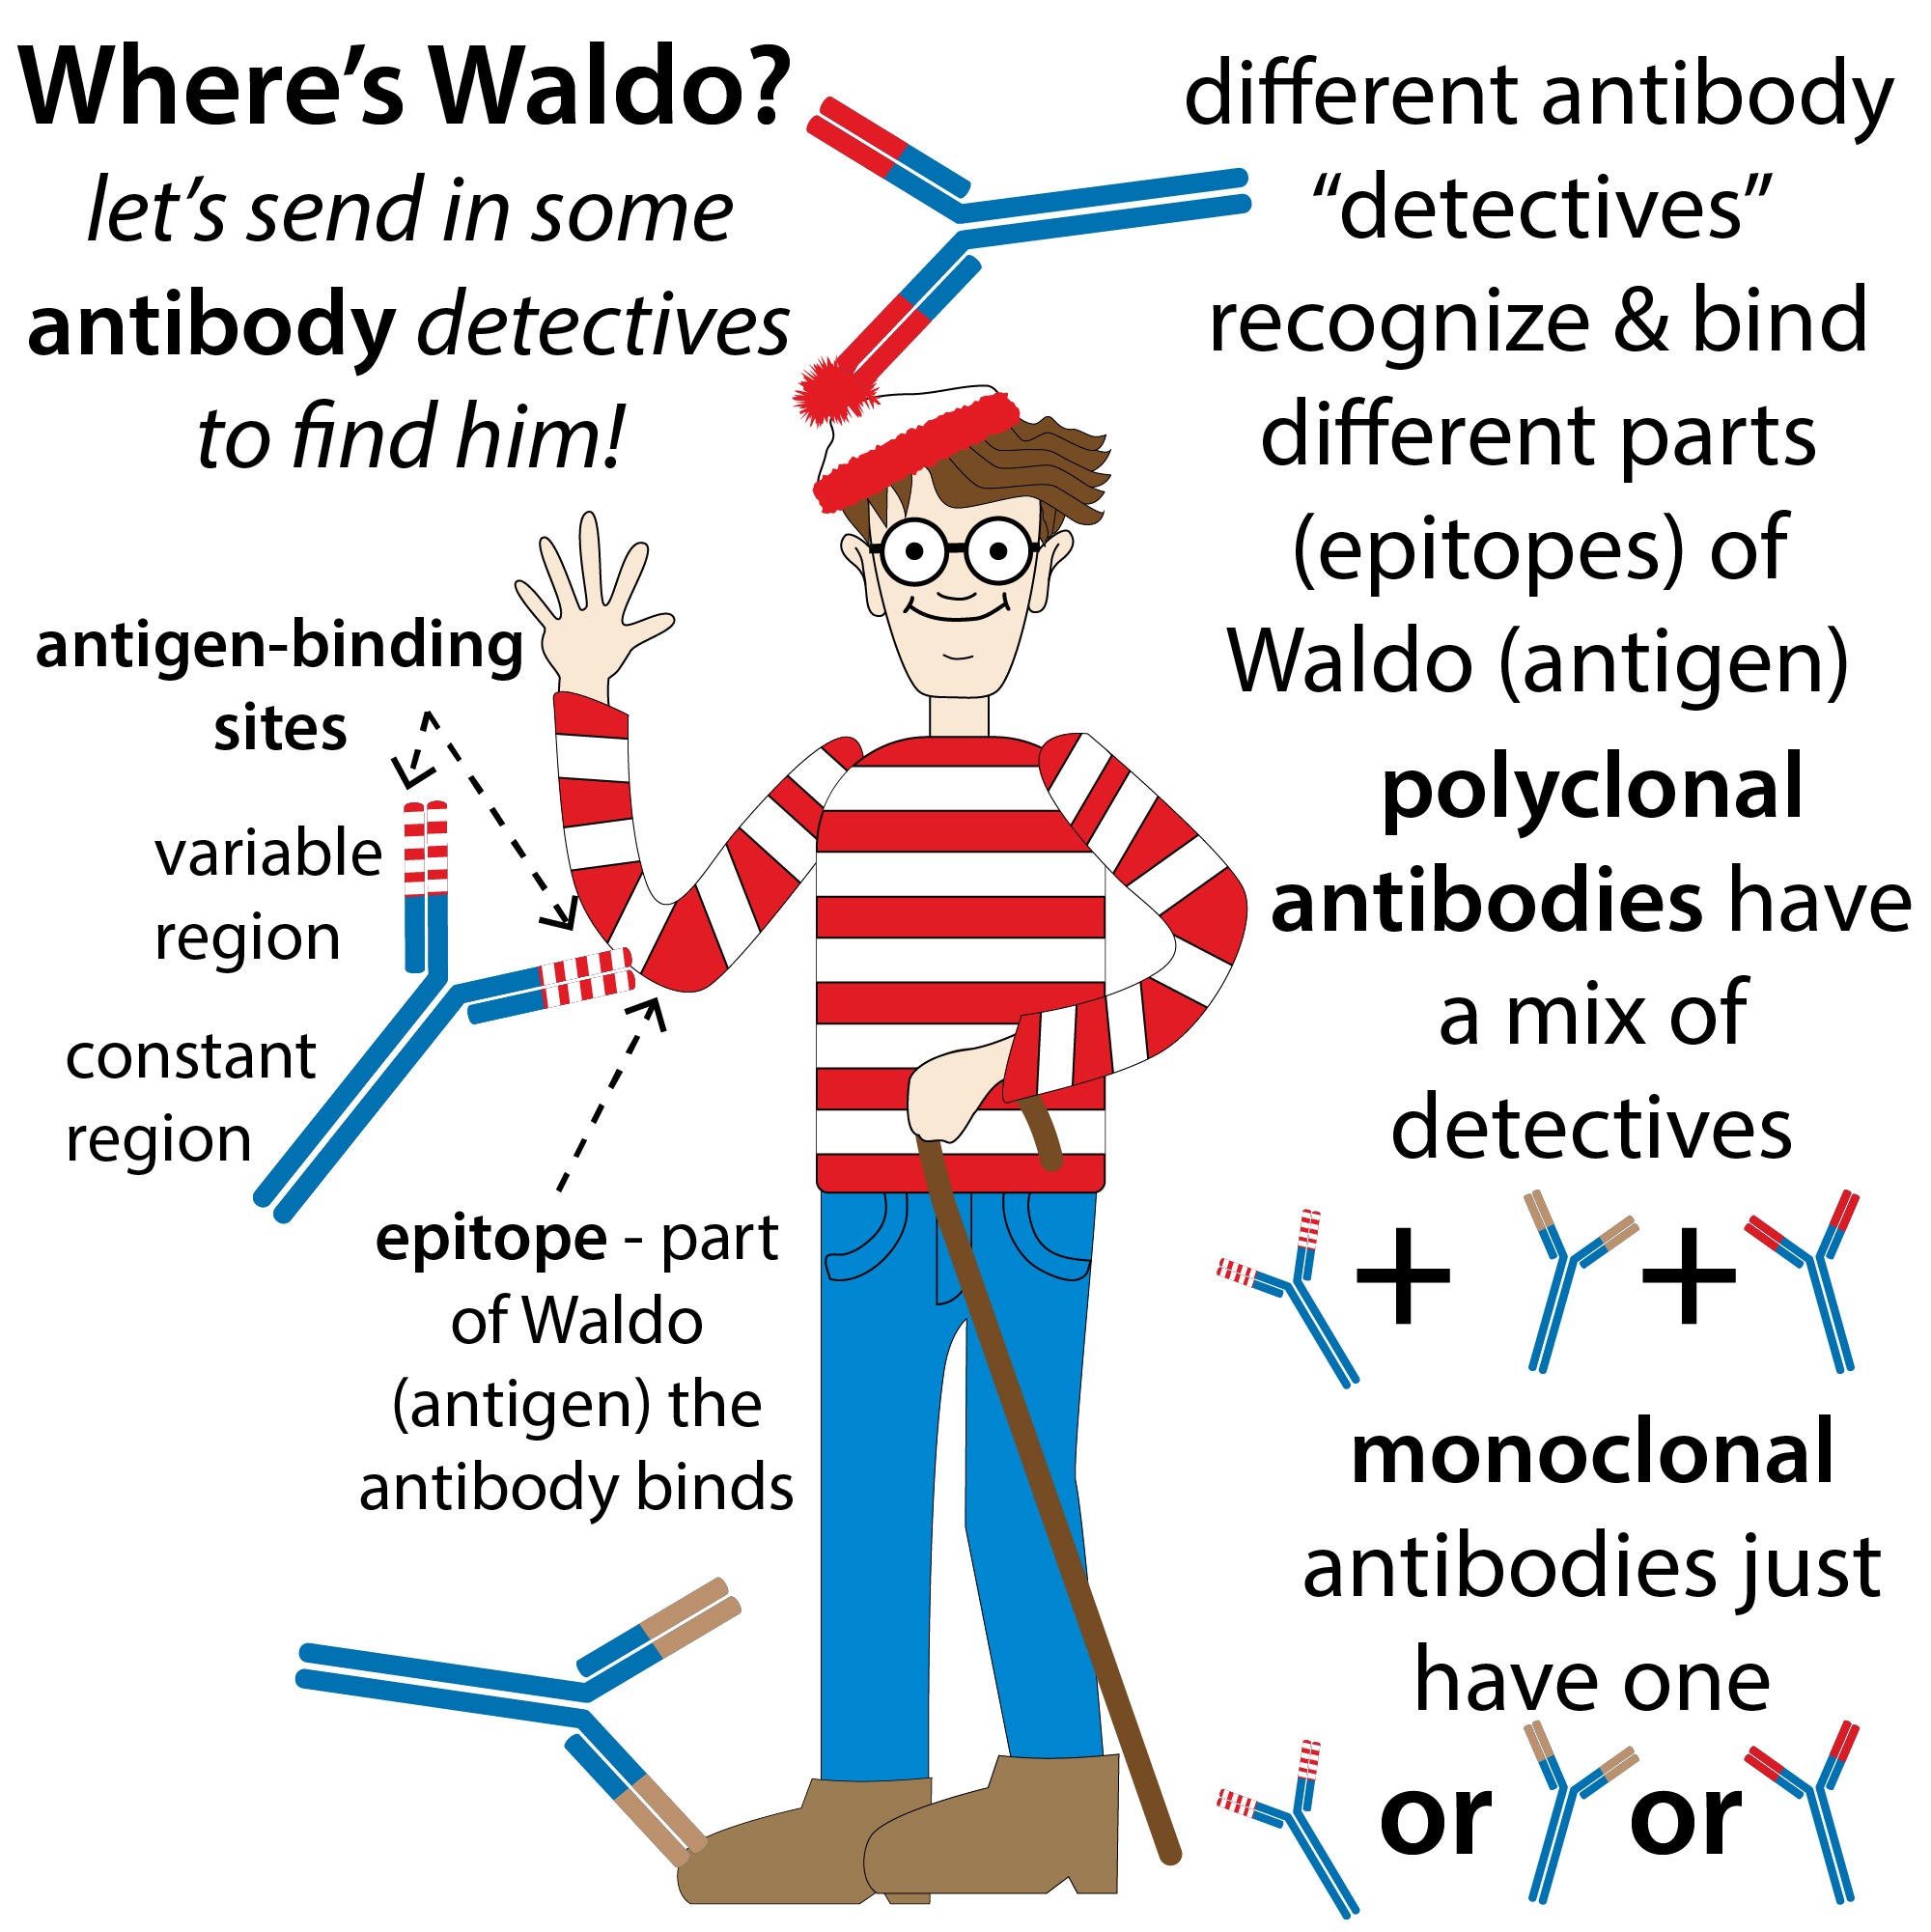
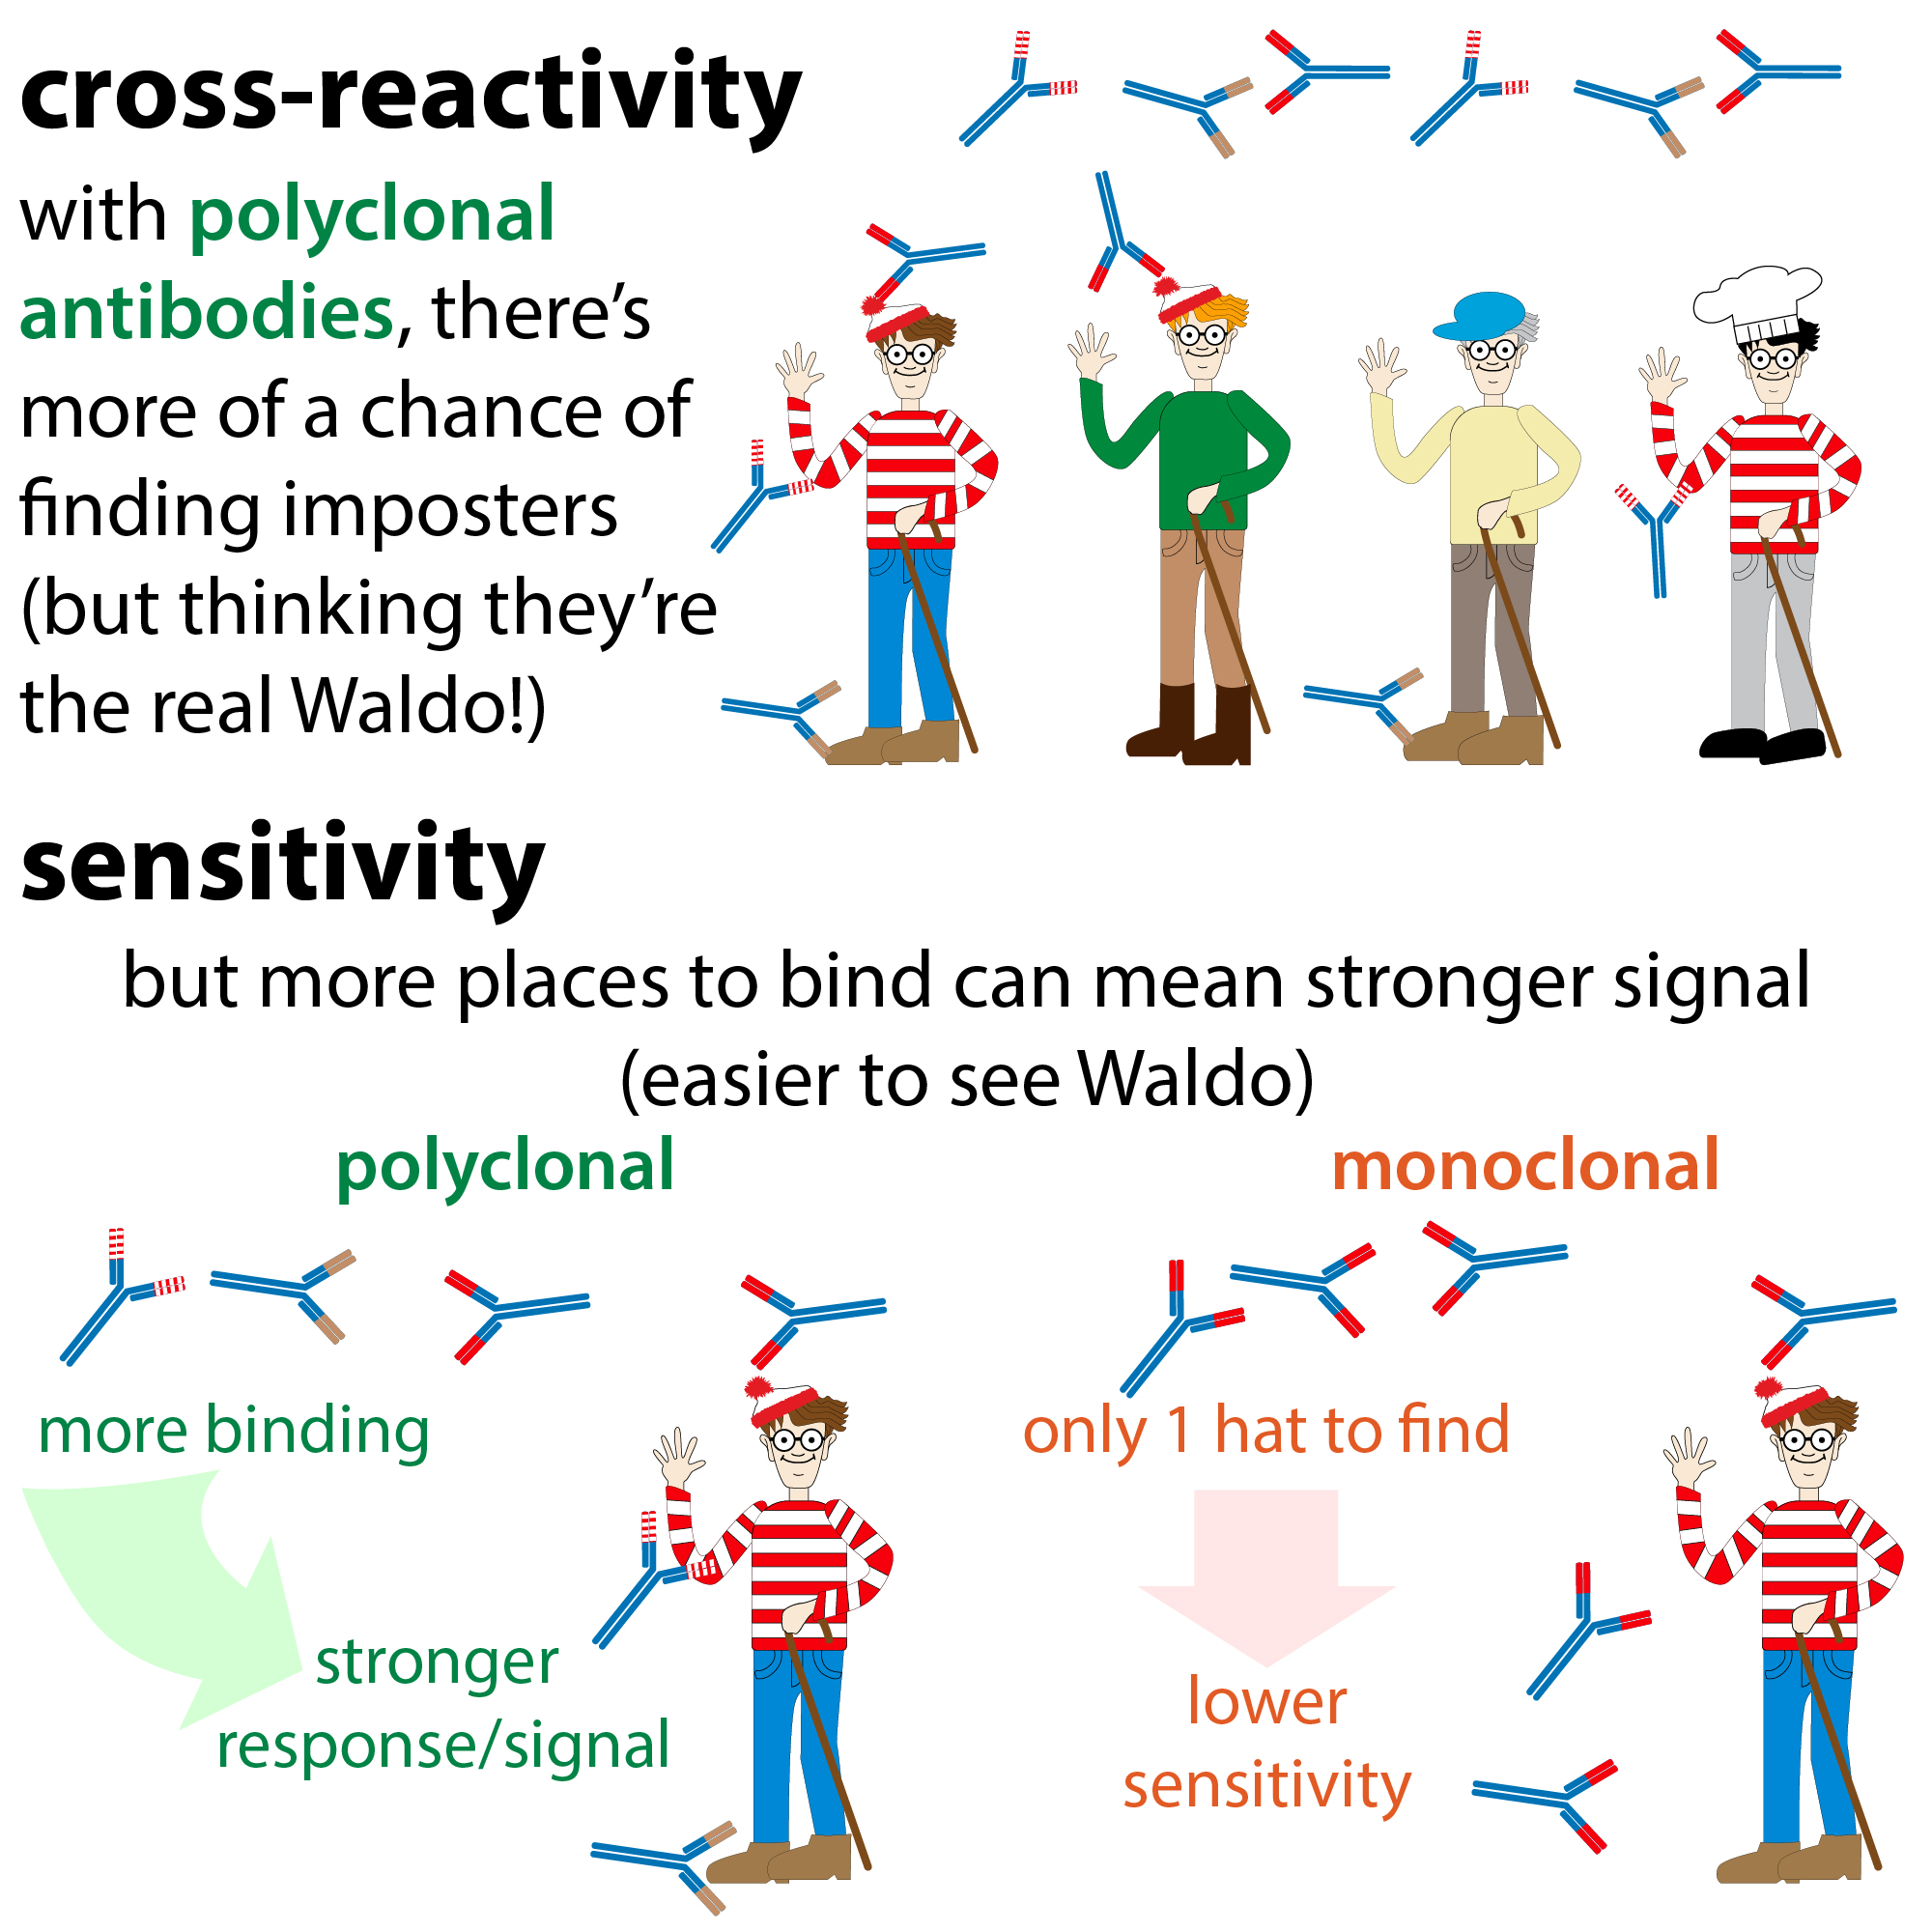
In order to get that high specificity, we need to target something unique about the bait. If we’re dealing with an unmodified, “native”, protein, this means we are basically limited to using antibodies directed against that protein. Not all proteins have very good antibodies against them available to buy. And, even if they do, they’re typically really expensive. So usually, if they can, people use generically-engineered proteins, where they add on a little “epitope” tag to the end, such as a FLAG, myc, or HA tag. An epitope is the part of a molecule that an antibody “recognizes” (binds to). So a FLAG tag, for example can be bound by anti-FLAG antibodies. And antibodies against these commonly-added epitopes are a lot cheaper to buy (because so many people want them) and have pretty good affinity and specificity.
That’s all still talking about co-IPs (or plain-old IPs where you’re not trying to see what the bait is bound to just want to isolate the bait). But other pull-down strategies use non-antibody routes. They still rely on binding to a unique thing, which is often some sort of label you put on – it could be something like biotinylation (which can be captured with streptavidin and is a strategy sometimes used to capture labeled RNA or DNA) or an affinity tag like GST (which can be captured with glutathione) that you add onto the end of the bait through genetic engineering like with the epitope tags.
The genetic engineering is sometimes done in the endogenous context (e.g. using CRISPR to add the tag-encoding DNA onto the bait gene in place). Or it can be done on a copy of the bait in a plasmid that is transfected into (stuck into) cells (with or without knocking out the endogenous bait).
Whether it’s an antibody or glutathione or whatever you’re binding to, you need to be able to isolate it from everything else that’s in the mixture. And this part is usually the “easiest” these days thanks to magnetic beads. Basically these beads are attached (permanently (covalently) or temporarily (non-covalently)) to the thing you’re using for the capture (e.g the antibody). And you can use a magnetic rack to suck the beads to the side of a tube in order to remove the rest of stuff.
Alternatively, you can use non-magnetic beads, often agarose, and isolate them by centrifuging gently to pellet them out (hopefully without disrupting bait/prey interactions).
Either way, the capturing thing needs to be attached to the beads. If you’re using a common epitope like HA or FLAG, you can buy already-linked beads. Similarly for things like streptavadin and glutathione beads. But if you are using a different antibody, such as one against a native protein, you’ll probably have to do the attaching yourself. A common way that this is done is by using Protein A or G coated beads. These proteins are bacterial proteins that bind the genetic part of antibodies. So they will bind any antibody, but non-covalently, so you may have to worry about the antibodies coming off the beads when you try to remove your bait if your conditions are too harsh.
A note to know about this too is that the antibodies have light and heavy chains that will show up ~25 & ~50 kDa on an SDS-PAGE gel which could get in the way of your analysis (especially if you try to do a western with a probe against the species it comes from – avoid that if at all possible!)
So, we’ve somehow got the beads bound to the capturer. And we just need to capture our bait (well, actually first we wash the beads a couple times to get them adjusted to the conditions we want to bind in). After that, it’s capture time! Often we’re pulling the bait down from a lysate (broken-open cells) to see what was interacting with what inside of the cells (do they bind). But you can also use mixtures of purified components to see if they bind (can they bind). Sometimes people do a sort of hybrid where they add a purified, labeled bait to lysate. This is less physiologically relevant than having the protein expressed in cells, but it gets around the need for manipulating DNA in the cells.
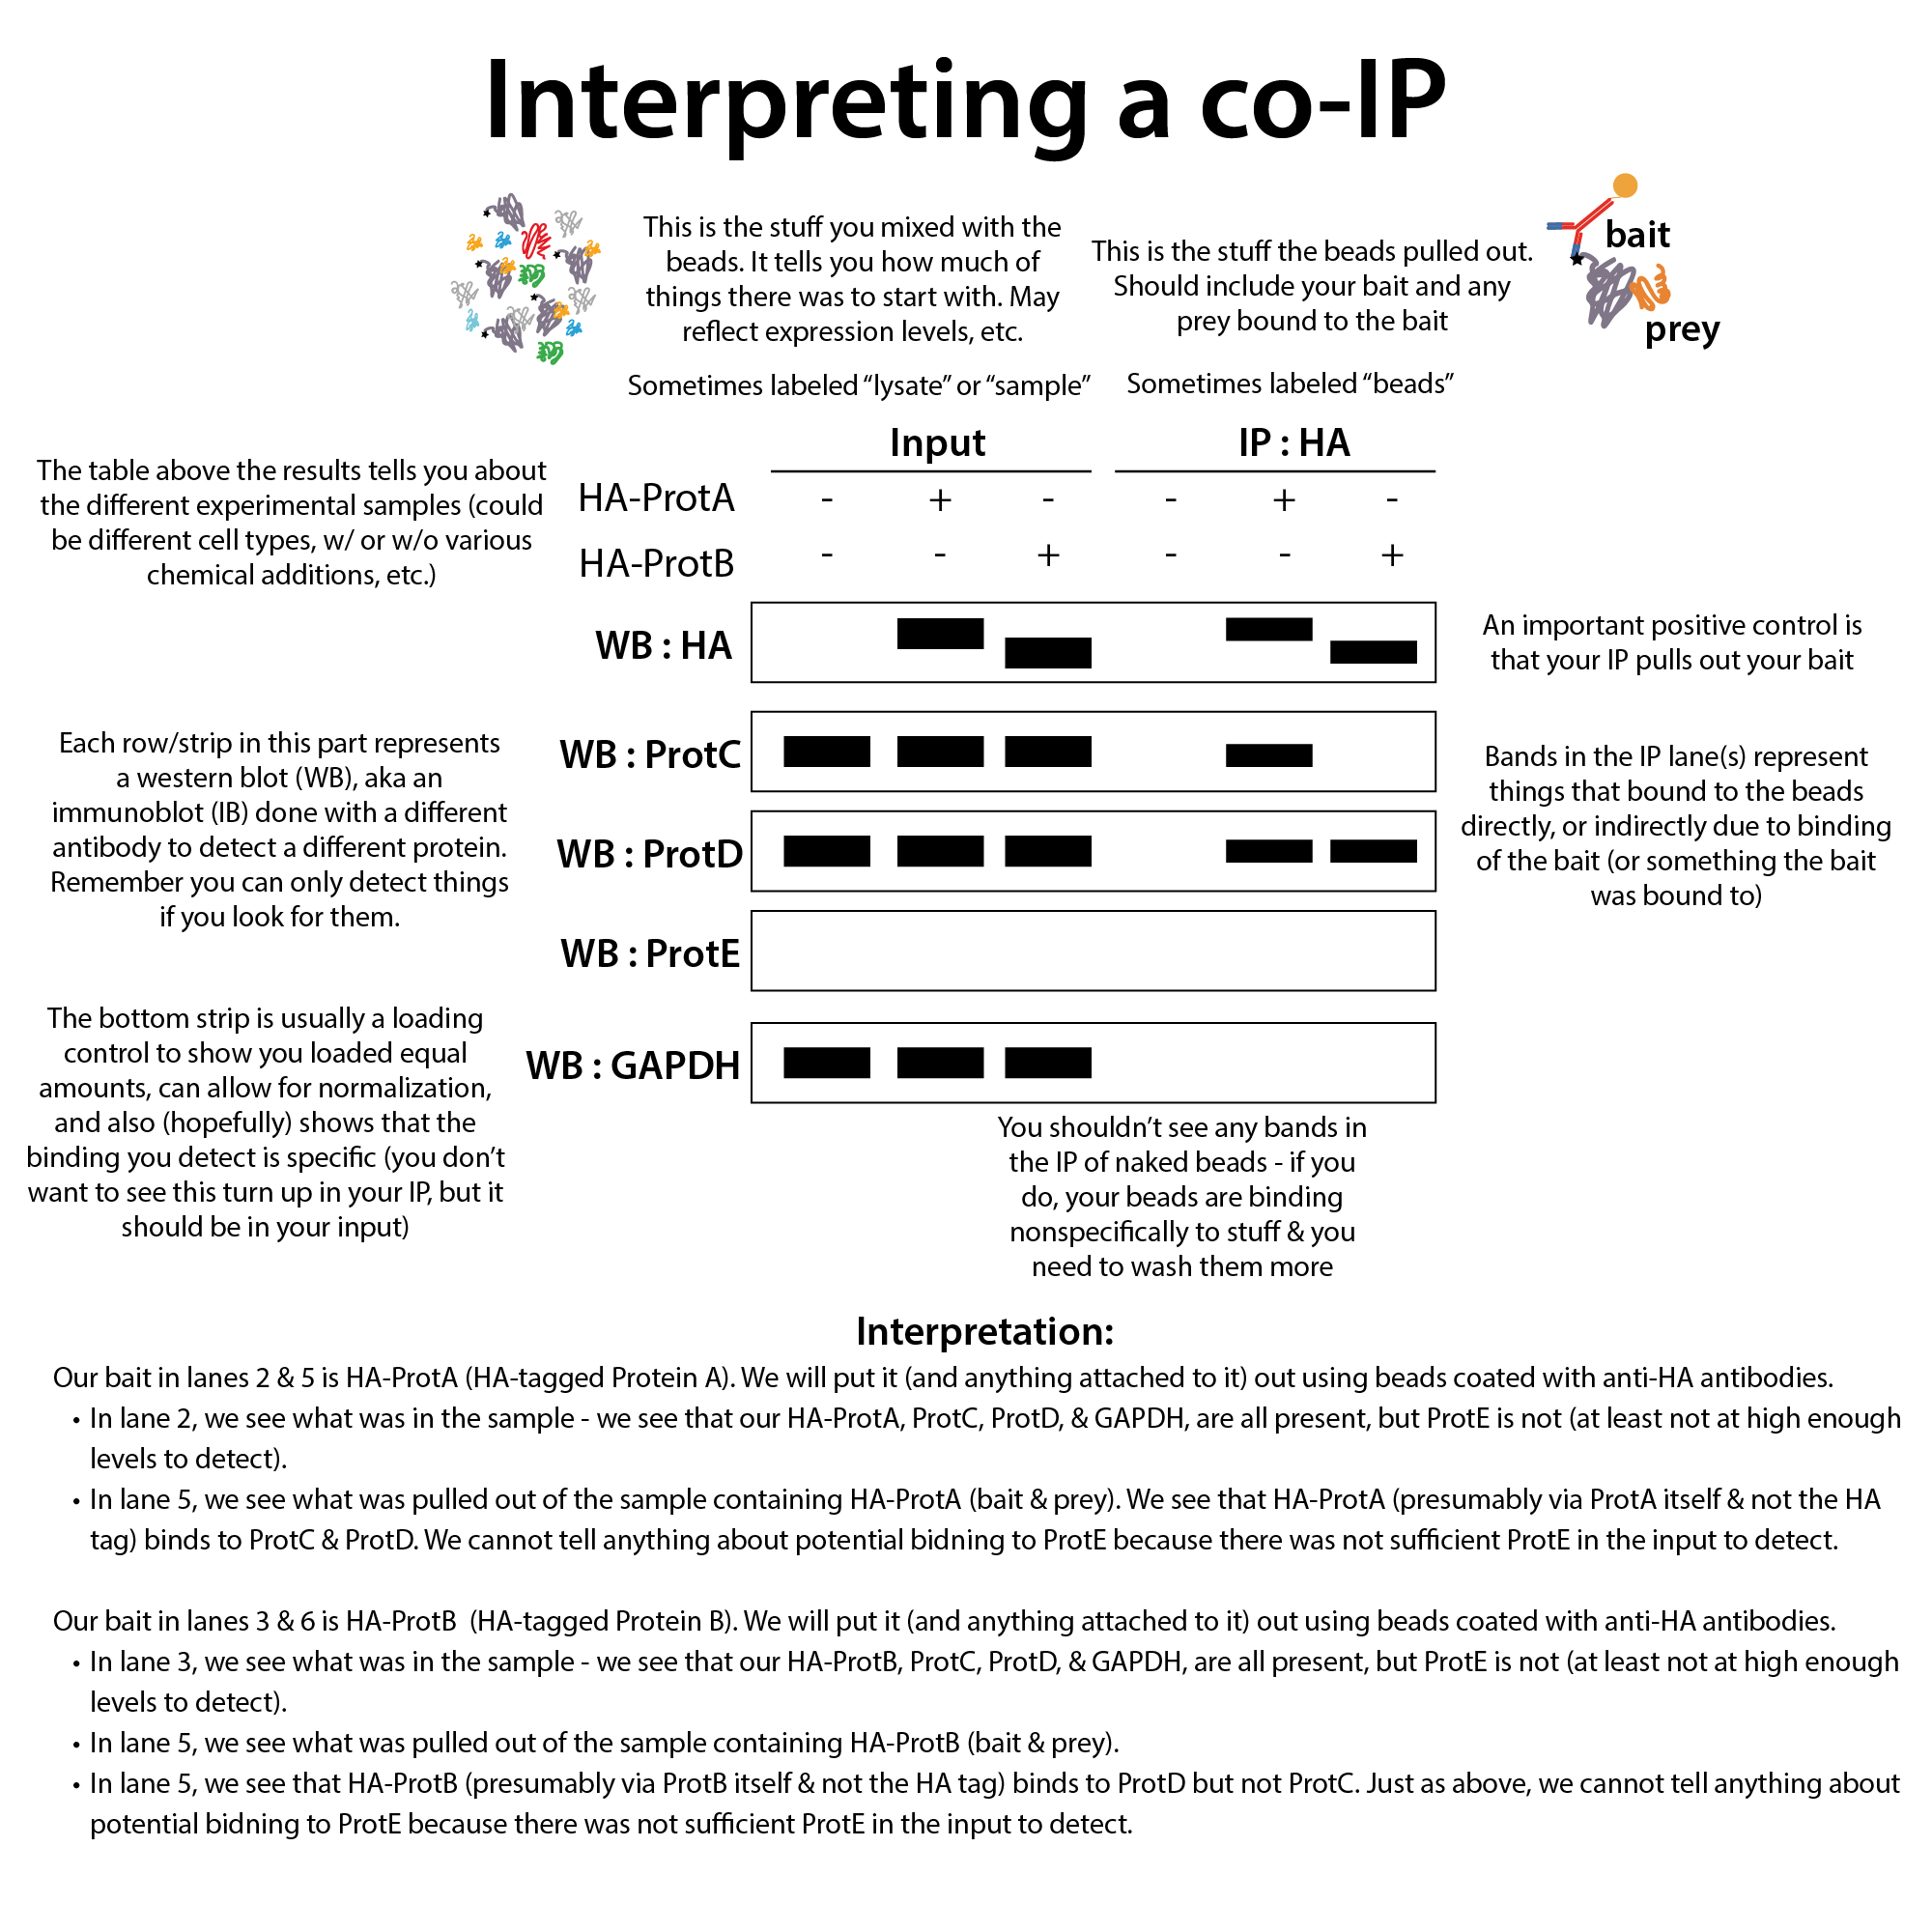
Whatever type of sample you’re using, take an aliquot (small portion) of it to use for the “input” lane of your gel – this is really important because it will tell you how much of proteins are present in the mixture. You will then compare this to how much gets pulled-down.
So, that’s super important to make sure and take that input aliquot. And now you can move on to getting your output!
Take your sample and mix it with your beads – away from the magnet. Often this is done in a thermal shaker at low speed to try to give all the bait lots of chances to meet the beads.
After that (which is often 30 min or so) you bring it to the magnet (or spin down) and remove the non bound stuff (save it in case you want to test it later).
You should have now gotten rid of the bulk of the non-bound stuff but you physically can’t remove all of the liquid – there’s always some hiding – and there’s likely still some really loosely-bound stuff that probably just bound during that mixing and not in the actual cells so it’s not really relevant. Bottom line – you need to do some washing. Which brings us to…
2. Wash
You might have to optimize your wash conditions based on:
- How weak of interactions you want to detect (do you want to be able to detect “friend-of-a-friend” type interactions? or just the directly bound?)
- How strong the affinity to the beads is. Of both your bait and non-specific things.
The weaker the interactions you want to be able to detect (and the weaker the bait-bead affinity is), the milder your wash needs to be.
If you want to only detect strong interactions and/or you have a high level of non-specific binding to the beads (and your bait binds well), you’ll want to harshen the wash.
Harsher washing usually entails using higher salt concentration and/or higher concentrations of detergent or harsher detergents.
How do you know if you have high non-specific binding? You need a negative control! You run this negative control in parallel with your “real deal.”
There are a variety of types of negative controls commonly used:
- “naked” beads (e.g. no antibody conjugated to them)
- beads with antibodies targeting a different protein
- same beads but in cells that don’t have the bait (such as beads targeting a tag in cells where the protein isn’t tagged)
Bands you see in this negative control tell you you have non-specific binding & you need to make your wash conditions harsher or at least keep an eye out for those bands and know they’re not bands that actually represent prey.
One option you can use to reduce such false-positives is to pre-clear the lysate by incubating the lysate with some sort of “decoy” beads like the naked beads to remove the non-specific binders.
You typically do about 3 washes and then it’s time for
3. Elution (unbind your bait/prey complexes)
There are different methods for doing this including heating with SDS-PAGE buffer, using acid or base, or using a competitor. Which you use depends on things like whether you’re hoping to preserve the complexes (in which case you don’t want to denature them) and whether your antibodies are covalently or noncovalently bound in your co-IP (if they’re noncovalently bound they’ll get denatured too and come off the beads and contaminate your elution, which you may or may not care about). I recommend looking to various protocols for specifics.
Bottom line is somehow you’re able to elute the stuff that was bound and now you can see what’s there…
4. Analyze
Most commonly, you’re looking for proteins, so I will discuss that in more detail, but you might be looking for nucleic acid sequences (DNA or RNA) that a bait was bound to, in which case you could send the sample for sequencing for an unbiased assessment (show me whatever is there) or you can use qPCR or northern or Southern blot to look for specific sequences of interest (show me whether or not (and how much) of a specific sequence is there).
For proteins, we can use mass spectrometry (mass spec) for an unbiased assessment or western blot to look for specific proteins of interest.
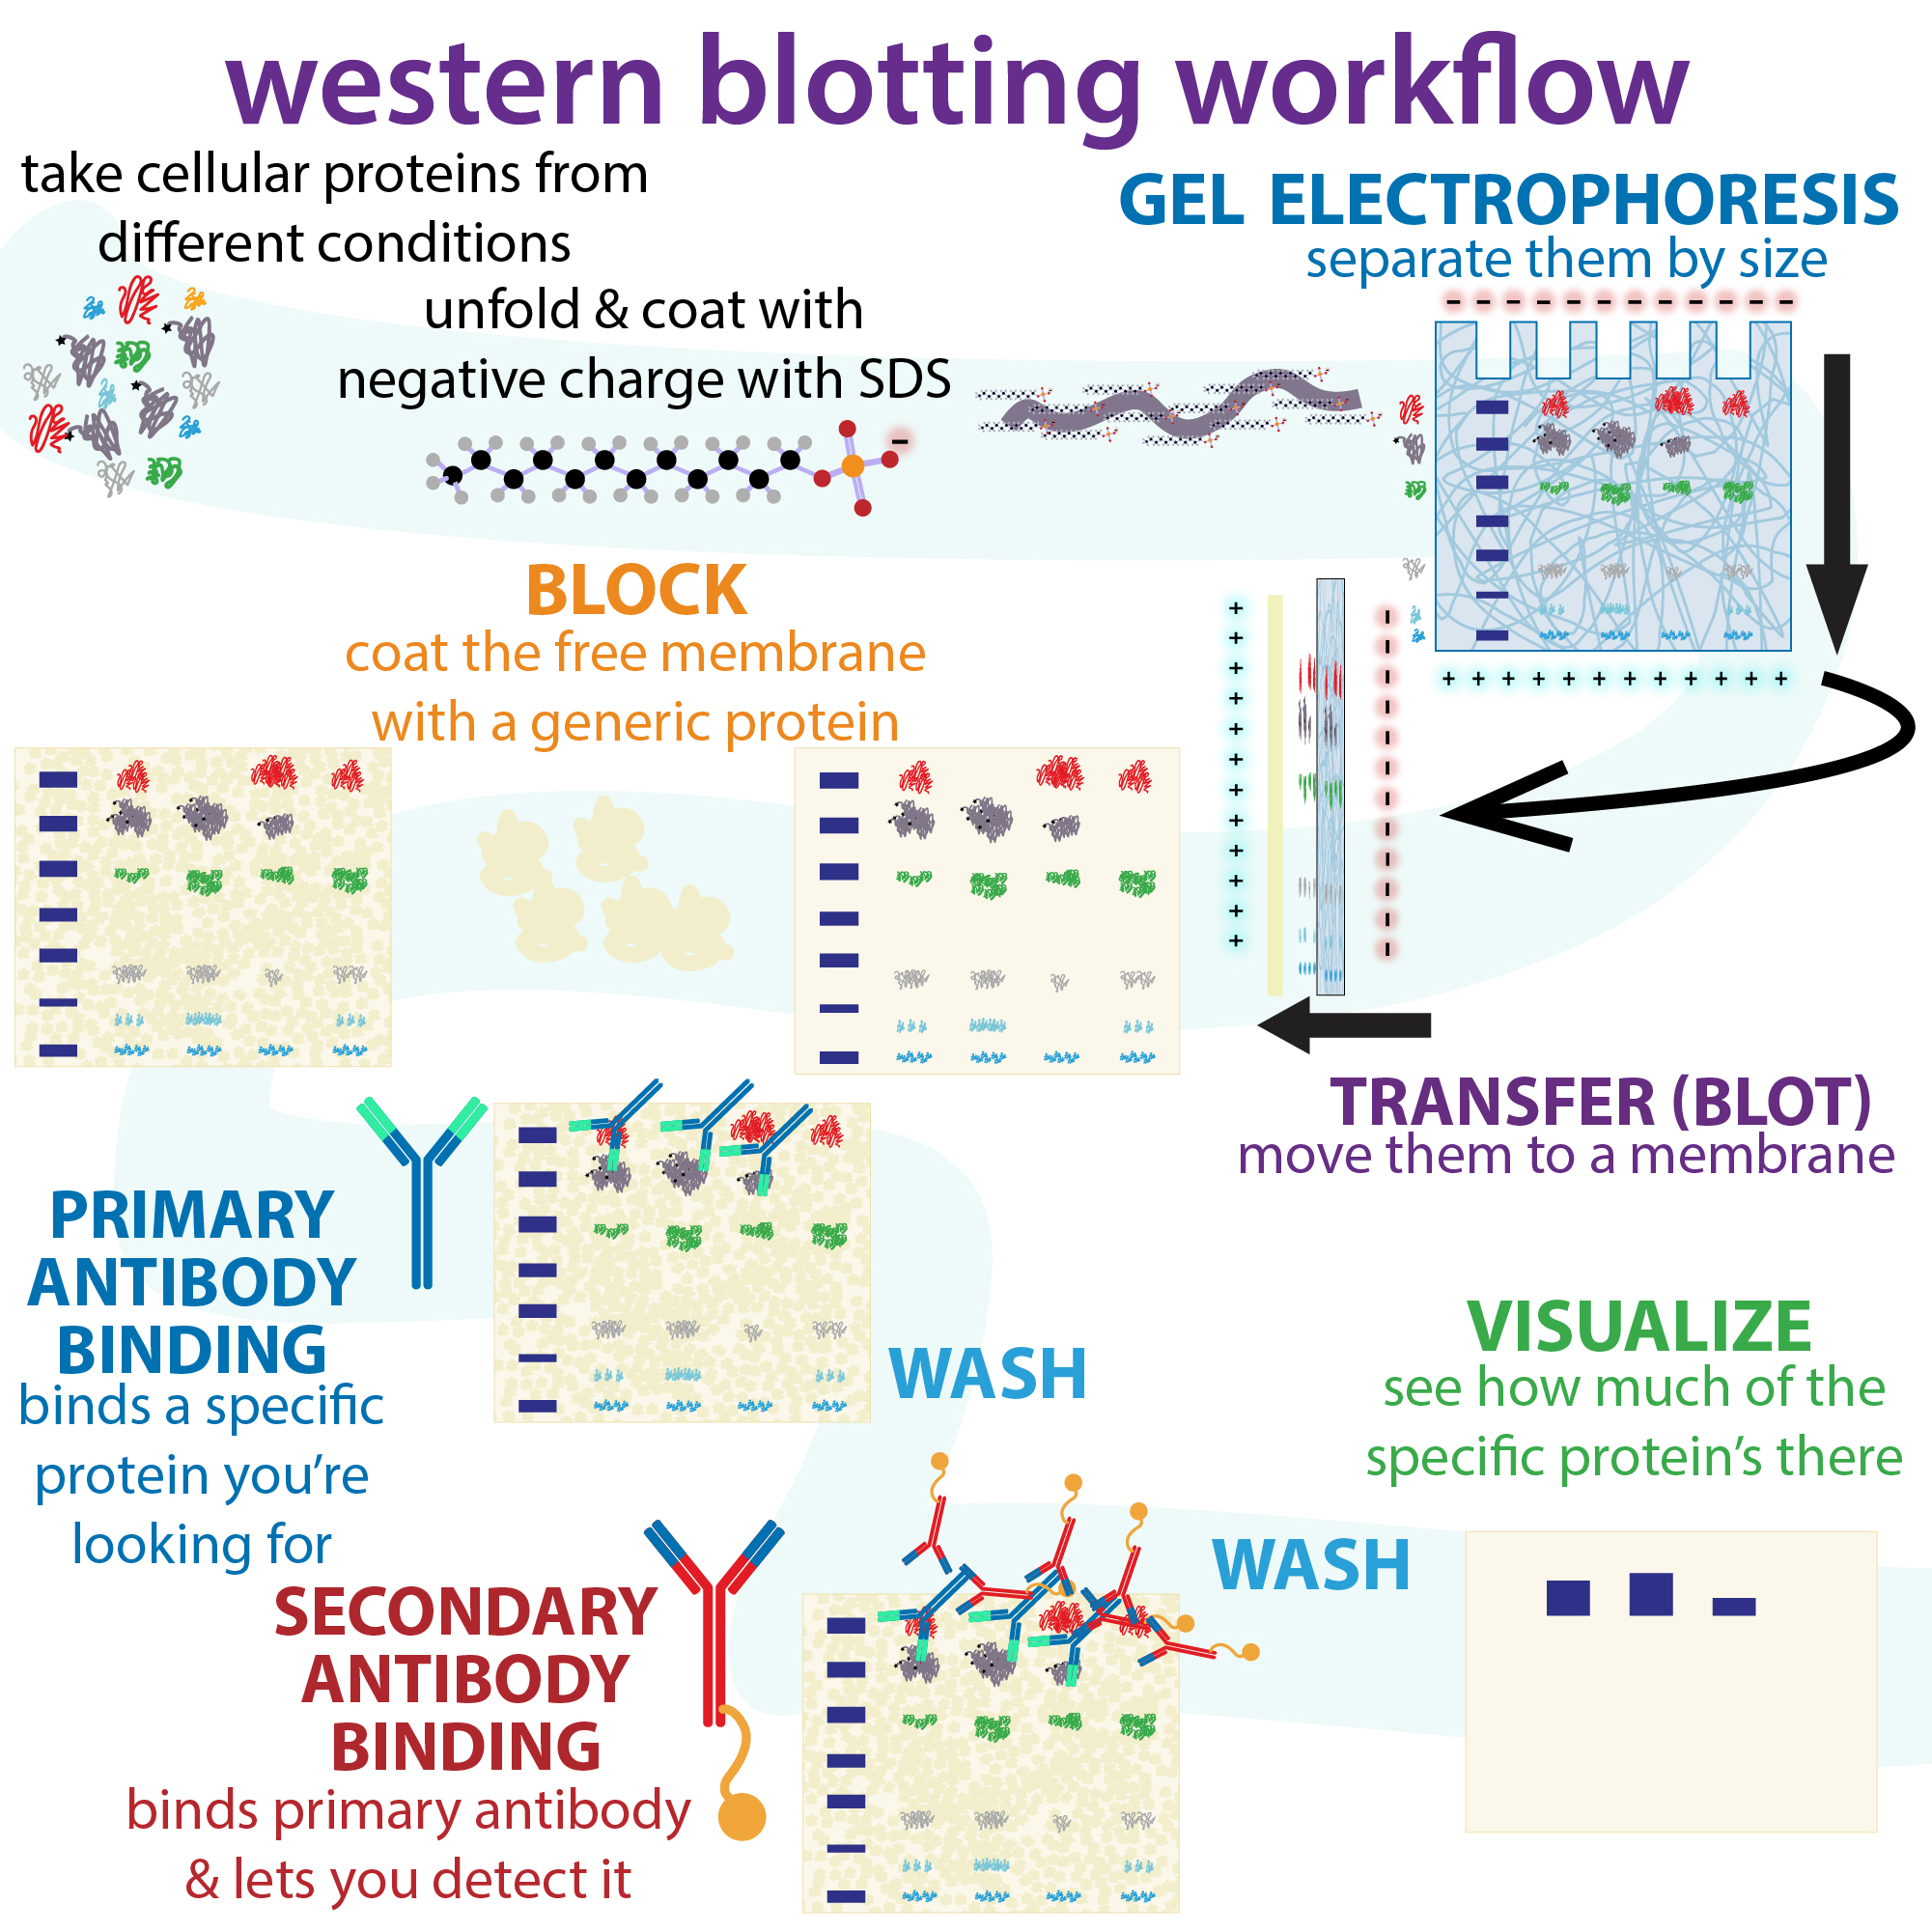
Much more on western blots in other posts but basically you separate proteins by size through SDS-PAGE (using electricity to send proteins traveling through a gel mesh) then transfer the proteins onto a membrane and use antibodies to probe for the presence of specific proteins (in this case, prey we suspect might be there). The more of the antibody-targeted thing there is, the stronger the band you see. If a protein was bound by the bait, you will see a band for it in your pull-down lane (the stuff you eluted) but if it wasn’t*, you won’t.
*if you don’t see a band in your pull-down it could also be for a more boring reason – that it wasn’t even present in the sample (maybe those cells don’t express it). This is one reason why it’s so important to take and check that input sample!
The strength of a band in the input tells you about how highly expressed a protein was. But the more exciting info comes from comparing that to the strength of that band in the pull-down lane. For the bait (bead-targeted protein), this just tells you about recovery efficacy: how well it bound the beads For other proteins (“prey”), this tells you about how strong the interaction with the bait protein was.
And of course you also need to check your negative control lane. You don’t want to see bands here! If you see bands there, you probably need to wash your beads better and/or pre-clear your lysate with decoy beads, because stuff is sticking non-specifically to the beads.
Before getting too excited about an interaction you think you’ve discovered, be sure to validate it. A common way you can do this is by swapping which is the bait and which is the prey. If you capture what was the prey does it pull down what was the bait with it? (E.g if A pulls down B does B also pull down A?) If so, it’s more likely the interaction is legit. At least in the lysate or whatever. Another hurdle to show is whether the interaction happens naturally in cells. Proving this might include things like in-cell immunofluorescence and/or various proximity-dependent readouts.
Co-IP & other pulldown figures can get complex, but the key things are to:
- Know what’s serving as bait – what’s getting directly pulled down? This should be labeled on the top right
- Look at what’s being probed in the bound stuff you pulled out along with the bait (the “IP” columns). This should be labeled on the left-hand side. Each row will have a different one.
- Look for differences in the input & IP
- Loss of a band → no interaction
- Maintenance of band → interaction
- Relative strength of band in input vs. IP → strength of interaction
- When you spot a difference, look to the top to see what changed in terms of included components.
There are lots of nuances and lots of variations. I’ve only skimmed the surface, but hopefully, this post and the accompanying video helped give you an overview and equipped you do be able to better understand what’s typically going on and what to look for.
cheat sheet: https://bit.ly/pulldownpractice
ThermoFisher has a nice guide on their website: https://www.thermofisher.com/us/en/home/life-science/protein-biology/protein-biology-learning-center/protein-biology-resource-library/pierce-protein-methods/co-immunoprecipitation-co-ip.html
more on western blots: http://bit.ly/westernblotworkflow ; YouTube: https://youtu.be/Oun6_u6E090
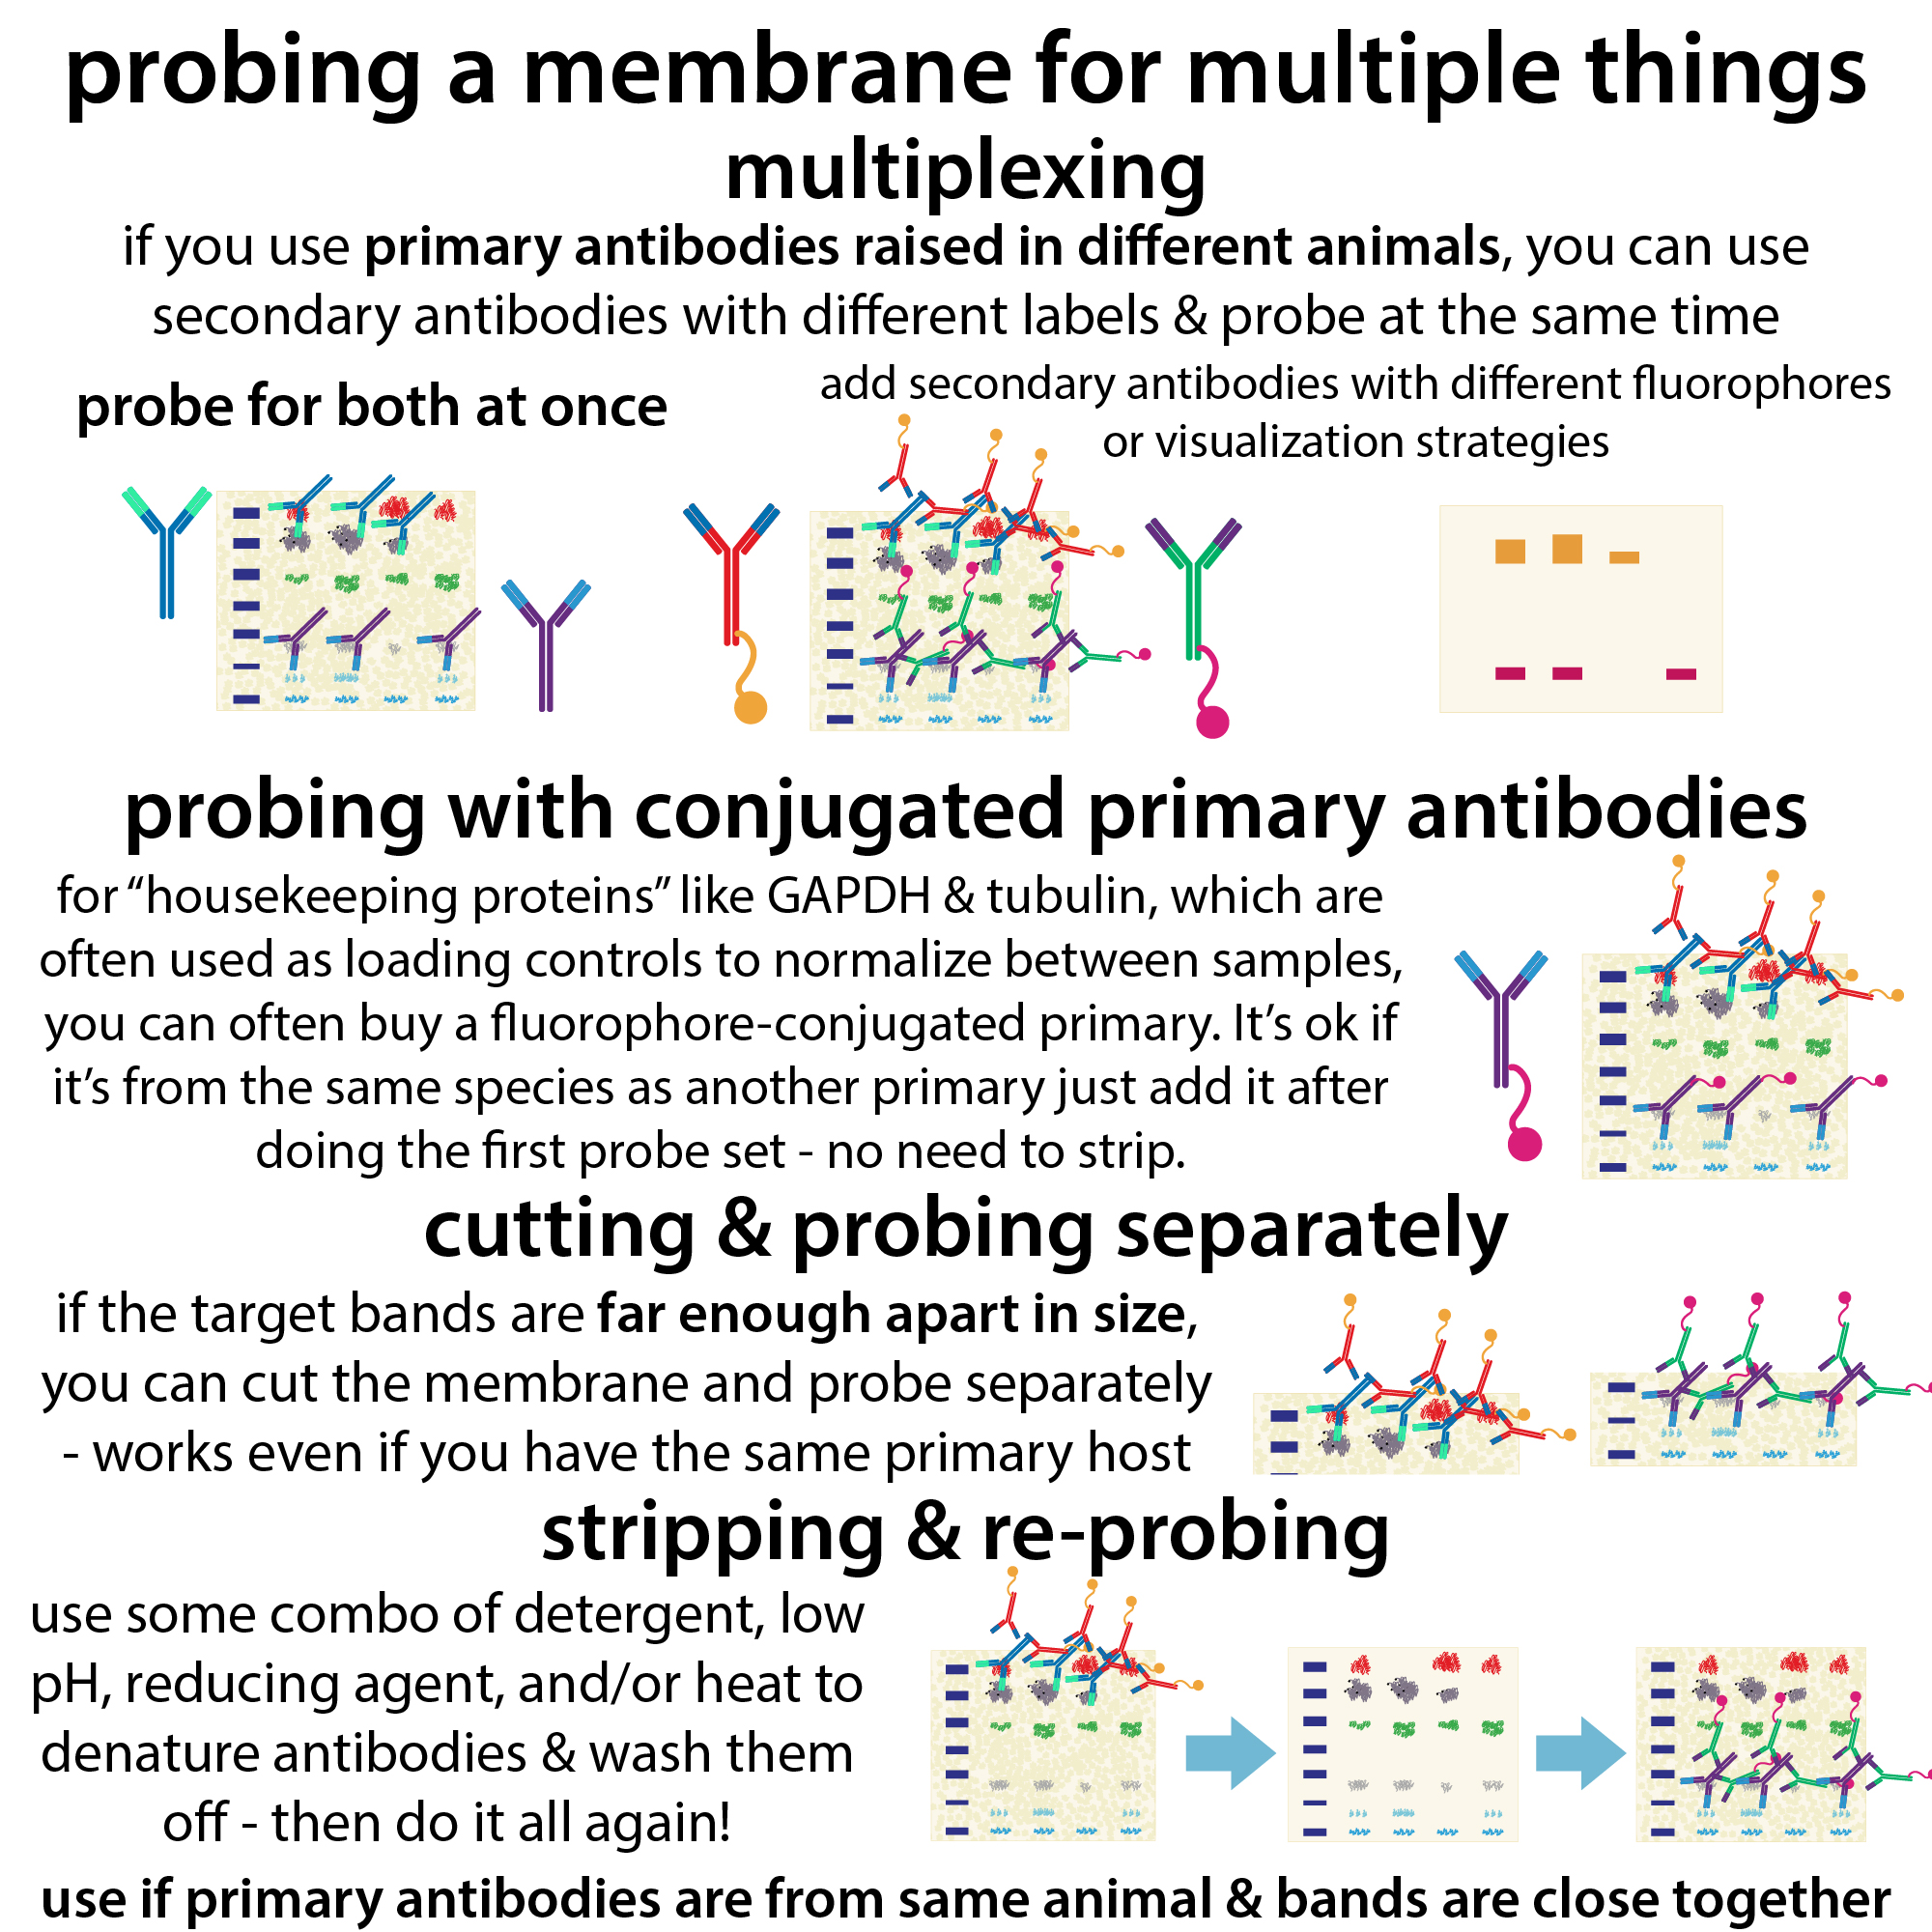
more on loading controls: https://bit.ly/housekeepinggenes ; YouTube: https://youtu.be/_Lj6nd-c8Wk & https://bit.ly/western_reprobe ; YouTube: https://youtu.be/XUb-8tpbG8k
more about all sorts of things: #365DaysOfScience All (with topics listed) 👉 http://bit.ly/2OllAB0 or search blog: https://thebumblingbiochemist.com