Want the greatness of glycerol without the gunk? Try preparing an 80% glycerol solution. It’s way easier to work with! Here’s a practical look at how you can do it.
Fold up a paper towel to make a hot flask holder when preparing agarose gels. Just fold it up, wrap it around the neck of the flask, pinch it close to the glass and don’t burn yourself!
Today’s lab trick, the finger flick! I learned from a mentor in undergrad, that flicking the bottom of tubes to create a manual vortex is one of the best ways to mix things gently. Just flick, flick, flick, then (typically) pulse spin in a microfuge to draw that flicked liquid down to the bottom of the tube. Microfuges are great for that, but not great for mixing! So flick, invert, pipet up and down, etc. when you want to mix. And for really tough stuff, like resuspending cell pellets or breaking up a clumpy solid you’re trying to dissolve, go to the real vortex – but don’t use that for things you don’t want to “break”! (don’t use that real vortex for things like mixtures with enzymes, genomic DNA, definitely NOT competent cells). For those things, a finger flick is fabulous!
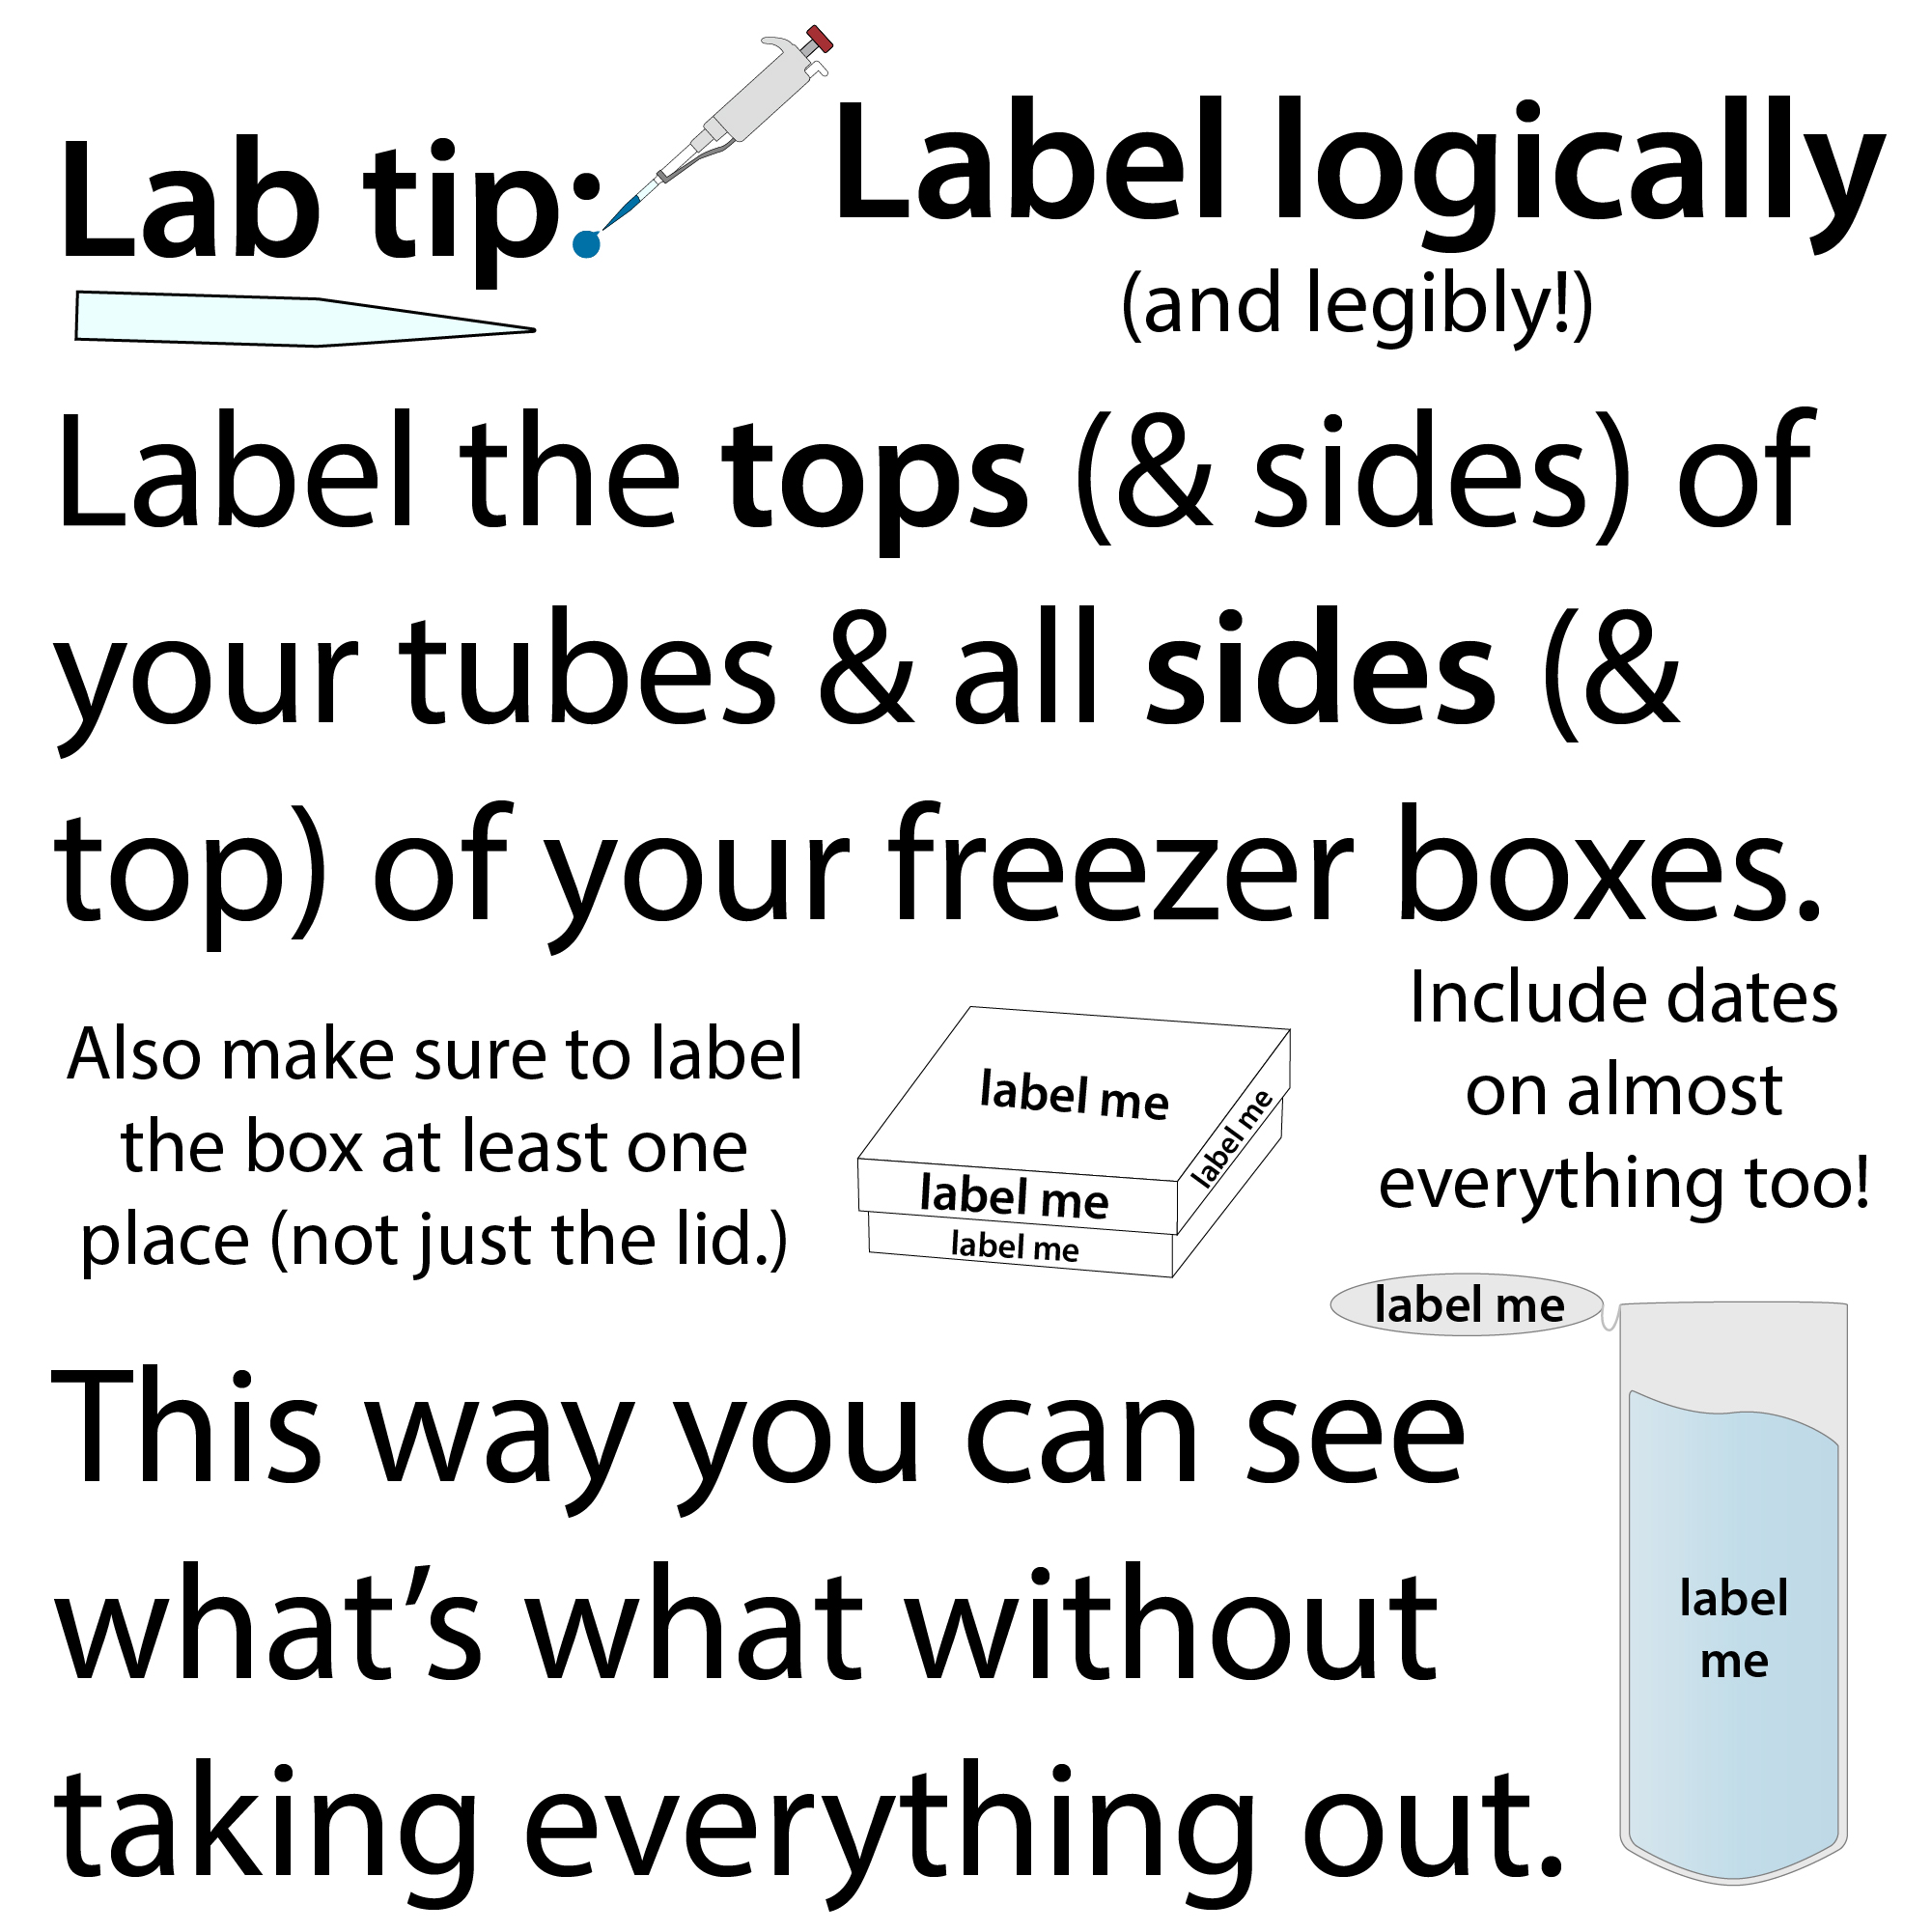
Lab labeling – do it! And do it well! So you don’t say “what’s this tube, I can’t tell…”
Flash freeze fishing – and other tricks for snap freezing eppendorf tubes in liquid nitrogen. More on the science behind flash freezing here: http://bit.ly/flashfreezingdance
Tips for loading PAGE gels – the strategy that works for me. Practice makes perfect but when it comes to pipetting sample into a PAGE gel well, here are some tips that I hope will help you excel!
Mastering master mixes – calculations & concepts
example spreadsheet: https://docs.google.com/spreadsheets/d/1ceAc5JDILORoZkcDEJ2u6V-Bg4dmvLWI/edit?usp=sharing&ouid=110501489579733284162&rtpof=true&sd=true
Random tips for working with DNA/RNA spin columns
Be careful taking the column in and out so you don’t contaminate your sample and ruin what the whole column’s all about!
More on how these columns work: http://bit.ly/spincolumns
Some solid solutions to making solutions (or at least some bubbly tips) – post here: https://bit.ly/solution_tips
Microcentrifuging – some tips and tricks to be using!
PCR tube rack – quick lab hack! Tape together 2 empty micropipet tip racks and you’ve got yourself a PCR tube rack! Simple but does the trick!
Some quick tips for when liquid jumps back & gets stuck in your tips! And how to prevent it from happening. Spoiler alert – keep your thumb down until all the liquid is out AND the pipet is out! (that’s what it’s all about!)
Random tips for choosing & using micropipettes. Just some more things I forgot to mentioned before, including:
- for greatest accuracy, choose the smallest pipet that will pipet your volume
- when pipetting small volumes, look to make sure you actually drew up & dispensed the liquid (it can be hard to see!)
- open tubes before loading tip…
- take tips in order to help you keep track
Core Facilities and Shared Research Resources. Not every lab has all the expertise or the equipment for every part of projects they want to do. And/or they don’t want to spend their limited time doing aspects of a project that don’t make the best use of the expertise they do have. Therefore, schools and research institutions often have core facilities for things like sequencing, mass spectrometry, imaging, antibody production, media making, etc. These cores provide physical services as well as consultations, often training, and sometimes access to equipment for you to use yourself. There are sometimes facilities with shared research resources like microscopes, incubators, qPCR machines, electrophoresis machines, etc. (ours is called the Center for Advanced Technology, CAT, and it’s really cool! You can also often (with permission of course!) use equipment in nearby labs and there are often listservs, Slack channels, and good ole word-of-mouth to help you find things you need (typically start by talking to trainees in the lab). So look into your options were you work. And remember, scientific sharing is caring! And people are often happy to try to help if they can. Another option can be formal collaborations with other labs who have expertise in an area. A really great thing about UCSF is it’s super duper collaborative, so labs are always working with one another. And I love it!
Clipboard managers are your friend! Random tip, but these are so useful but I didn’t discover them until grad school! Basically they automatically save things you copy and let you quickly recopy them. I use one called CopyClip (not a paid endorsement!) and it puts a little paperclip icon in my top computer bar where I can see the last 20 (you can set it for more or less) and I just have to click on them to re-copy them so I can paste them. This has saved me on so many occasions!
Here’s a link to CopyClip https://apps.apple.com/us/app/copyclip-clipboard-history/id595191960?mt=12
And info about PC ones –https://zapier.com/blog/best-clipboard-managers/
western blot boxes & other practical pointers for antibody probing (a random rambly labtips post)
more on western blots: http://bit.ly/westernblotworkflow ; YouTube: https://youtu.be/Oun6_u6E090
Western blot blocking. In a western blot, it’s important that the places where the primary antibody is bound are only where your protein is. If you add the primary antibody without blocking, it’ll still bind your protein, but it’ll also bind all the exposed sticky surface. So you need to first coat the sticky surface with some “boring” protein. By “boring” I mean it won’t interact with any of the antibodies and/or interfere with any detection methods, etc. Basically, you want something that’s there just to de-stickify the membrane so that the whole membrane is coated in proteins – but be so unreactive that it’s like nothing’s there. A couple common options are BSA (Bovine Serum Albumin) and nonfat milk (really!) Milk’s cheap but can have clumping and cross-reactivity problems. You don’t want to use milk if you’re going to use a biotin-based detection system (because milk has biotin) and you also don’t want to use milk if you are probing for phosphorylation because milk has proteins like casein that are phosphorylated.
Be it BSA or milk, we typically dissolve it in a solution containing a low concentration of a detergent. Most commonly, we use Tris Buffered Saline (TBS) with Tween 20 detergent (so TBST). My starting point is 1% nonfat milk in TBS w/0.1% Tween 20. Then if I have background or signal problems I can optimize as needed. Some helpful resources:
G-Biosciences: Western Blot Blocking: Tips and Tricks for Blocking Agents, Posted by The Protein Man on May 30, 2017 https://info.gbiosciences.com/blog/western-blot-blocking-tips-and-tricks-for-blocking-agents
Thermo Fisher, Western blot tips, tricks and troubleshooting: https://www.thermofisher.com/ps/en/home/global/forms/life-science/western-tips-tricks-troubleshooting.html.html
Filtering biochemical solutions. We filter solutions a lot in biochemistry – for sterilization (0.2μm (micron) ones for that) or just de-crudding stuff (often 0.45μm). To get the liquid to go through the membrane we can use syringes, vacuum, or centrifugation (but don’t confuse the spin filters with the spin concentrators (ultrafiltration devices).
We choose filters based on what we’re trying to keep out, what we want to go through safely, and what our solvent is. When we’re dealing with protein solutions, we often use a treated PVDF or PES membrane, which have low protein binding. For small volumes we can use spin filters or syringe filters, and for larger volumes, bottle or tube-top vacuum filters.
Here are some good guides to choosing
How to Select a Syringe Filter and How to Use it? (2020 Guide), Aireka cells, https://airekacells.com/blog/syringe-filter
Syringe Filters for Aqueous Solutions, Tisch Scientific https://scientificfilters.com/syringe-filters-aqueous-solutions/
Corning filtration guide: https://www.corning.com/catalog/cls/documents/selection-guides/t_filterselectionguide.pdf
and here’s the source for the particle size figure: https://commons.wikimedia.org/wiki/File:Airborne-particulate-size-chart.svg Jisaac9, Mieszko the first, CC BY-SA 3.0 https://creativecommons.org/licenses/by-sa/3.0 , via Wikimedia Commons
Prepping lots of gel samples.
Random (for least you a) lab tip(s) for preparing lots of SDS-PAGE samples
- instead of preparing them in individual tubes, use PCR strip tubes or PCR plates
- instead of adding loading buffer to each sample individually, pipette excess into a PCR strip or plate row, then use a multichannel to load into the wells (either before adding sample, or after sample (then you can mix multi as well))
- if you’re running multiple gels in the same box, label the gel cassettes (at the top of the plates, I suggest writing the name multiple times in case it washes/rubs off)
- if you’re running multiple gels, load all the ladders first and it will help you find the other wells (and is helpful because you often load a lower volume of ladder and then you don’t have to keep changing the pipet setting)
- if you’re running 4 gels in a tetra box, make sure that you see bubbles from each module – sometimes the connection can be bad and you need to fiddle around to make sure all the metals are making contact to the power supply
more on SDS-PAGE: http://bit.ly/sdspageruler
more on working with lots of samples: http://bit.ly/mastermixesmultichannels
Parafilm! Parafilm is like a heavy-duty, super-stretchy, water-repelling, saran wrap. We use it in the lab for lots of things including:
- wrapping petri dishes
- preparing agarose gel samples
- covering beakers to prevent evaporation
- covering graduated cylinders to mix solutions by inverting
- sealing bottles of hygroscopic (water-absorbing) solutions
It’s super duper duper awesome. Just take a small piece, hold one end down and gently stretch around the thing and stick it back on itself. Voila! You’ve got a seal! See the appeal?
Biochemistry involves a lot of balancing – and not just schedules! So here is some hard-won advice for preparing centrifuge tubes efficiently, such as when you ask cells to make a protein for you, then lyse the cells (break them open) to rescue that protein but need to pellet out the membrane gunk).
- start with eyeball guessing it, pouring roughly equal amounts into the tubes
- no matter how many tubes you have, work pairwise
- weigh each in a pair – placing the tube in something stable, in the center of the balance
- zero the scale with the heavier of the pair
- add leftover sample (the tiny bit still in the tube after you poured your sample in) dropwise until it’s zeroed
- always make sure you’re including the caps when weighing – and use the same make of tubes & caps for both samples to make your life easier with the estimations
- always make sure you’re wiping off any ice before weighing (and before placing in rotor) (and check the rotor buckets before and after the run to make sure they’re dry)
- if you have an odd number of samples, do all the pairs first (using some from this last tube to get the others to balance if you need to), then cap and zero this oddball and make a water blank for it (start with eyeballing it, then add dropwise such as from a squirt bottle)
- make sure you keep track of which tubes are paired with which so you don’t have to re-weigh them!
Save (with) the date – practical advice for good lab labeling/file-naming/organizing, etc. habits
link to video in case embed isn’t working: https://youtu.be/vFg3tO5C4dQ
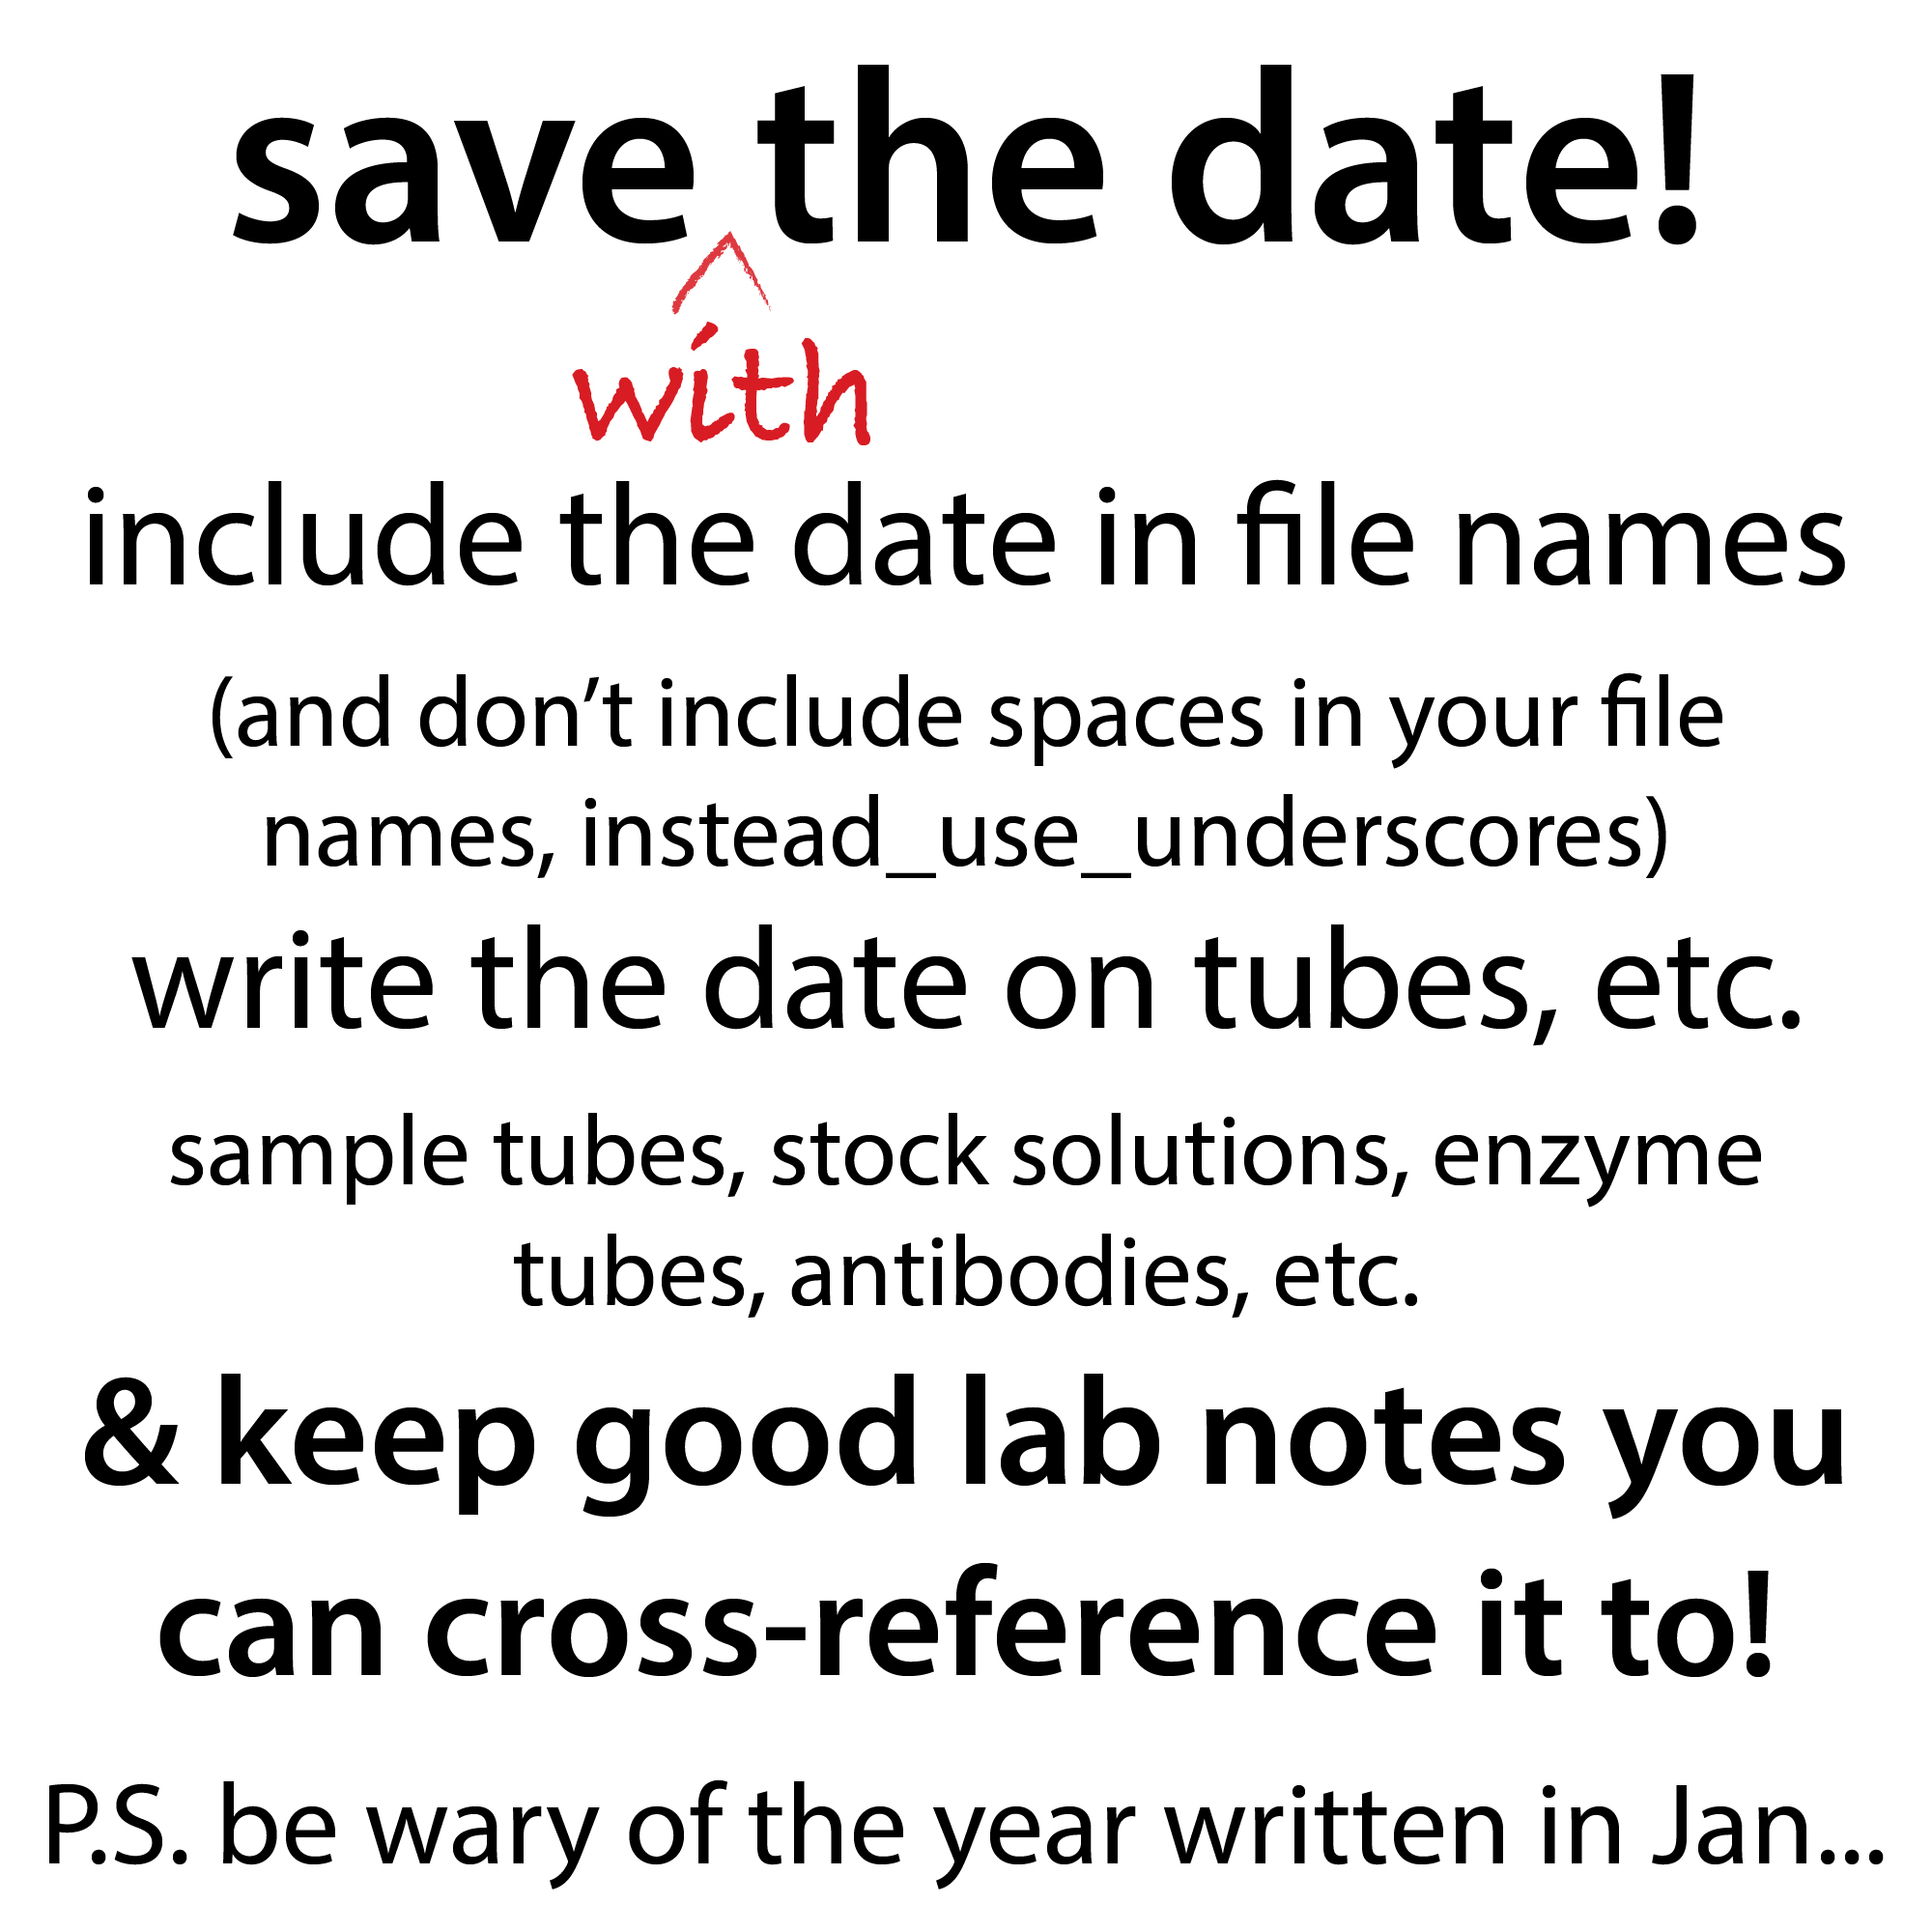
One of the most important pieces of advice I can state is always, always, save (with) the date!
- include the date in file names
- (and don’t include spaces in your file names, instead_use_underscores)
- write the date on tubes, etc.
- sample tubes, stock solutions, enzyme tubes, antibodies, etc.
And keep good lab notes you can cross-reference to!
P.S. be wary of the year written in January…
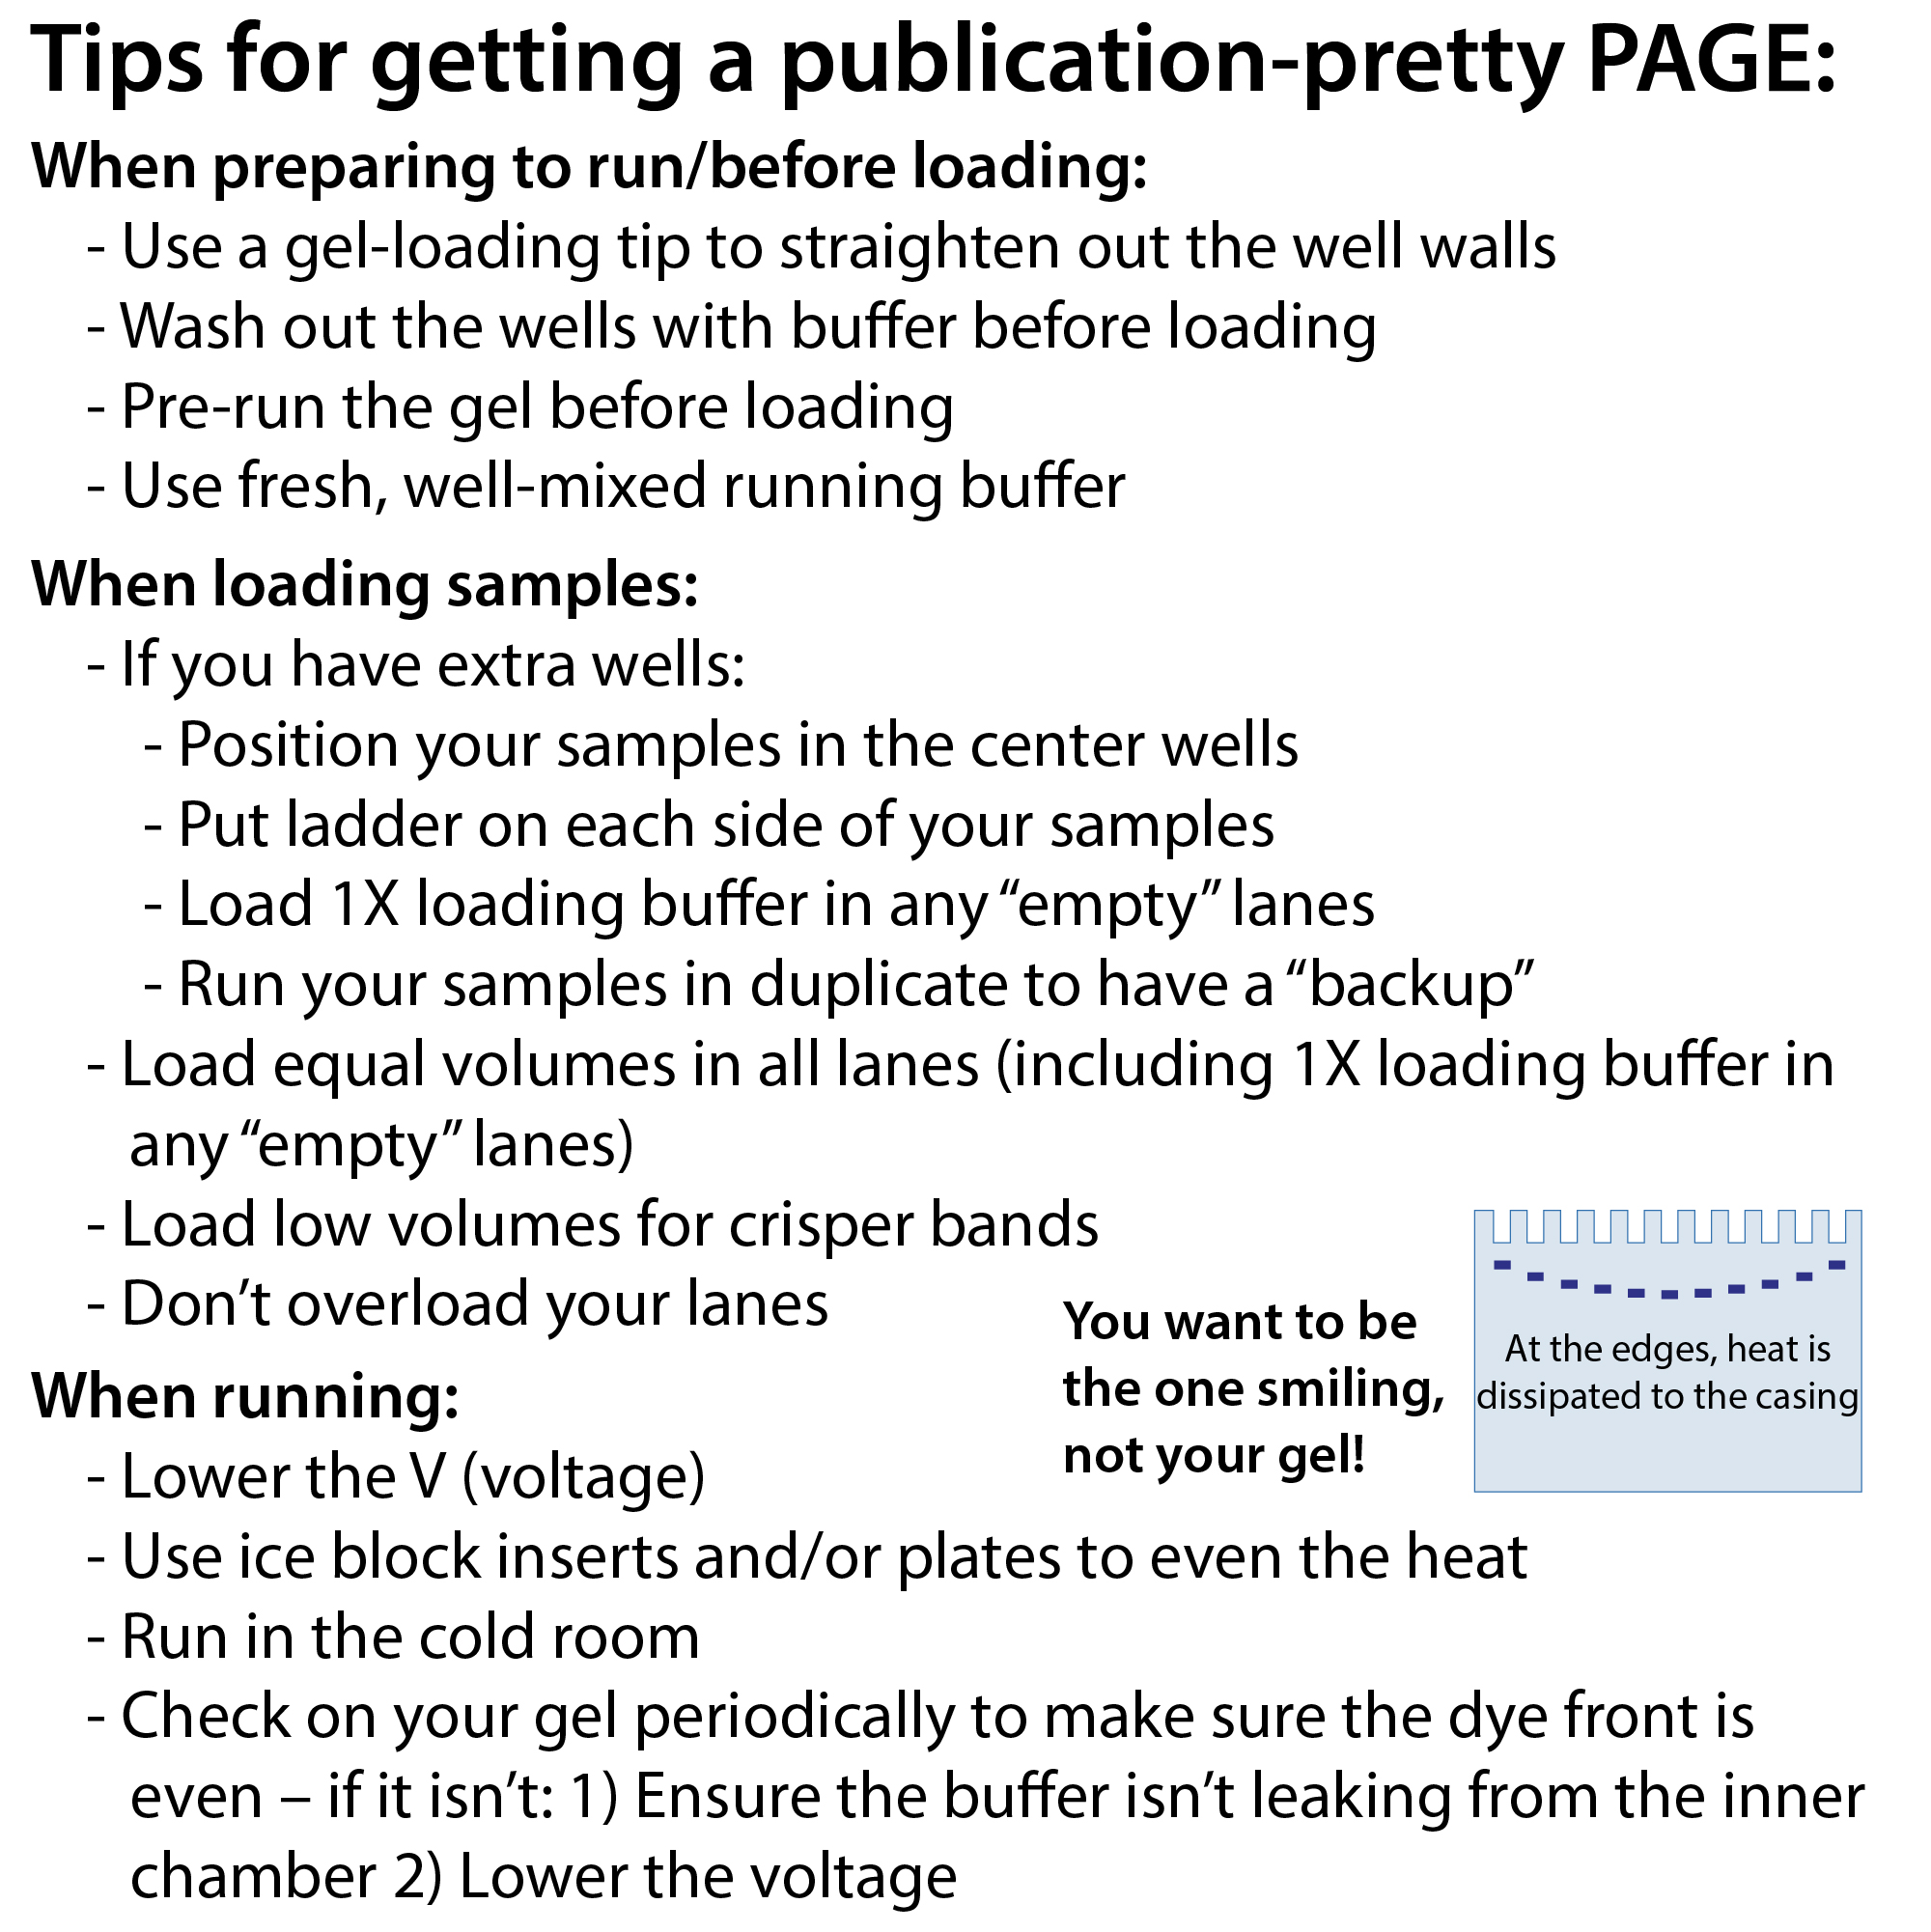
Tips for getting a publication-pretty PAGE (SDS-PAGE, urea-PAGE, etc.):
- When preparing to run/before loading:
- Use a gel-loading tip to straighten out the well walls
- Wash out the wells with buffer before loading
- Pre-run the gel before loading
- Use fresh running buffer
- Ensure your running buffer is well-mixed
- When loading samples:
- If you have extra wells:
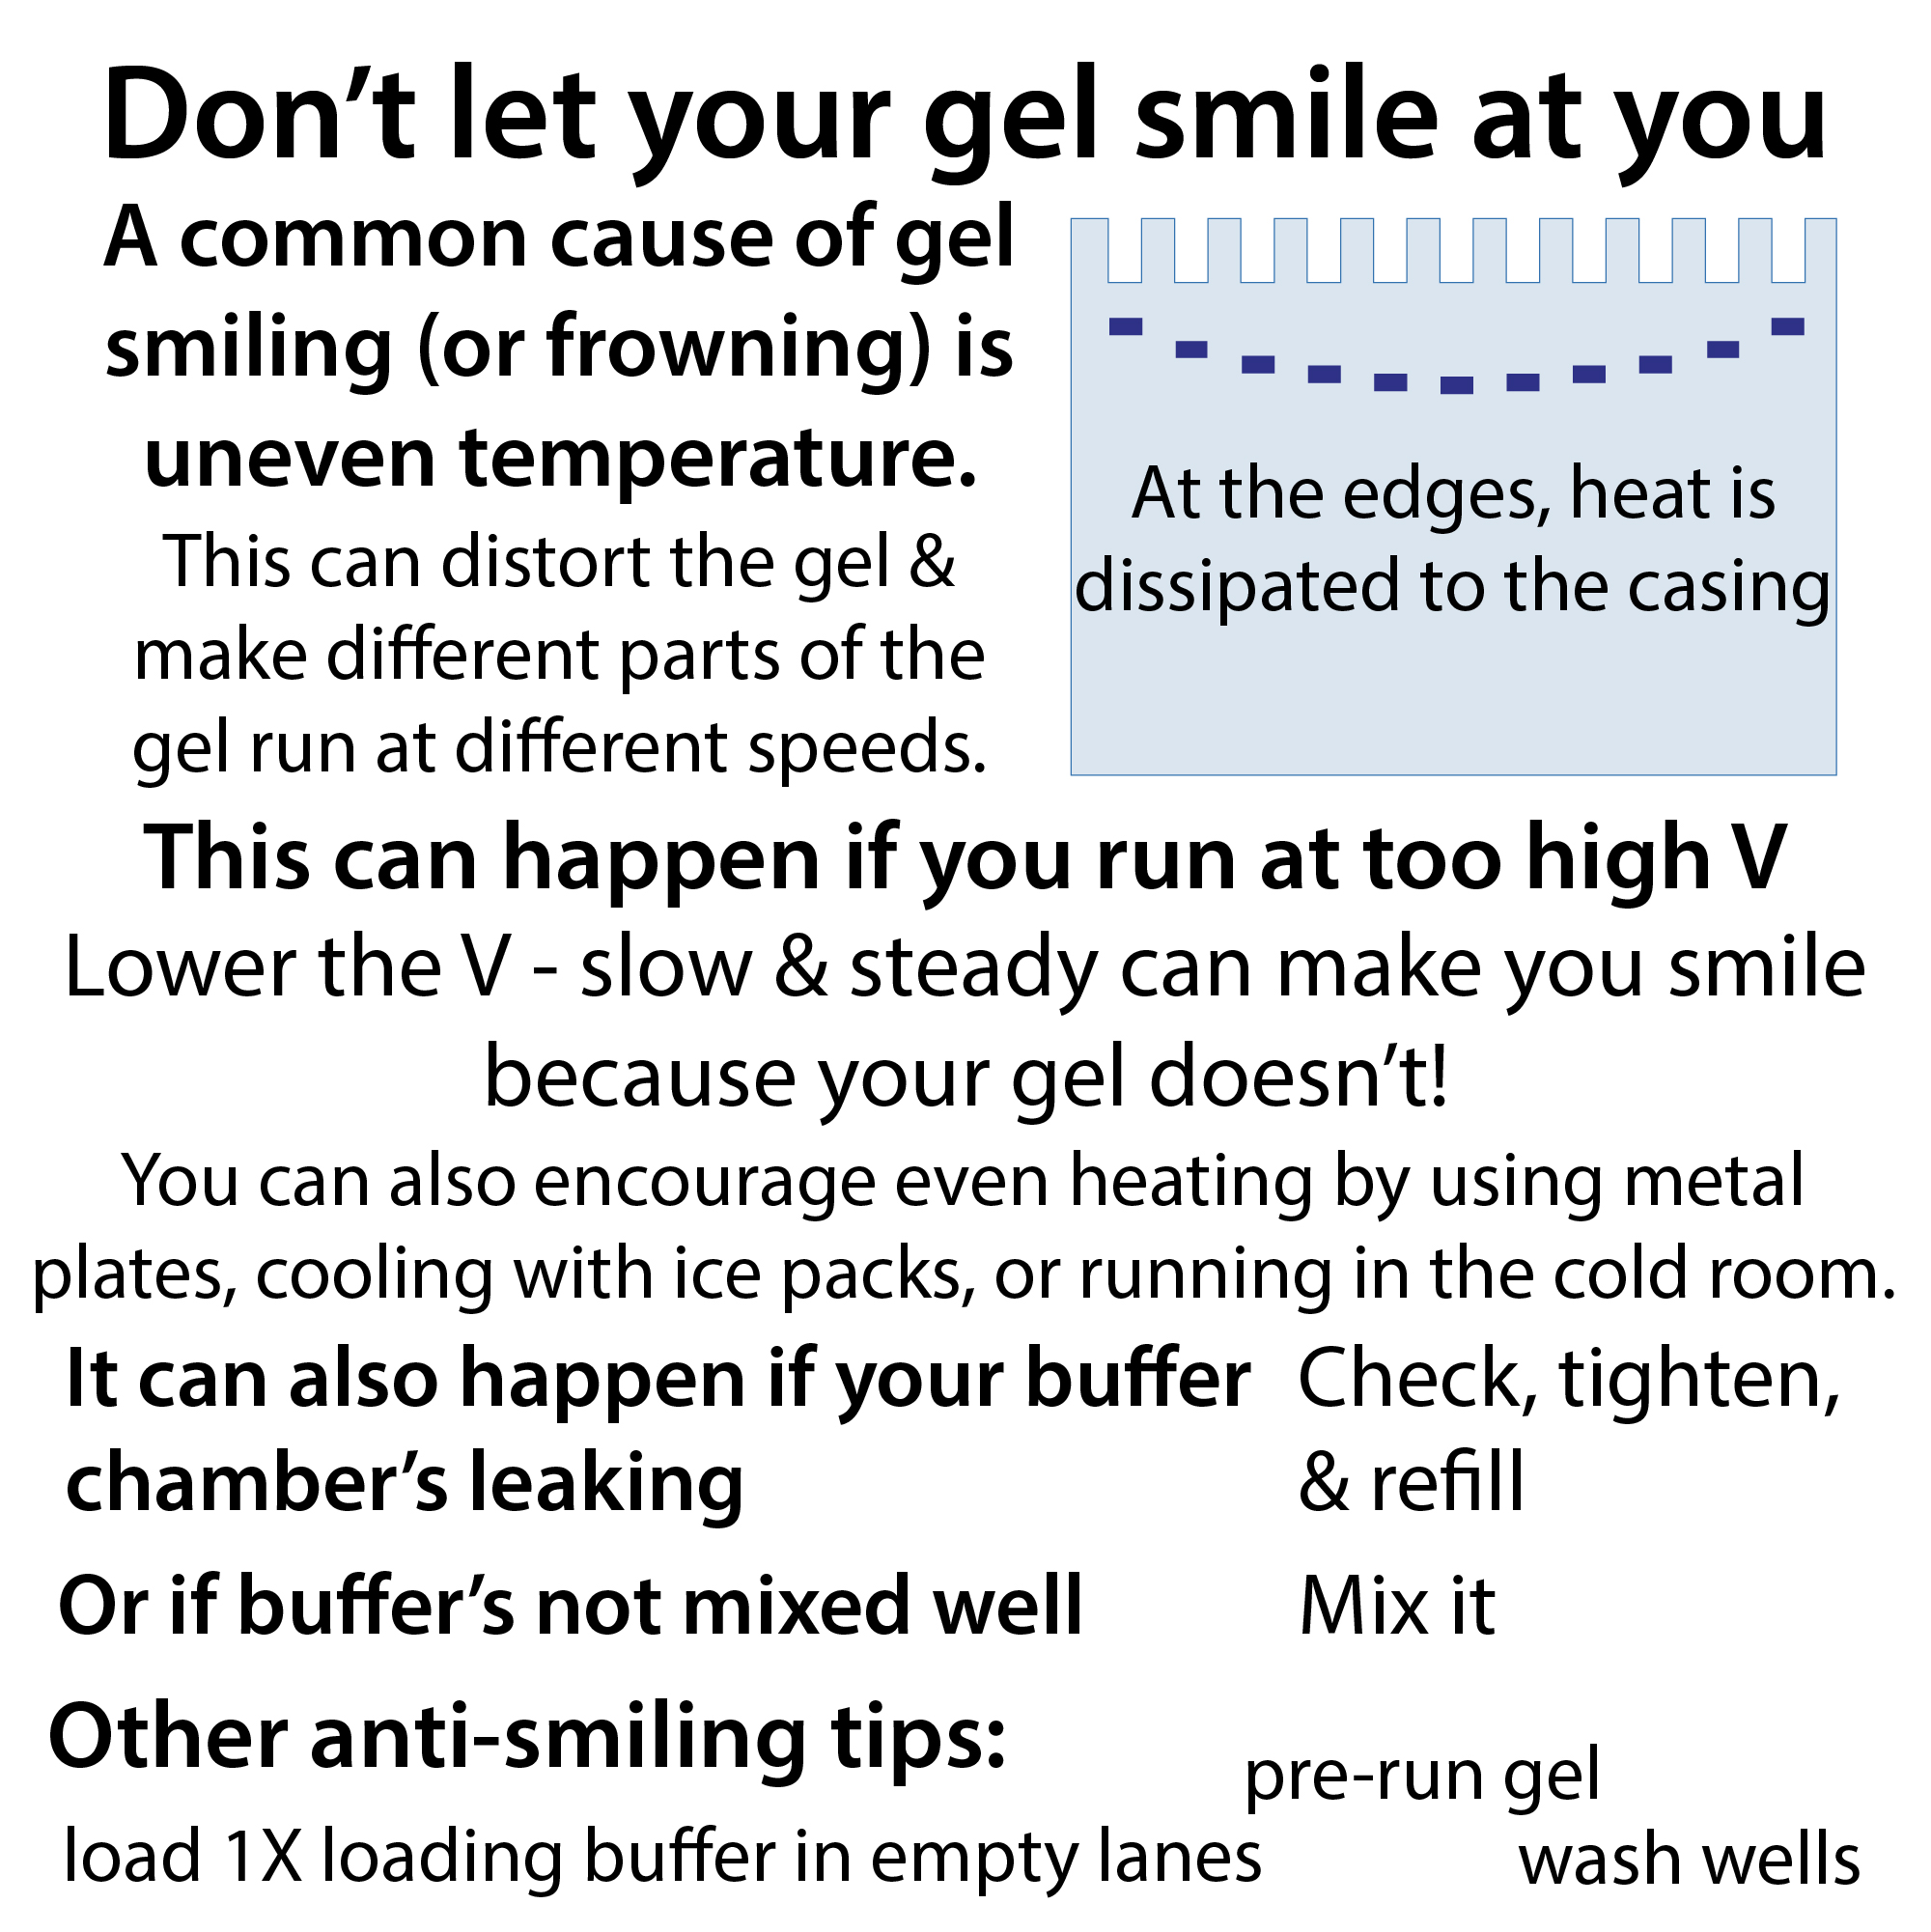
- Position your samples in the center wells, where they’ll be less affected by smiling (outer lanes running slower than the middle ones) and less likely to get ripped
- Put ladder on both sides of your samples
- Load 1X loading buffer in any “empty” lanes
- Run your samples in duplicate to have a “backup” to choose the nicer-loaded one
- Load equal volumes in all lanes (including 1X loading buffer in any “empty” lanes) to promote even running
- Load low volumes for crisper bands
- Don’t overload your lanes, as it will both look bad itself & warp nearby lanes
- For proteins, limit to ~2-3 µg of a pure protein or 10-20 µg of total protein in a mixture like a lysate (load less if running a western blot, which is more sensitive in its detection)
- Work quickly so things don’t diffuse
- When running:
- Lower the V
- Helps even the heat in the gel to prevent smiling and other warping
- Helps make bands crisper
- Use ice block inserts and/or plates to even the heat
- Run in the cold room
Check on your gel periodically to make sure the dye front is even – if it isn’t: 1) Ensure the buffer isn’t leaking from the inner chamber 2) Lower the voltage
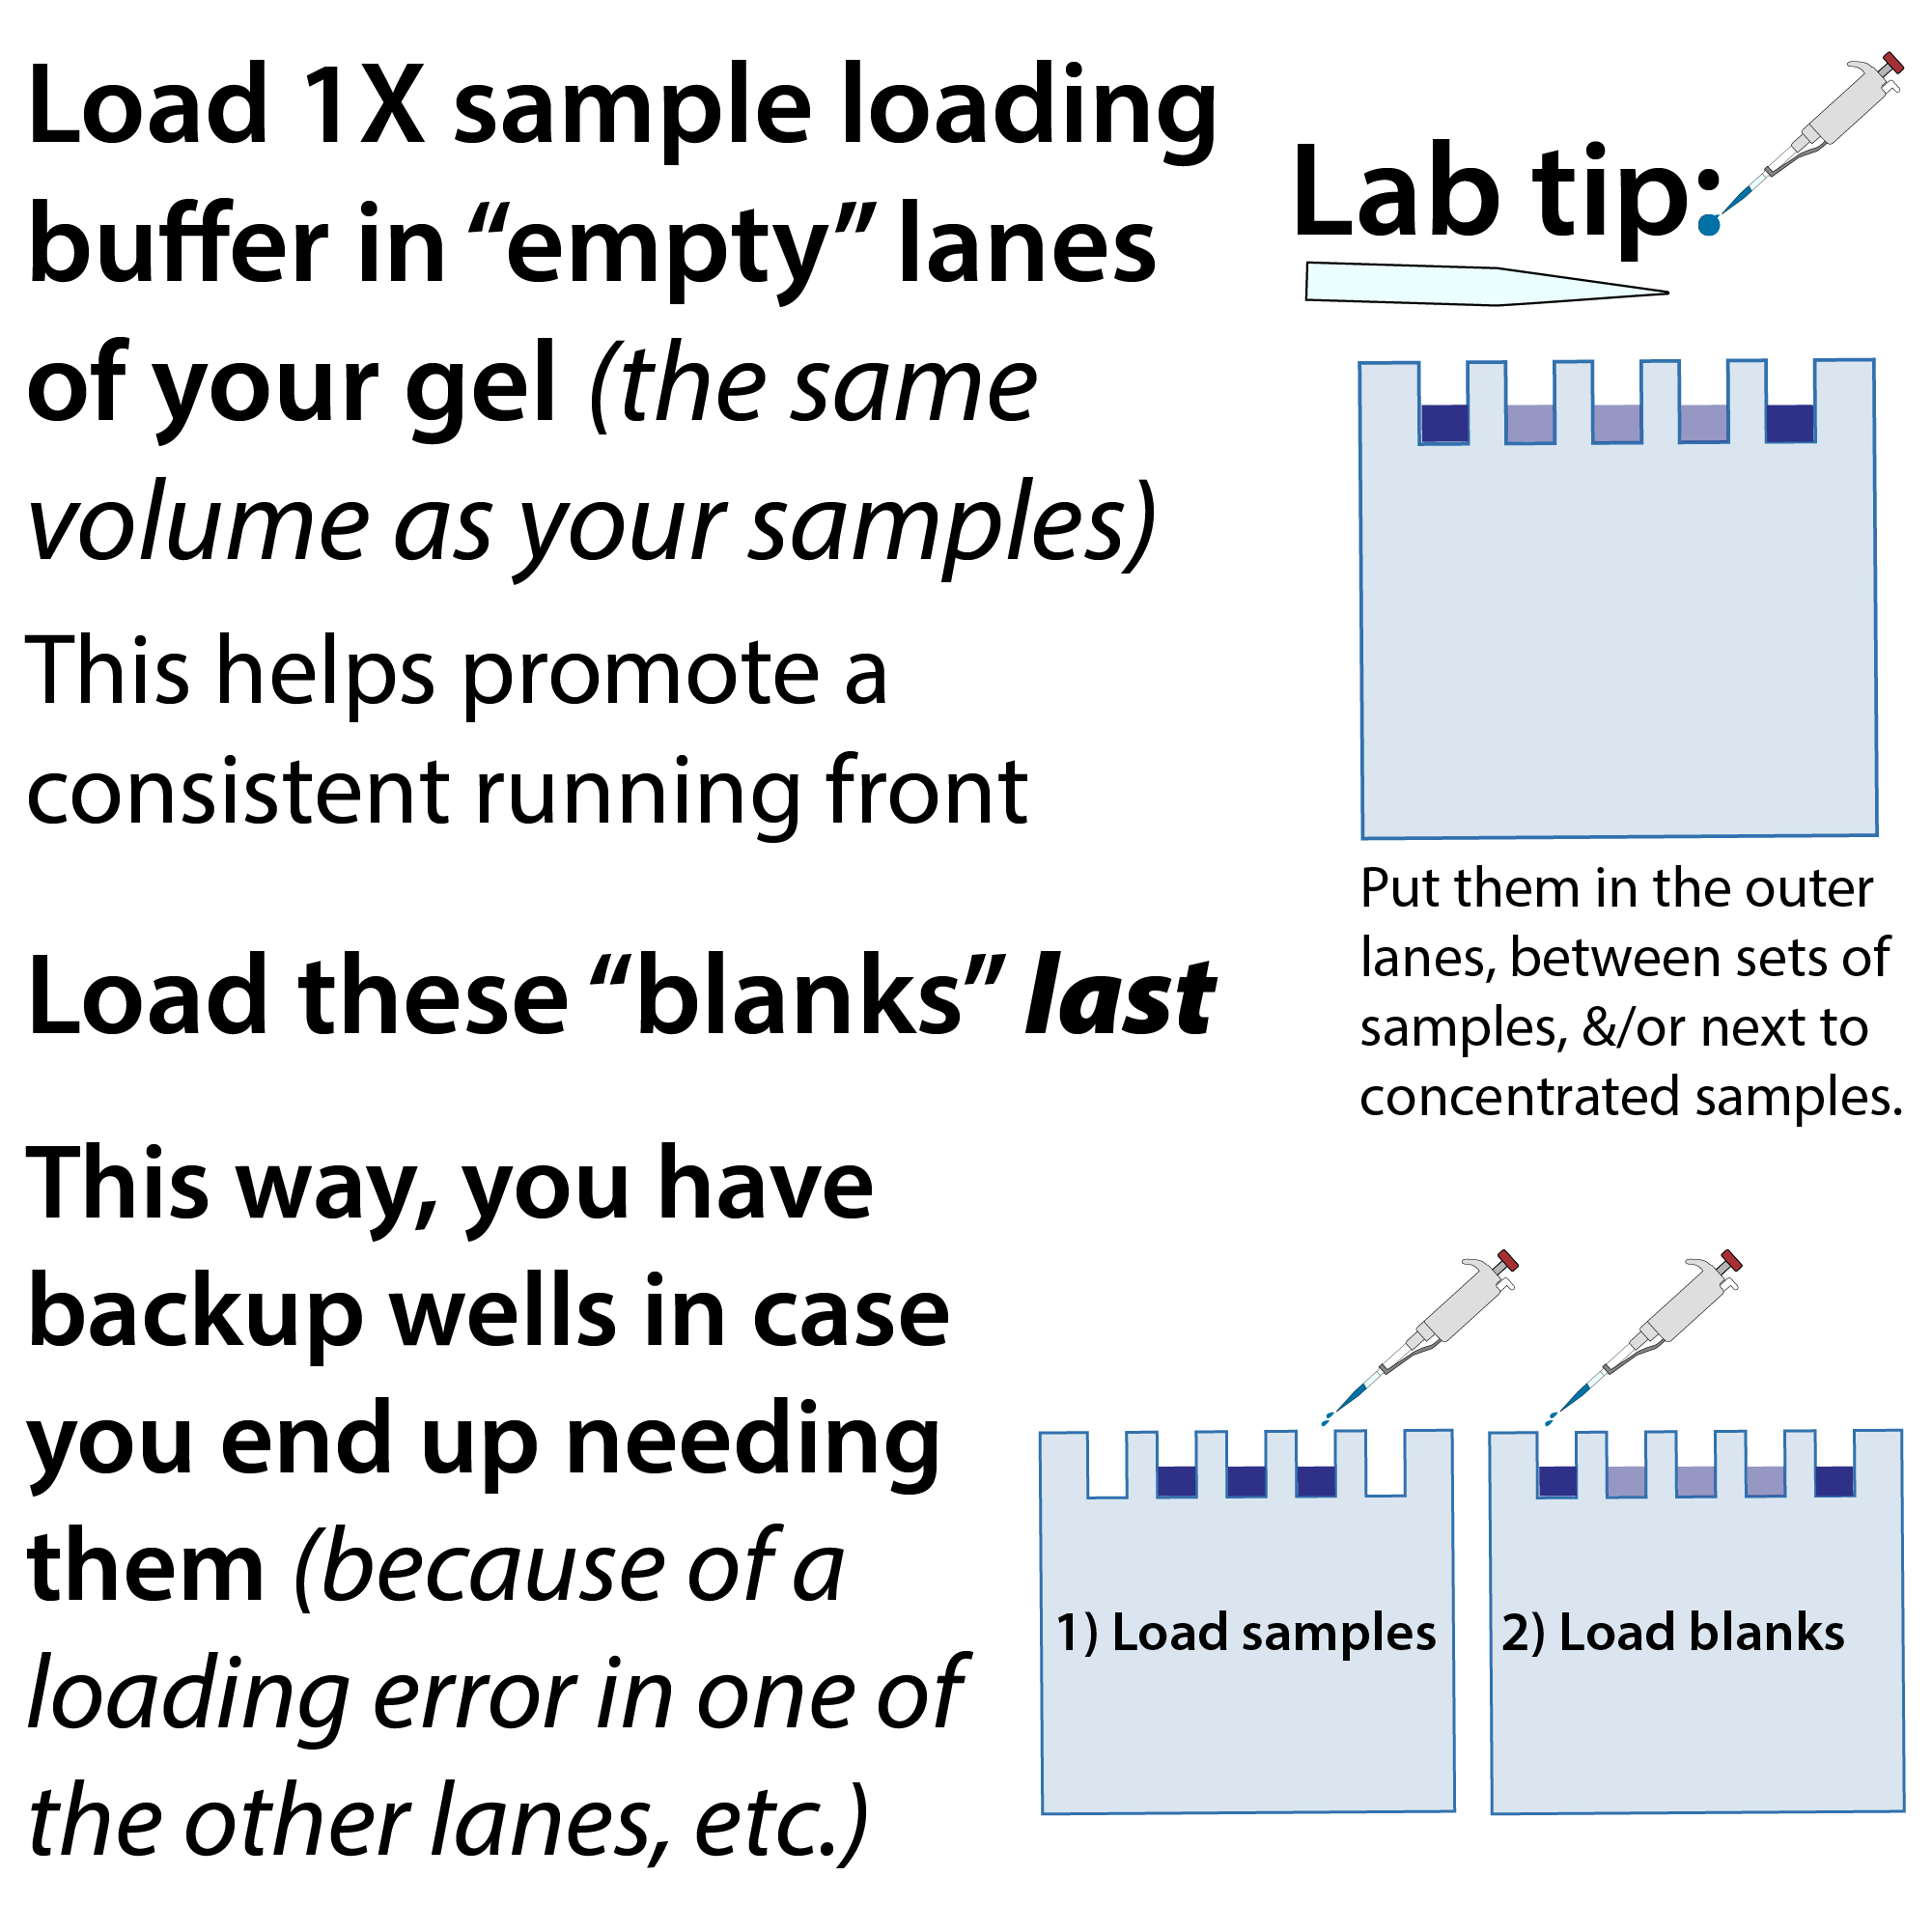
Load 1X sample loading buffer in “empty” lanes – but load them last, and strategically
Especially if you load the same volume as your samples, doing this will help promote a consistent running front (avoiding artifacts like smiling, where the middle lanes run faster than the outer lanes, giving your bands an evil grin . . .)
You want to be strategic about where you put them – I like to put them in the edge lanes, between sets of samples, &/or next to highly-concentrated and/or viscous samples, which have a tendency to warp the neighboring lanes.
I recommend loading these “blanks” last – just in case . . . This way, you have backup wells in case you end up needing them (because of a loading error in one of the other lanes, etc.)
Note: 1X indicates that it’s at the working concentration. So for example, you might have a 4X sample loading buffer that you normally mix one volume of that with 3 volumes of sample (e.g., if you wanted to prepare 20 µL worth, you’d mix 20/4 = 5 µL loading buffer + 15 µL protein solution). For the blanks, in this case, you’d mix the loading buffer with water (or a buffer) instead of protein solution.
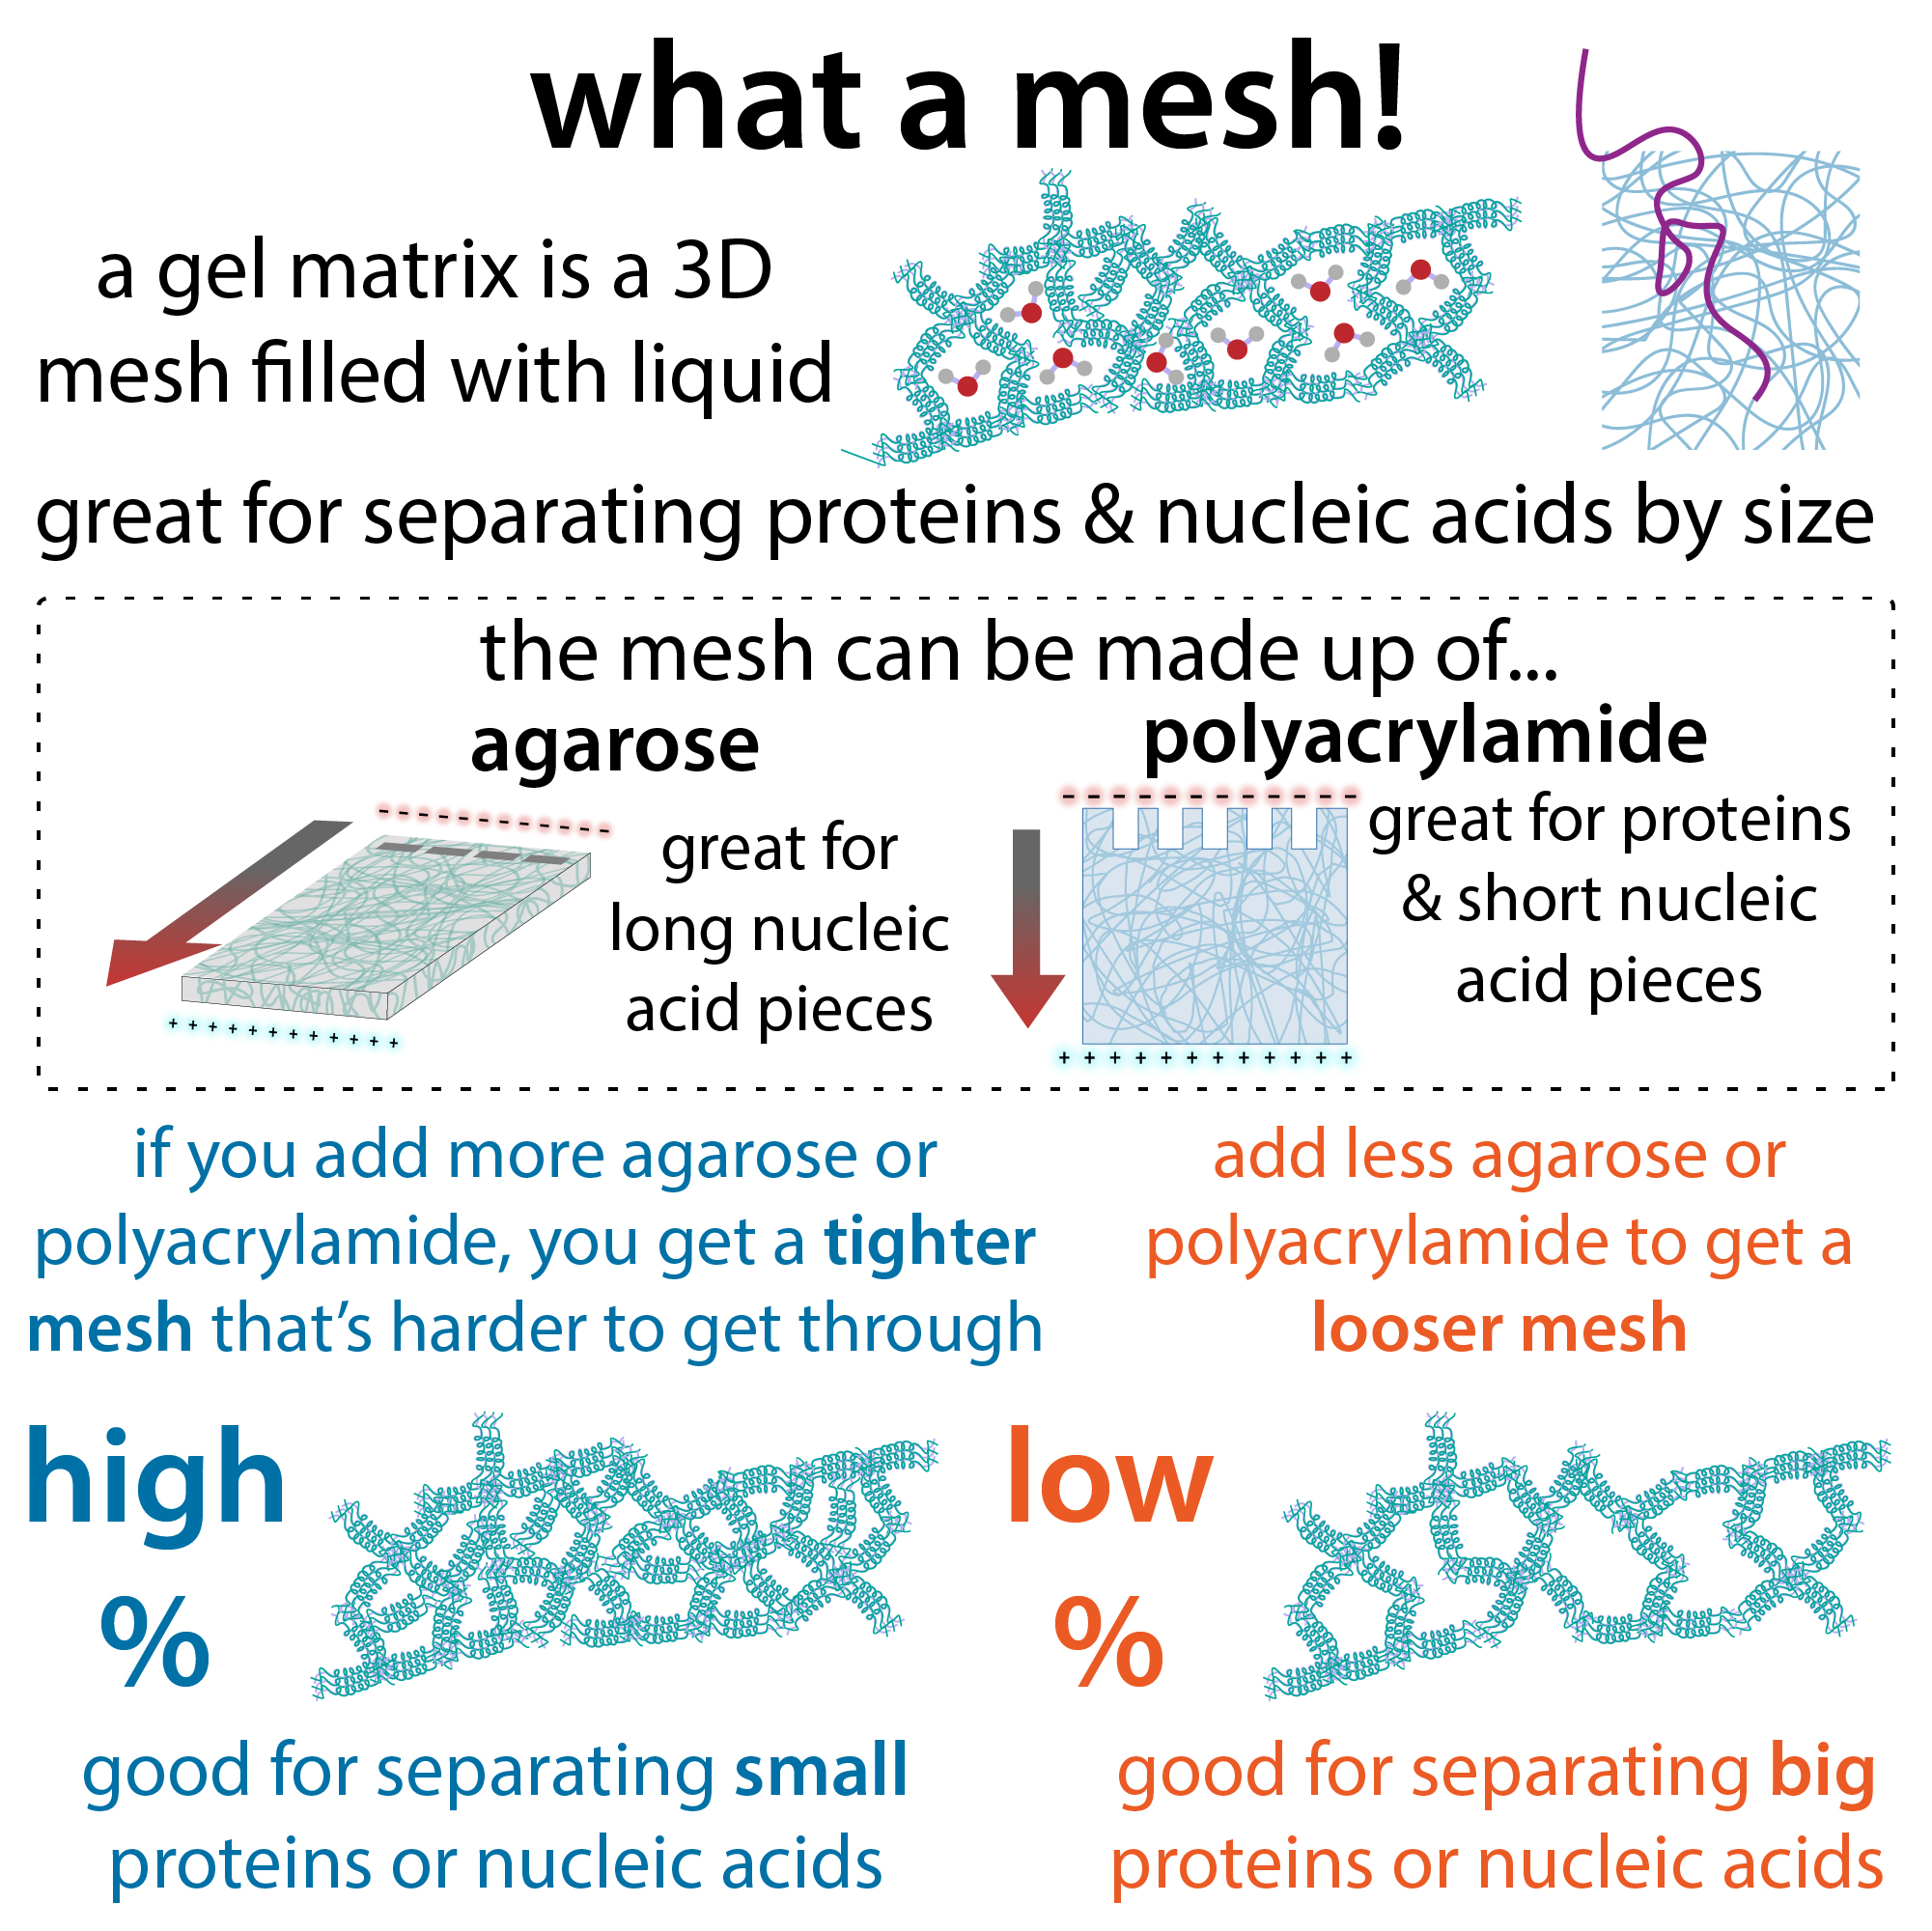
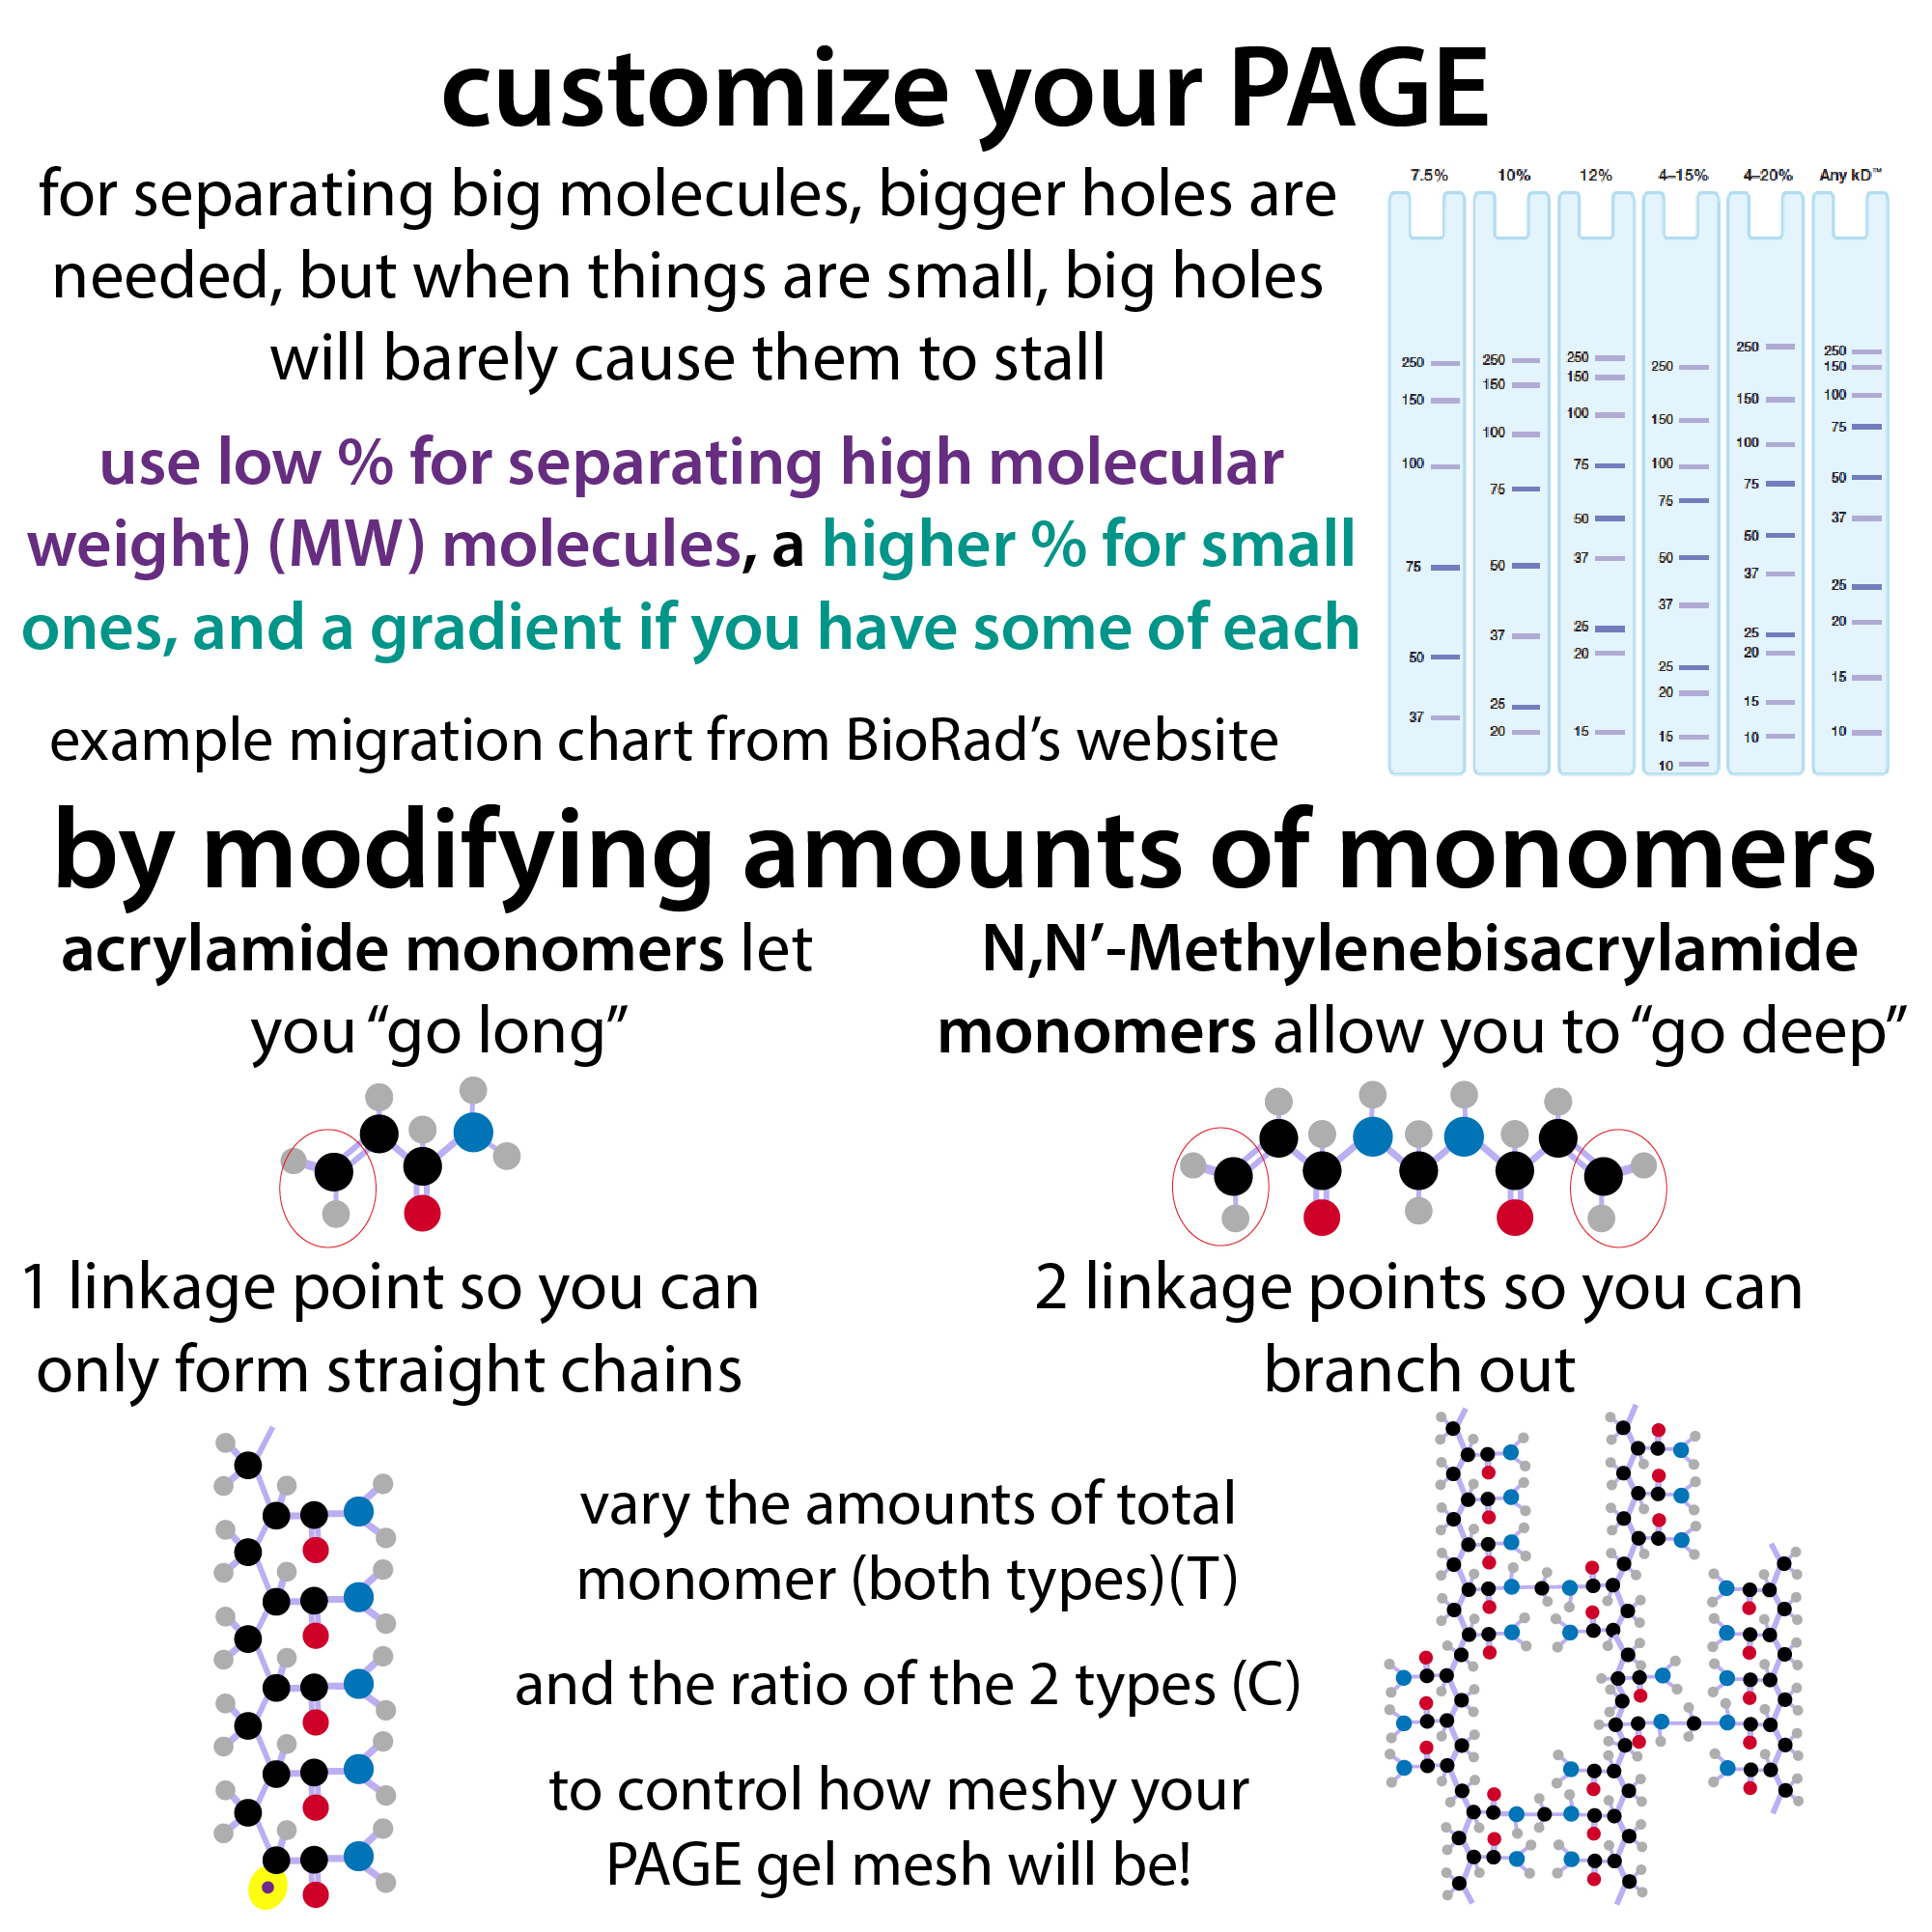
Choosing a gel percentage for gel electrophoresis (polyacrylamide & agarose)
link to video in case embed isn’t working: https://youtu.be/ecFPG1oJcF0
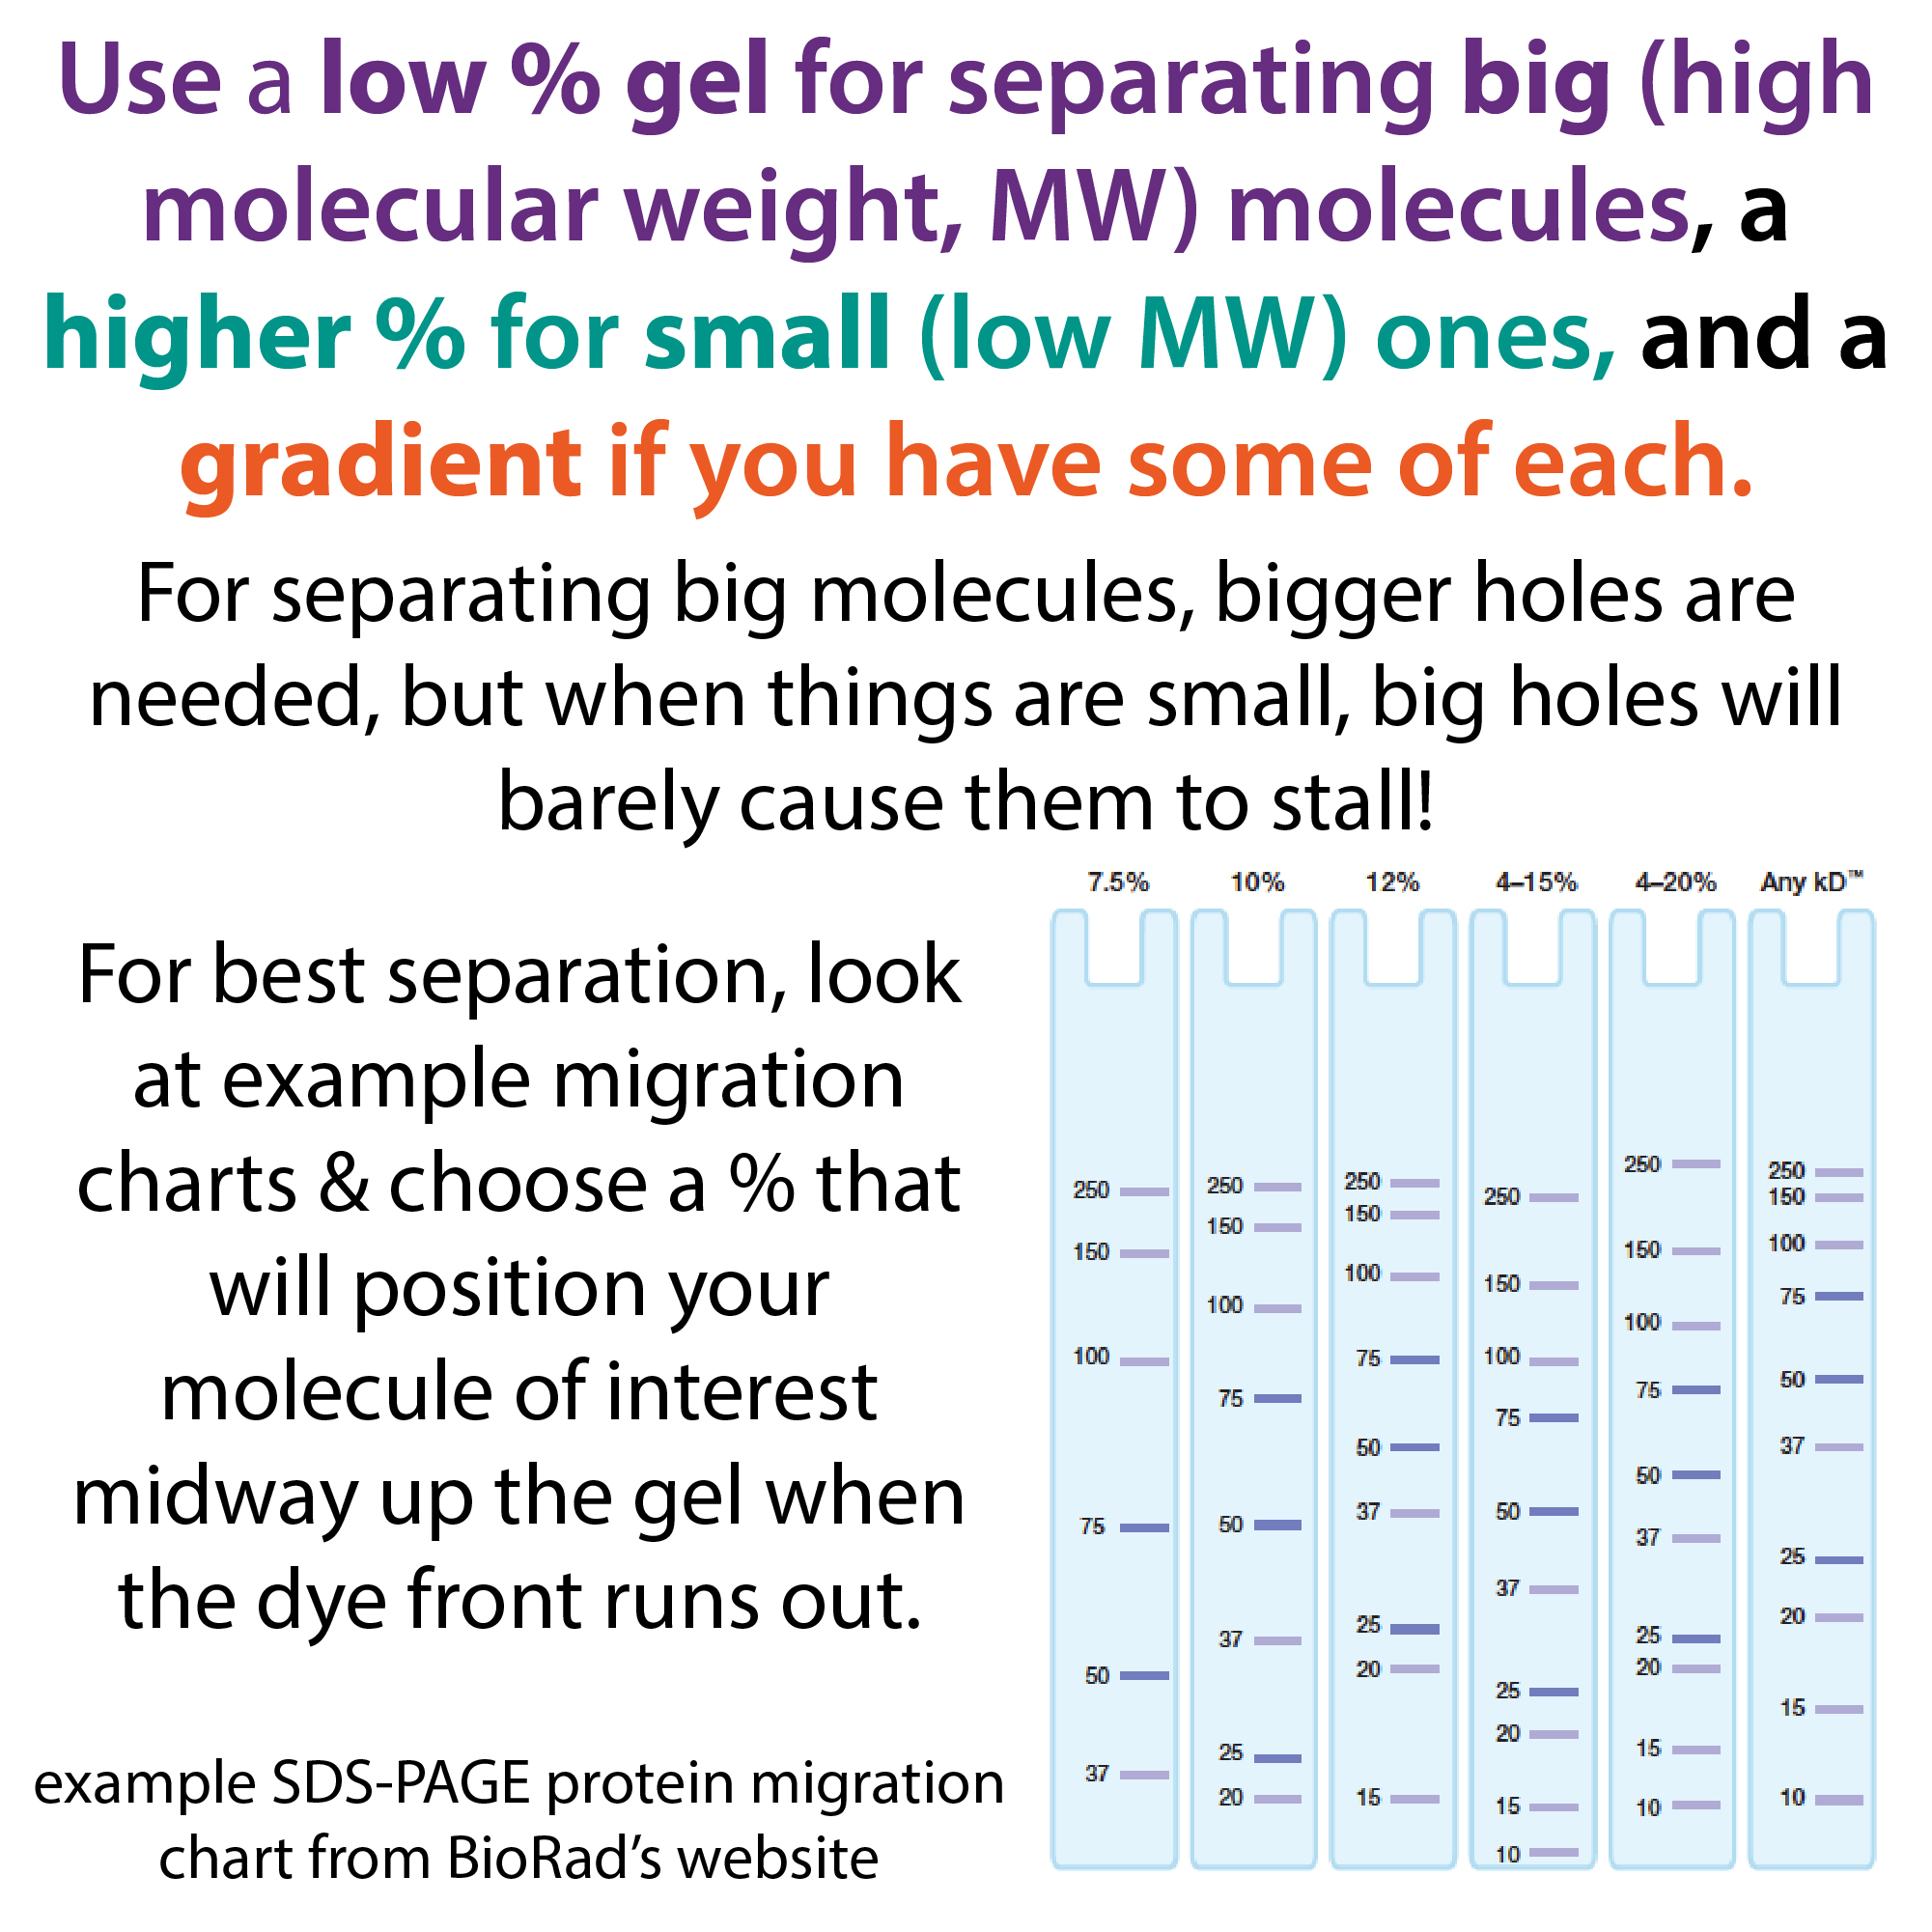
Use a higher percentage gel to separate smaller molecules and lower percentage gel to separate bigger molecules. Have some of both? A gradient gel might serve you well! Not sure what to use? Look to a migration chart to tell!
YouTube: https://youtu.be/ecFPG1oJcF0
ThermoFisher Gel Electrophoresis Tables: https://www.thermofisher.com/us/en/home/references/ambion-tech-support/rna-electrophoresis-markers/general-articles/gel-electrophoresis-tables.html
more on agarose gels: http://bit.ly/agaroses ; YouTube: https://youtu.be/aVj8hhOupLs
more on polyacrylamide gels: https://bit.ly/polyacrylamidepolymerization ; YouTube: https://youtu.be/wj2i18Y1GeY
Practical lab tips for avoiding sample loss during storage…
link to video in case embed isn’t working: https://youtu.be/vg74vIFGm8c
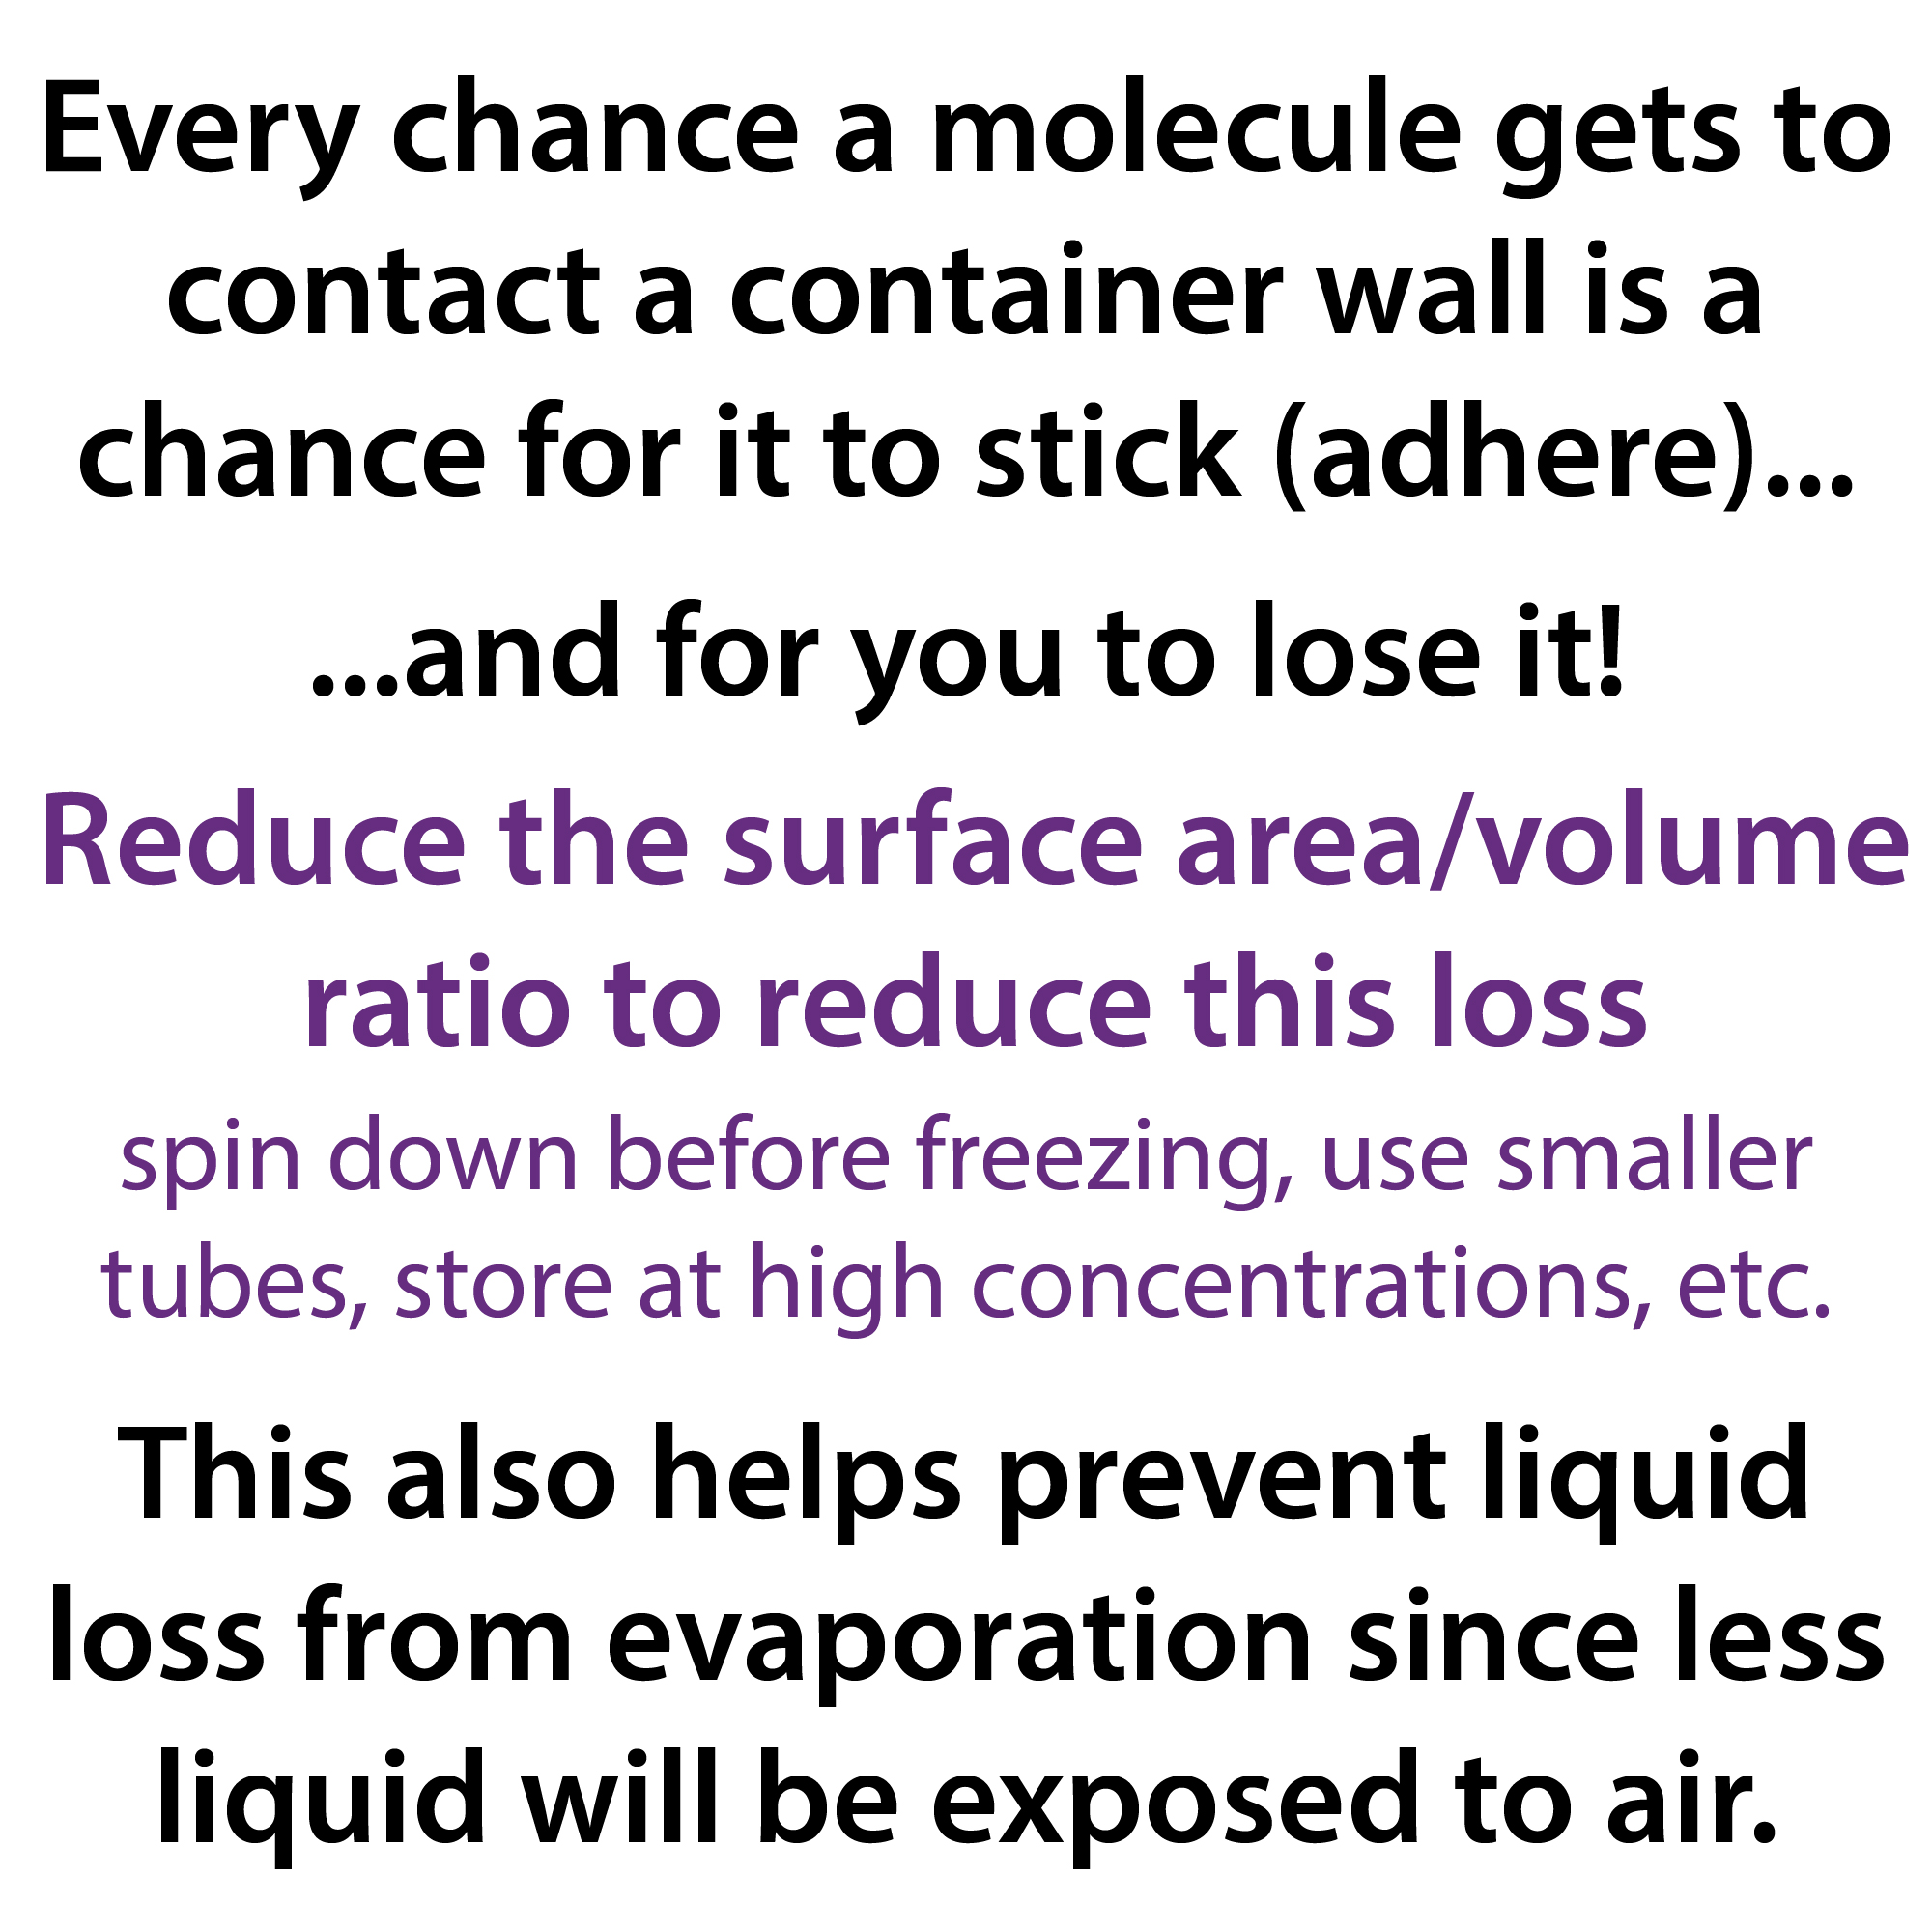
very chance a molecule gets to contact a container wall is a chance for it to stick (adhere) and for you to lose it! Reduce the surface area/volume ratio to reduce this loss. This also helps prevent liquid loss from evaporation since less liquid will be exposed to air.
YouTube: https://youtu.be/vg74vIFGm8c
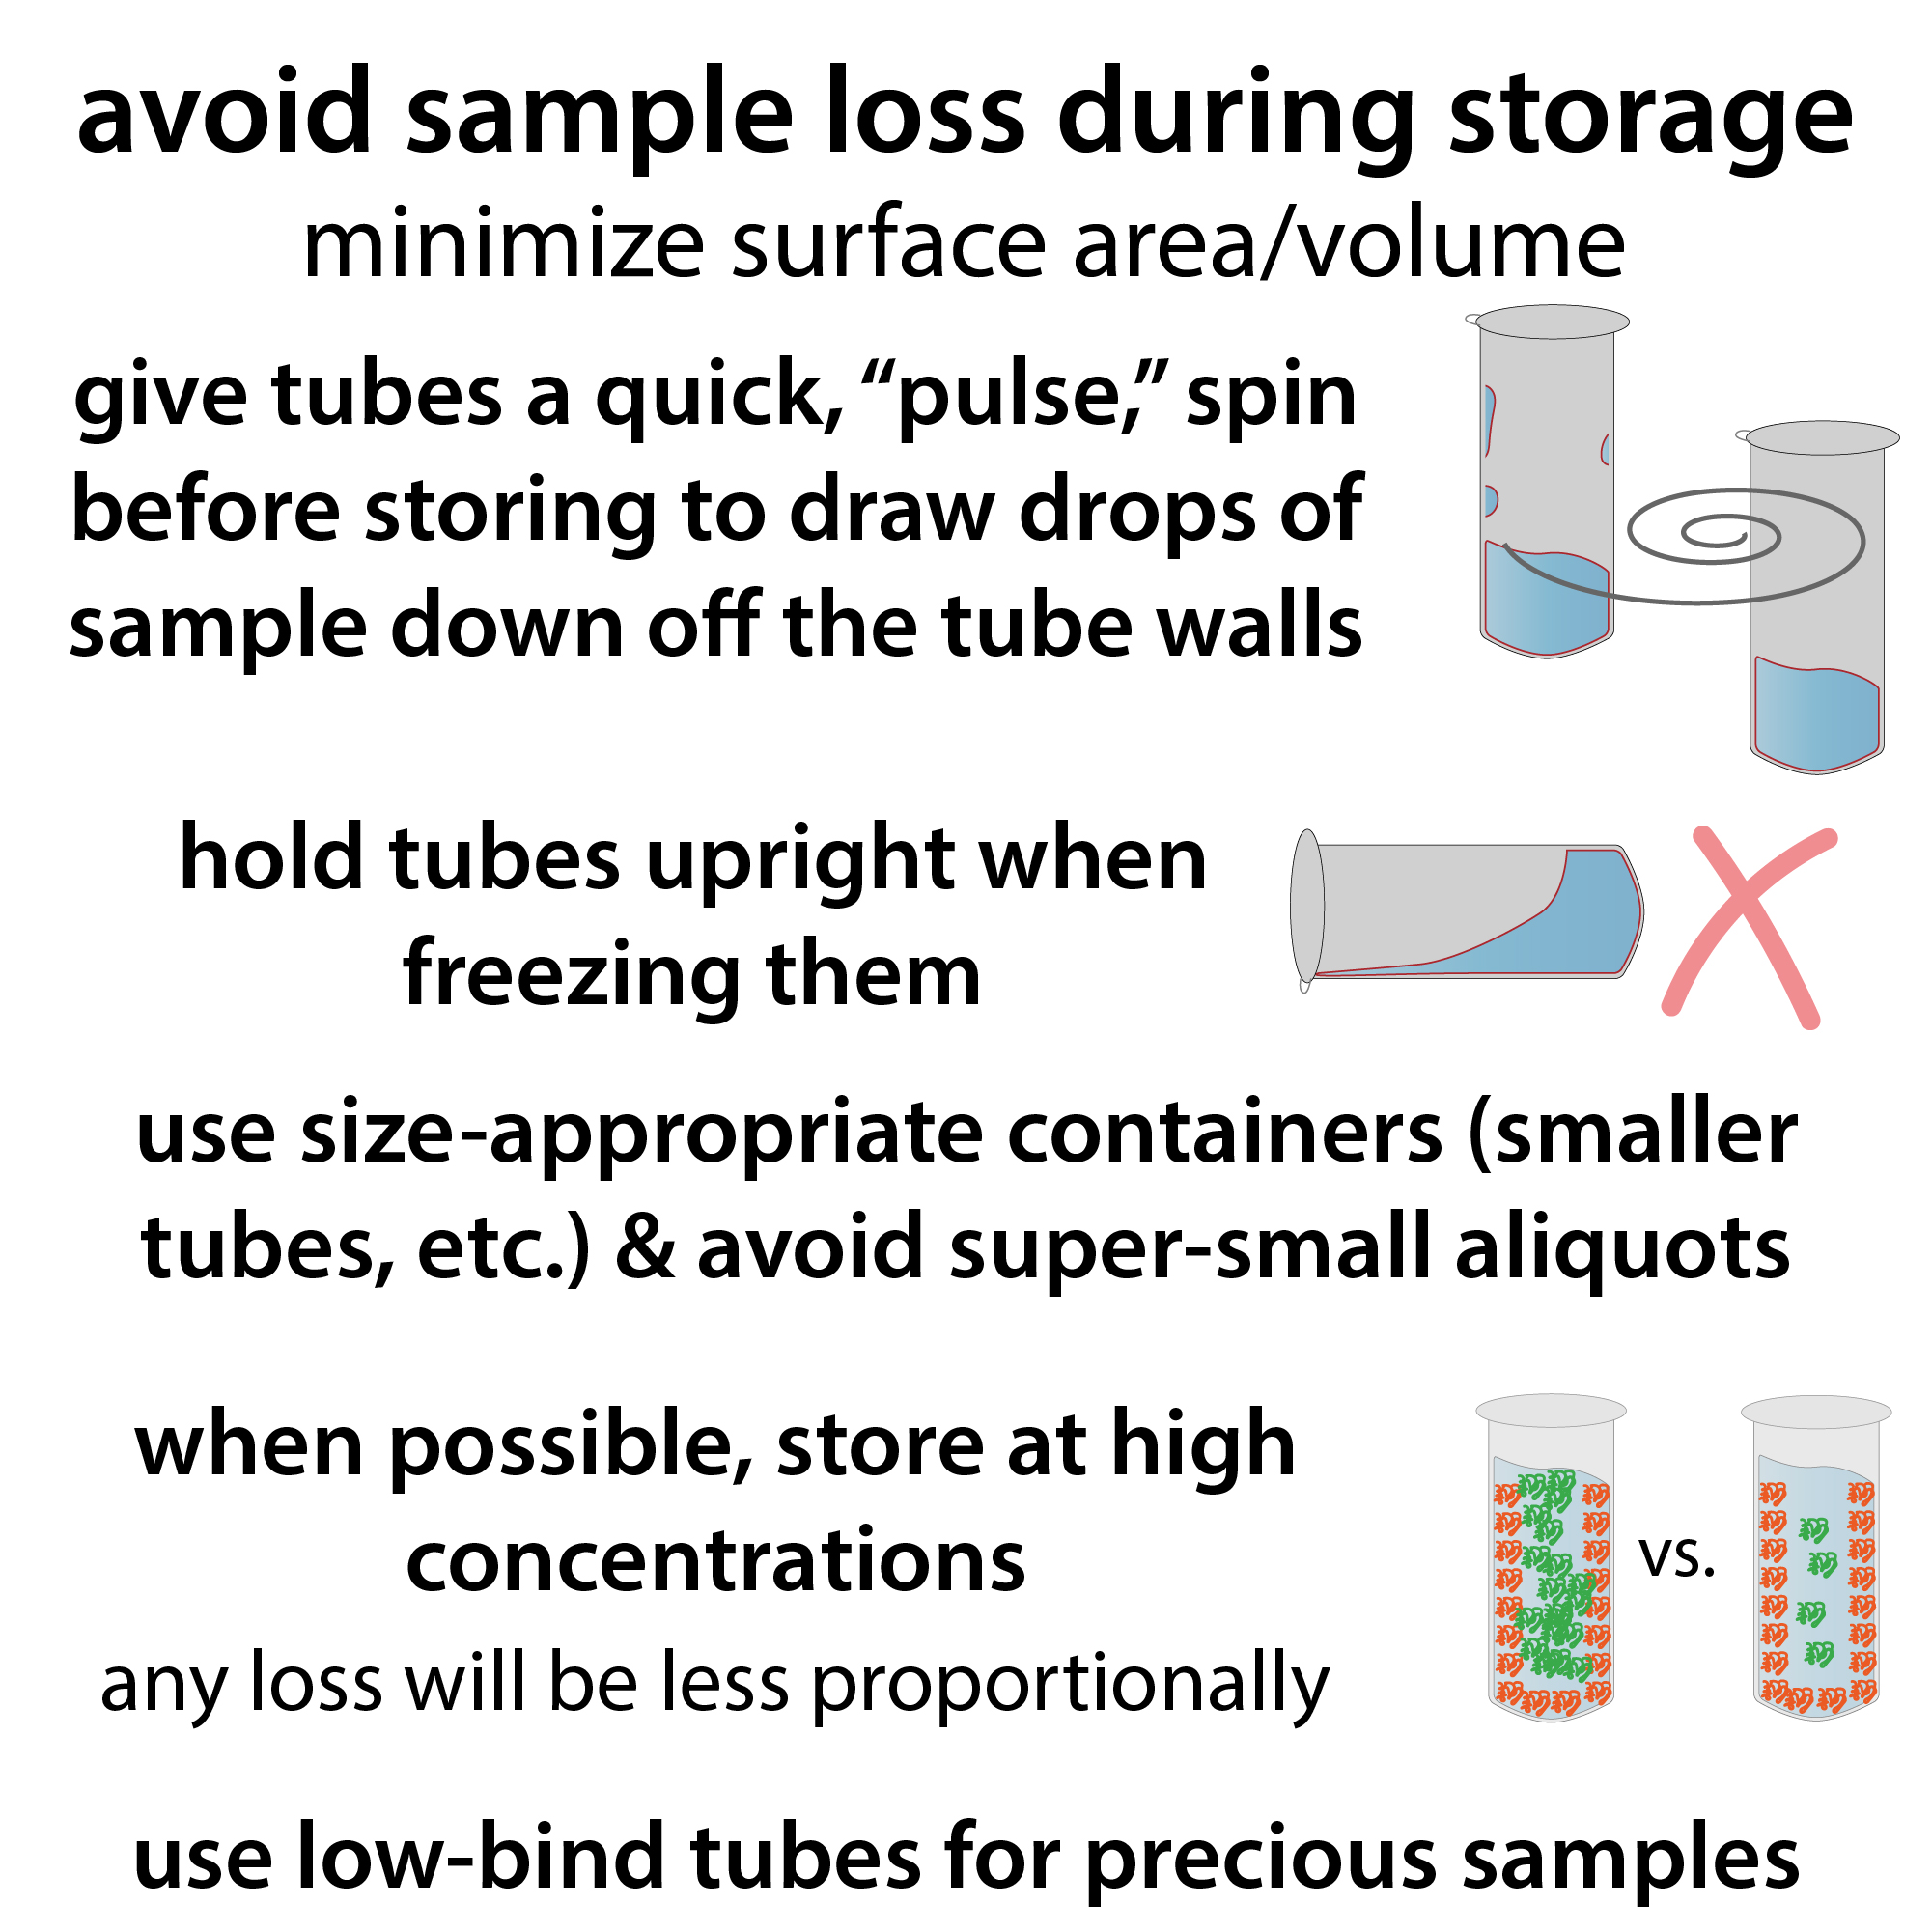
Here are a few strategies to avoid sample loss during storage:
- give tubes a quick, “pulse,” spin before storing to draw drops of sample down off the tube walls
- hold tubes upright when freezing them
- use size-appropriate containers (smaller tubes, etc.) & avoid super-small aliquots
- use low-bind tubes for precious samples
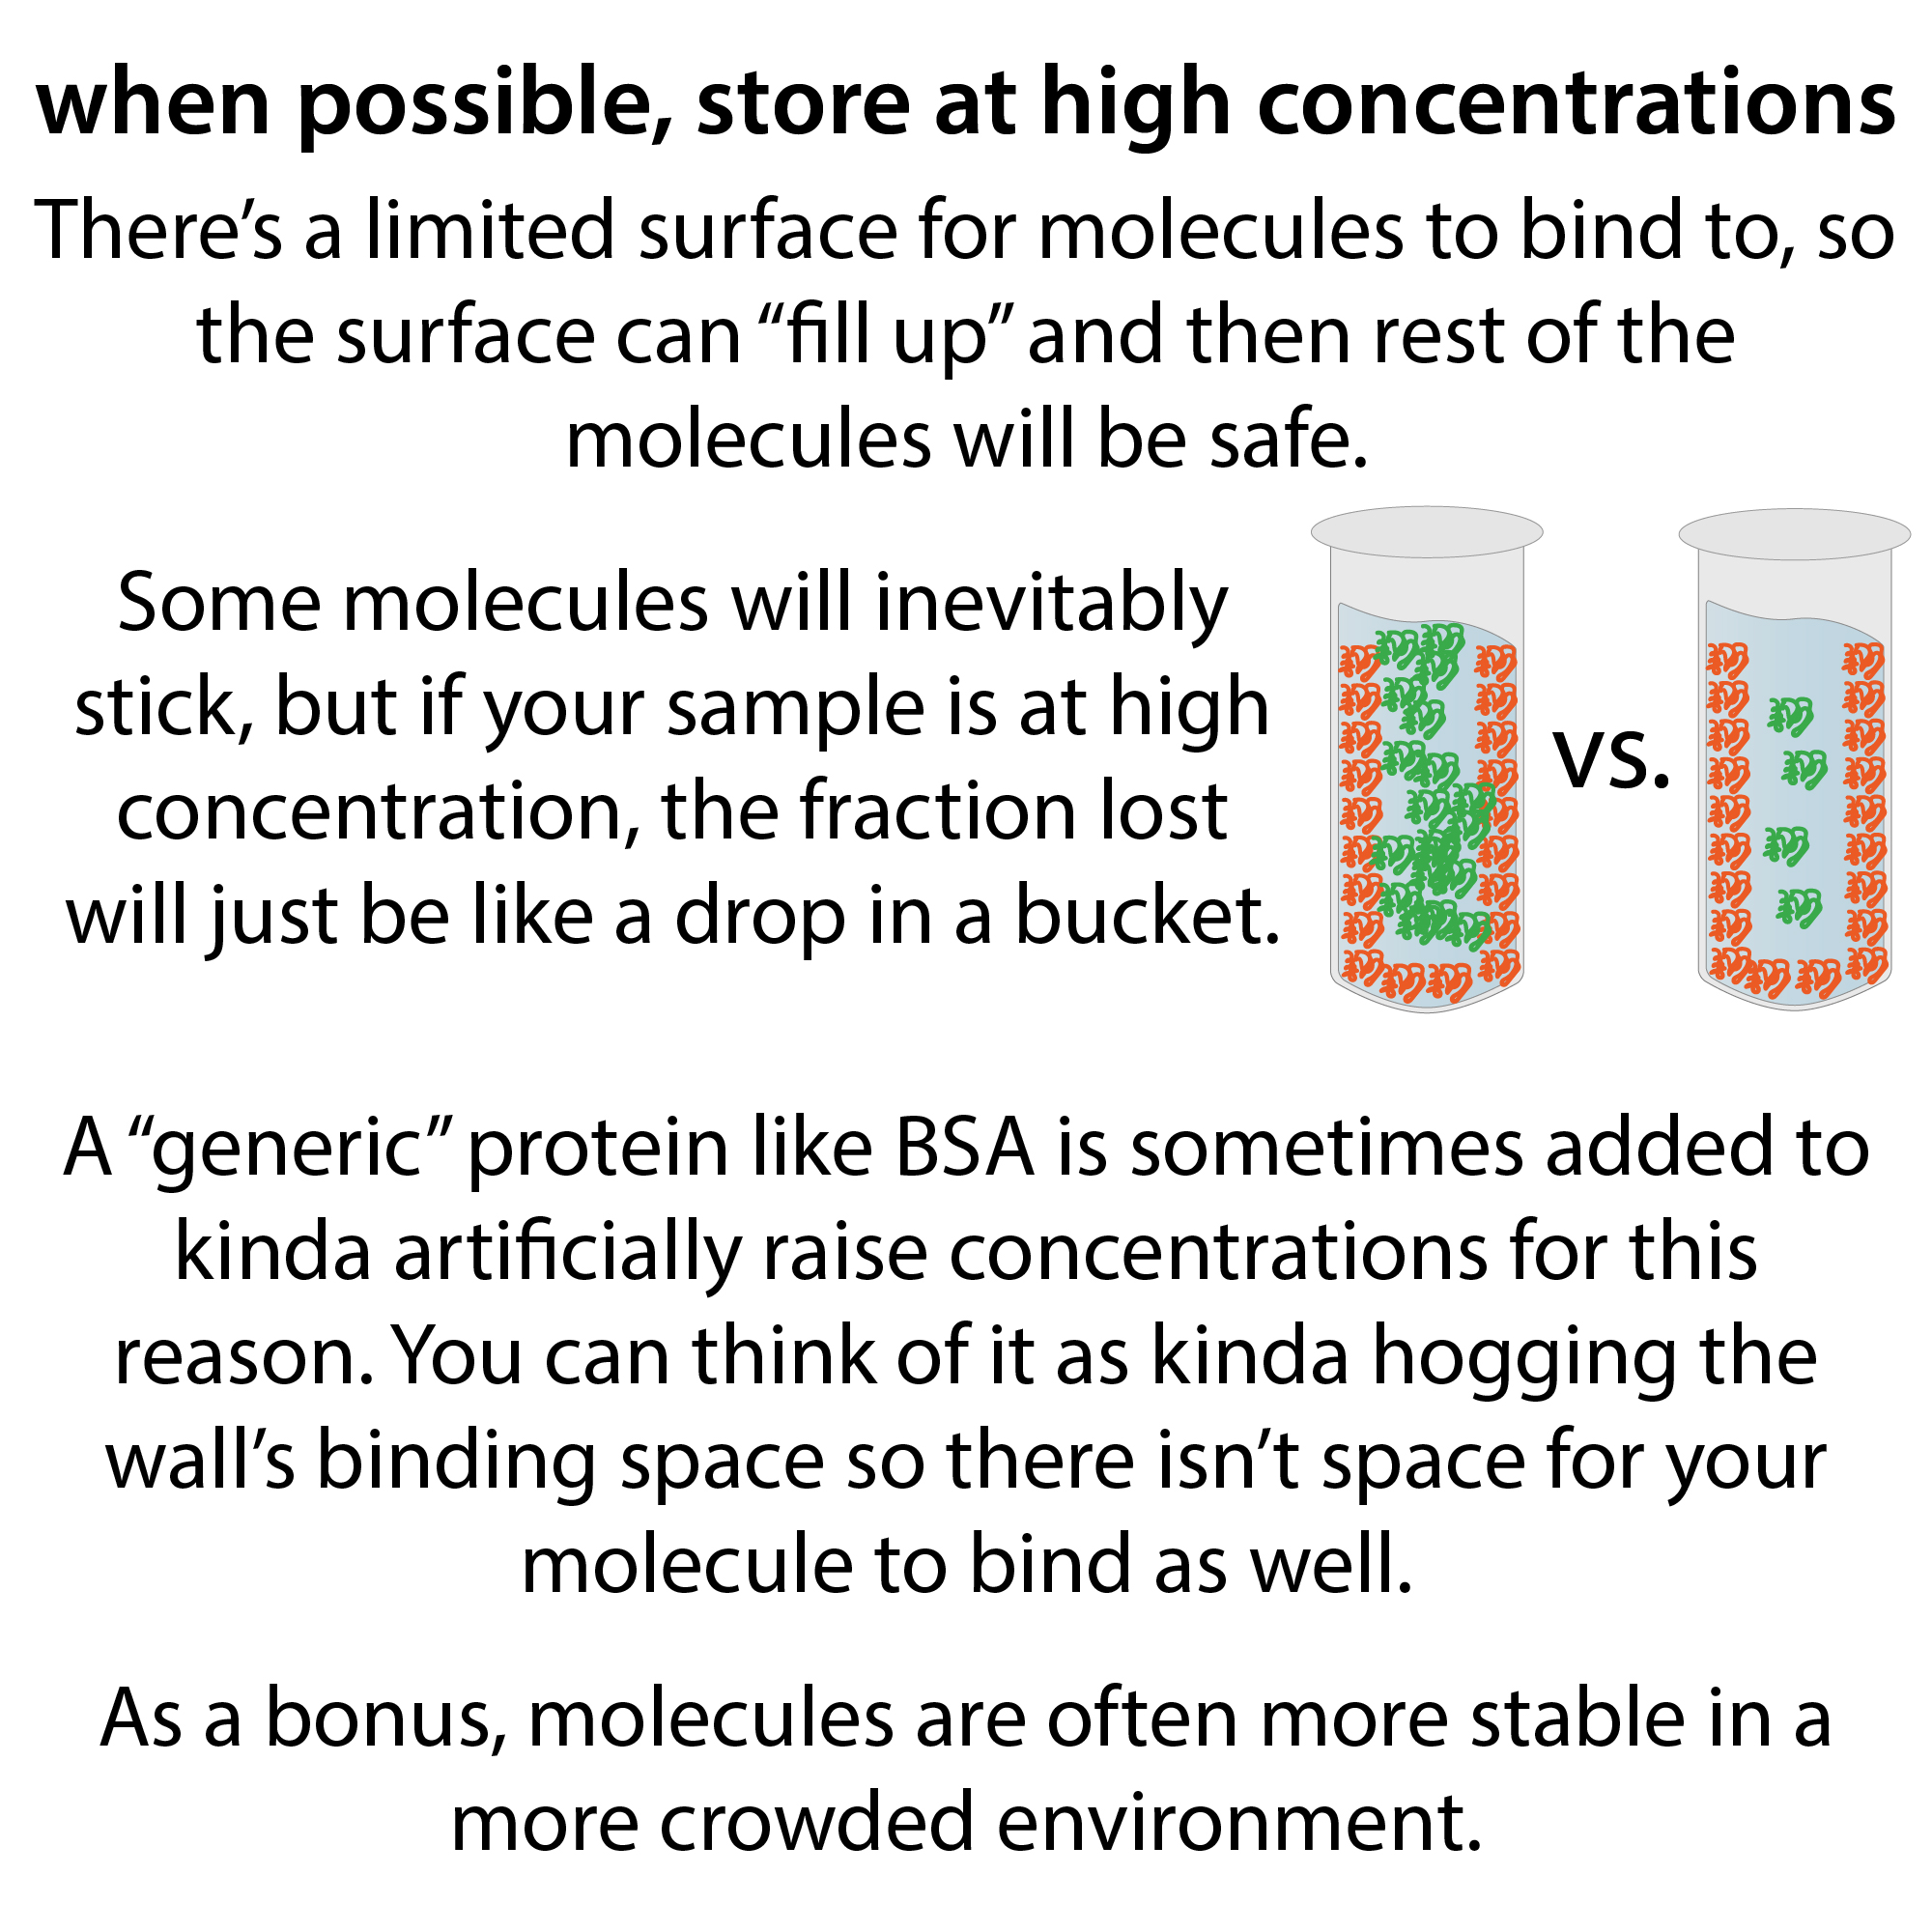
- When possible, store at high concentrations. There’s a limited surface for molecules to bind to, so the surface can “fill up” and then rest of the molecules will be safe. Some molecules will inevitably stick, but if your sample is at high concentration, the fraction lost will just be like a drop in a bucket.
- A “generic” protein like BSA is sometimes added to kinda artificially raise concentrations for this reason. You can think of it as kinda hogging the wall’s binding space so there isn’t space for your molecule to bind as well.
- As a bonus, molecules are often more stable in a more crowded environment.
Make more than you think you need: practical lab tips for avoiding, but preparing for, sample loss…
link to video in case embed isn’t working: https://youtu.be/5VjTpA3ns3g
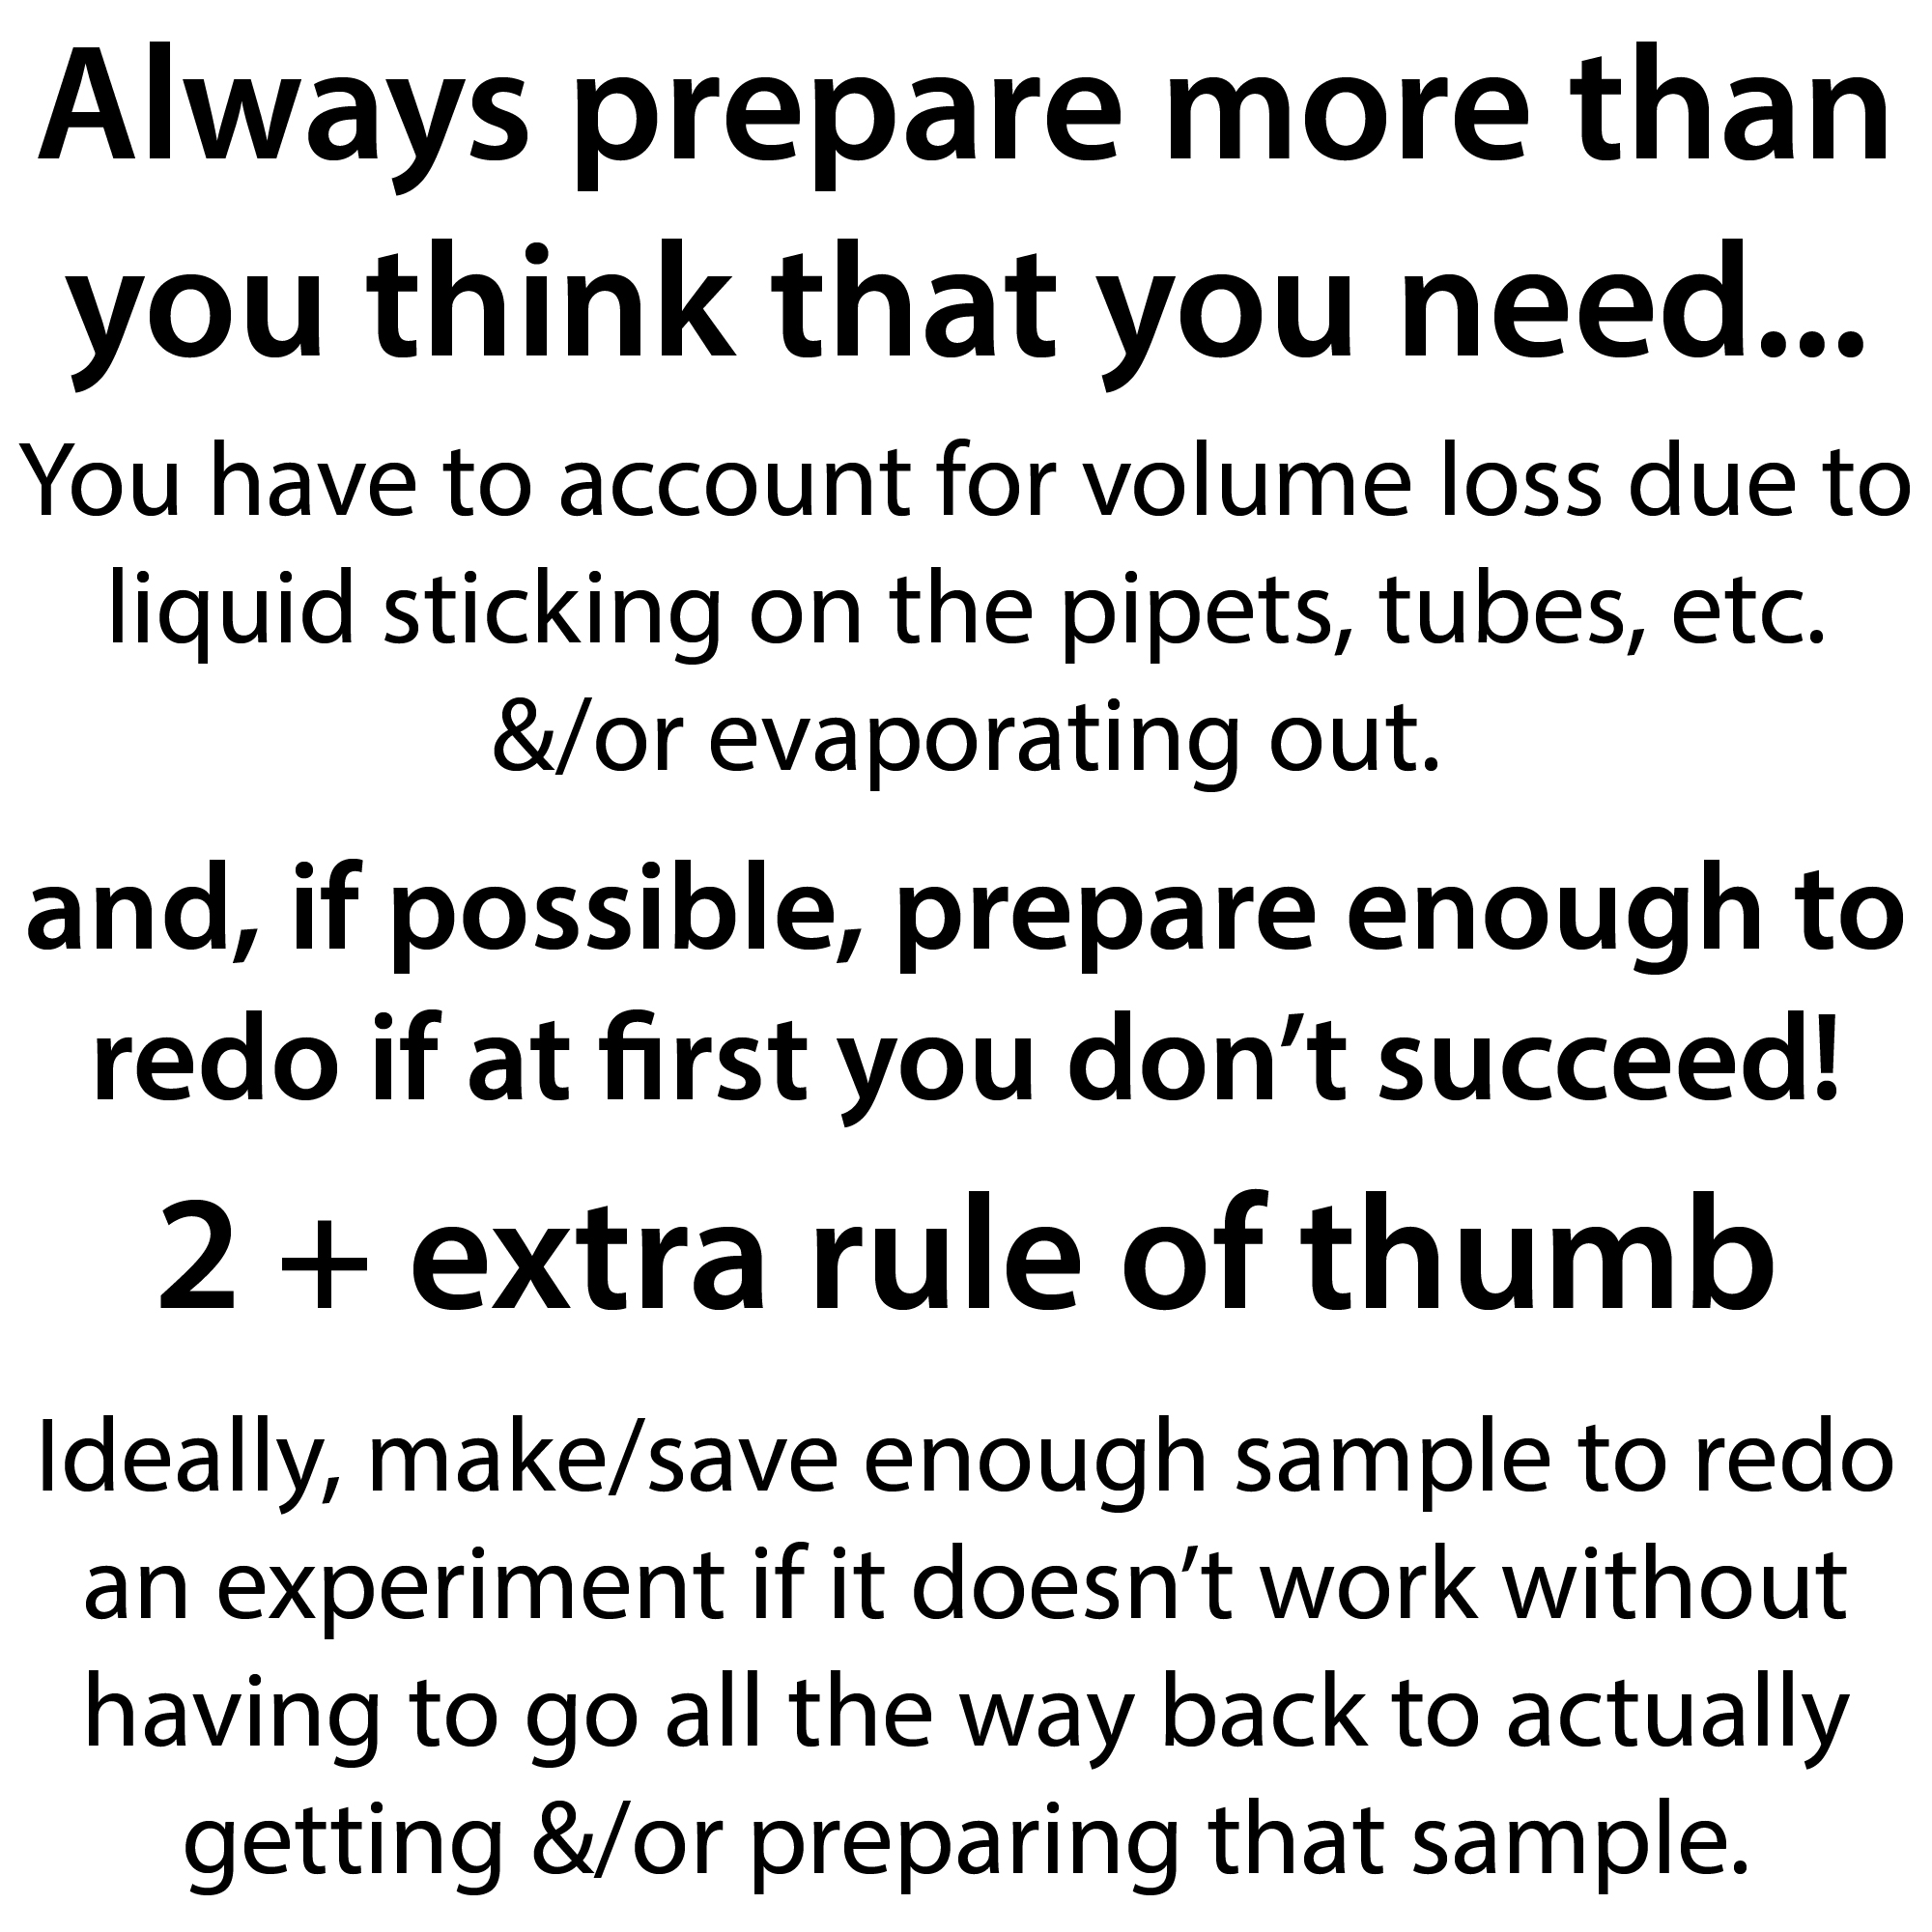
Always prepare more than you think that you need – and, if possible, prepare enough to redo if at first you don’t succeed!
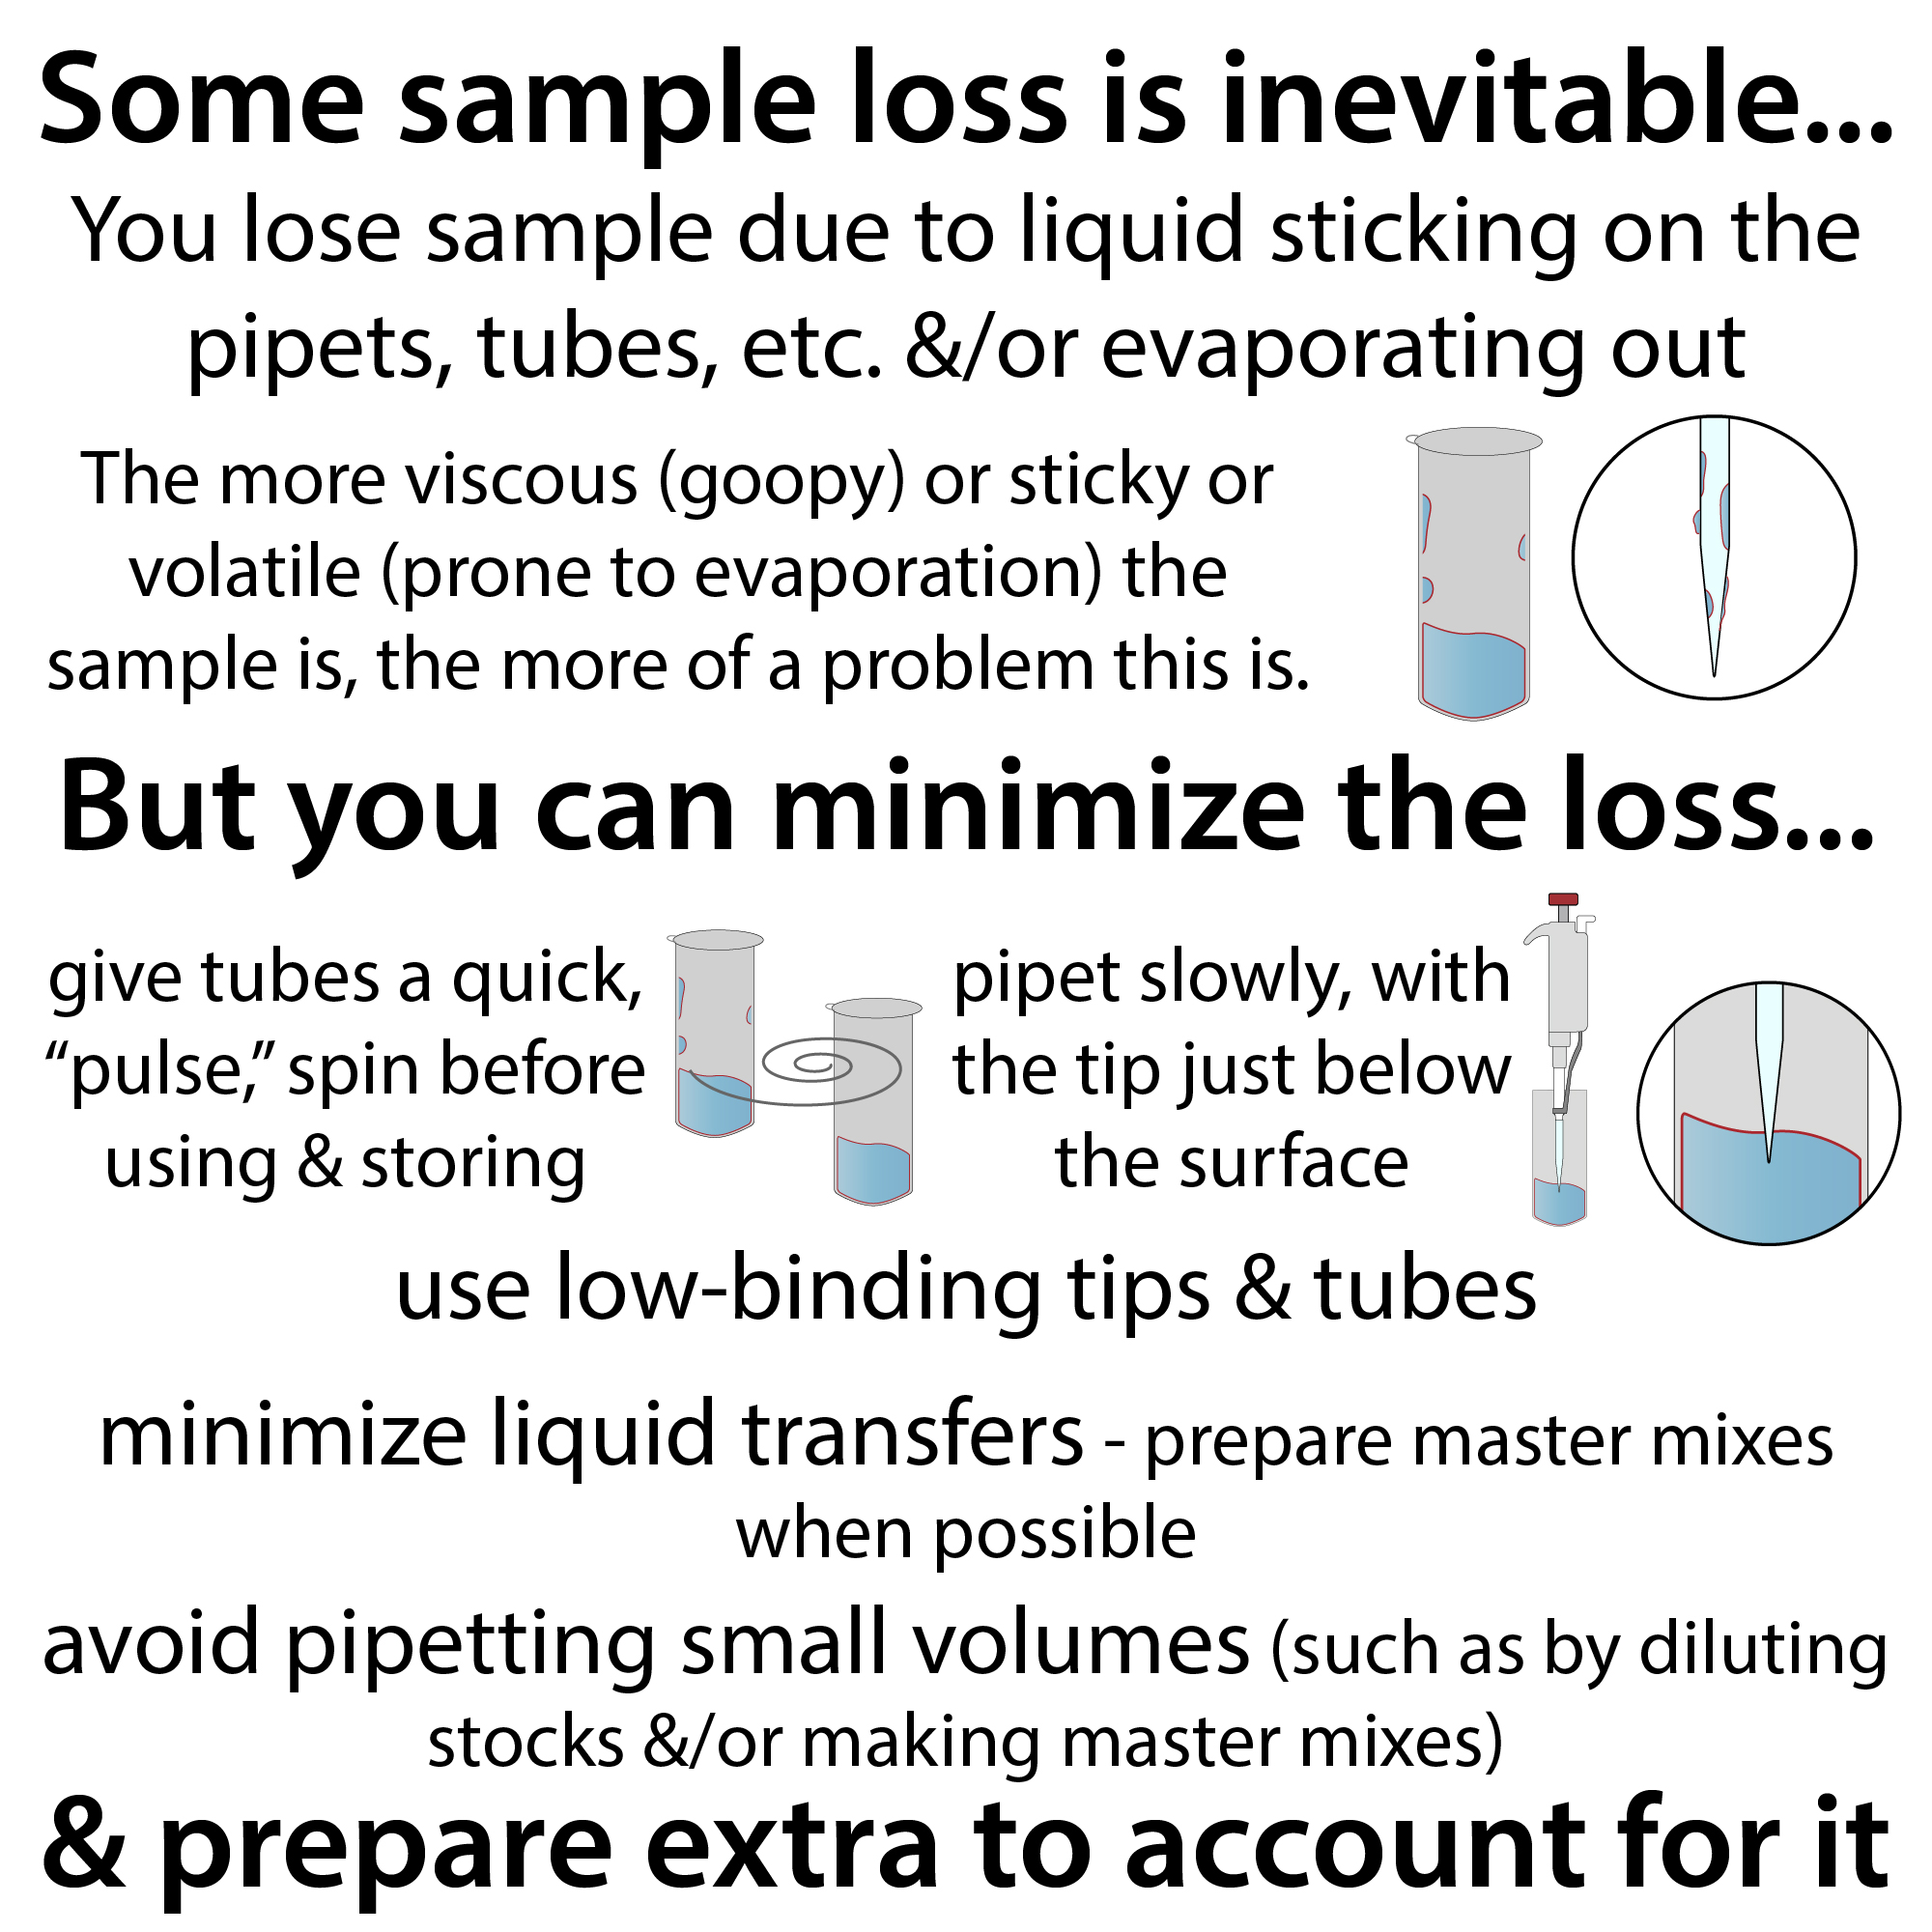
Some sample loss is inevitable…
You lose sample due to liquid sticking on the pipets, tubes, etc. &/or evaporating out. The more viscous (goopy) or sticky or volatile (prone to evaporation) the sample is, the more of a problem this is.
But you can minimize the loss…
- give tubes a quick, “pulse,” spin before using & storing
- pipet slowly, with the tip just below the surface
- use low-binding tips & tubes
- minimize liquid transfers – prepare master mixes when possible
- avoid pipetting small volumes (such as by diluting stocks &/or making master mixes)
And prepare extra to account for it
I have a sort of 2 + extra rule of thumb I try to follow where I like to have enough sample so that I can redo an experiment if it doesn’t work without having to go all the way back to actually getting and/or preparing that sample. The “extra” is because you have to account for volume loss due to liquid sticking on the pipets, tubes, etc. and/or evaporating out.
So, for example, if I’m running an SDS-PAGE gel and I have plenty of sample I will prepare enough to load 2 lanes worth of the gel. Which means making ~2.5 lanes worth.
How much “extra” you need to make depends on things like how big your total volume is, how sticky or viscous your sample is (you’ll need more for these) and how many pipetting steps you have (remember you lose some each time). It also depends on how expensive and/or available the components are!
Practical tips for processing lots of samples
link to video in case embed isn’t working: https://youtu.be/xcxWAYWD3vQ
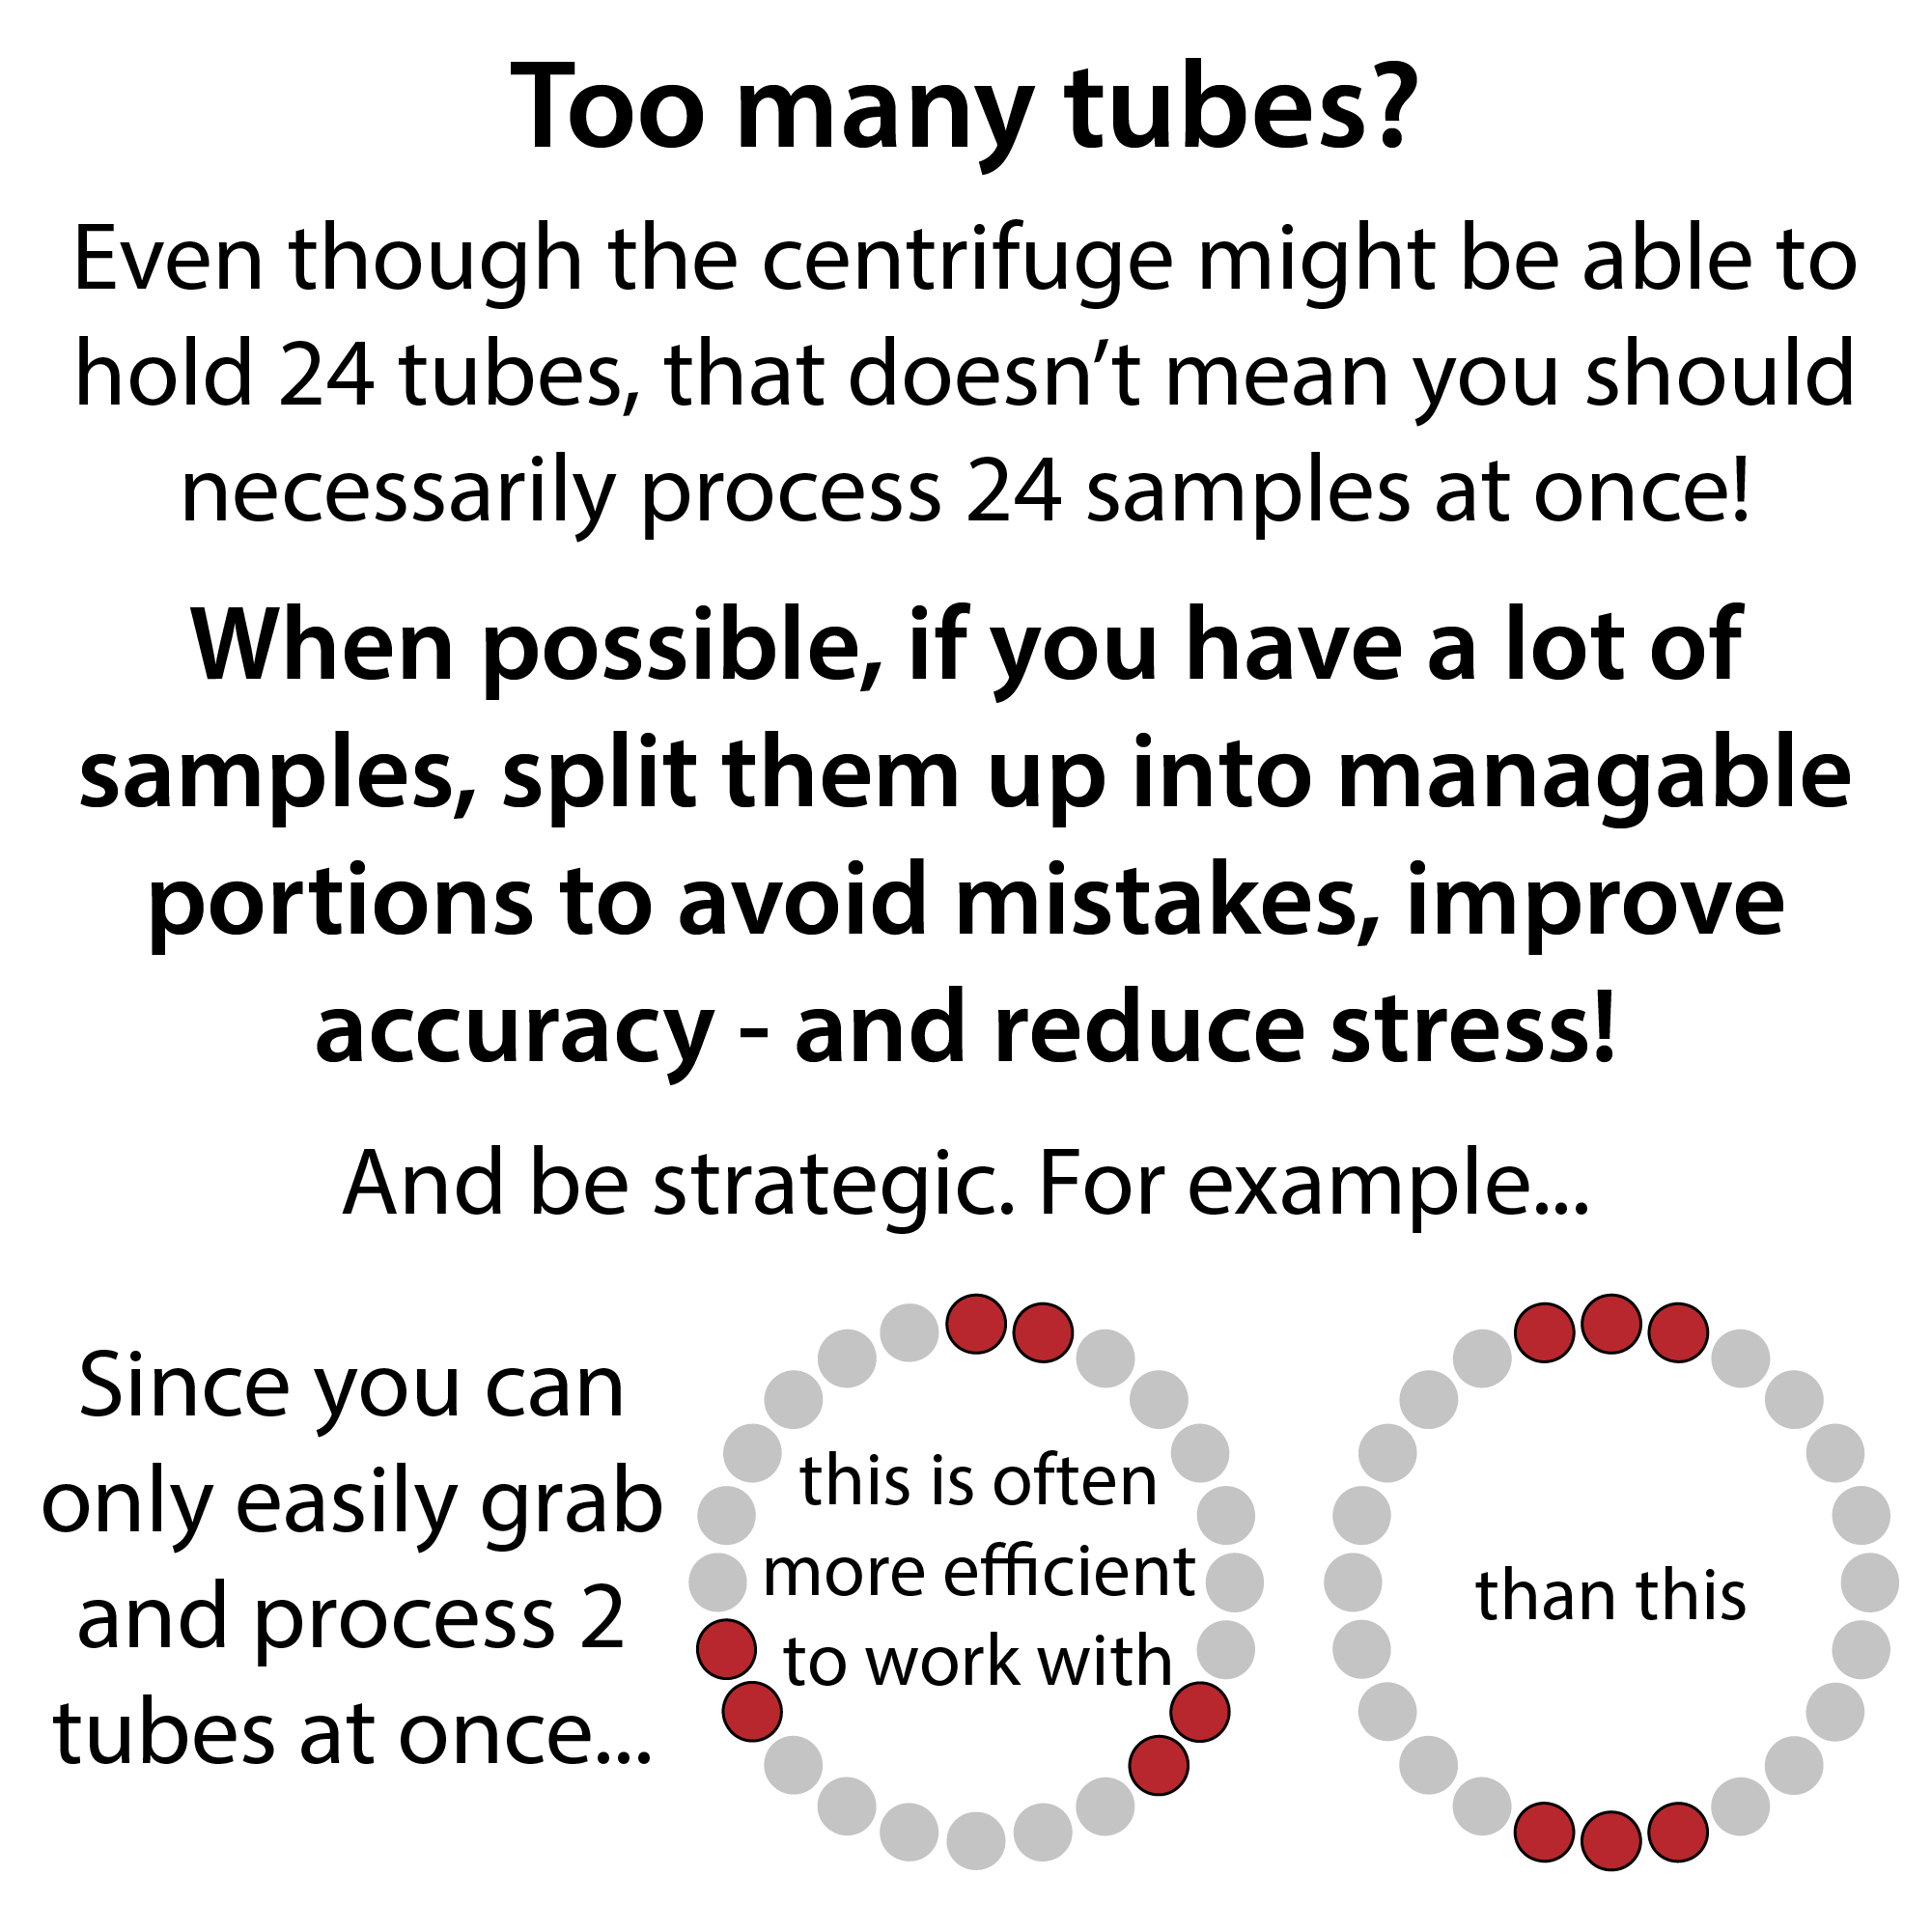
Resist the urge to process all your samples at once – sometimes going through all the steps twice (say on 6 samples, then again with the next 6) can actually be more efficient than trying to do them all in parallel (e.g. all 12 at the same time), which you just don’t have enough hands for! In addition to being a lot less stressful (albeit a bit more tedious), it can improve your accuracy. This is especially relevant if you’re dealing with time-sensitive steps, such as things with enzyme reactions where the timing would be off between the first & last samples, or pellets that might resuspend by the time you get to them.
YouTube: https://youtu.be/xcxWAYWD3vQ
It can also prevent you from making silly errors (mixing up tubes, skipping a step, pipetting into the same tube twice, etc.) which would make you have to start over, potentially even from an earlier step if you lost your sample. Speaking of which, come up with a strategy to keep track of which tubes you are on when working, such as always going in the same tube order each step & moving and/or capping-uncapping tubes after adding to them. Have detailed instructions written out so you don’t lose track of what you’re doing.
Going back to the idea of not having enough hands… You can probably pick up and handle 2 microcentrifuge tubes in one hand fairly easily, but 3’s a challenge (especially if they’re those 2 part things with a column and a collection tube). So try to space out your tubes in even numbers in the centrifuge for most efficient in/out-ing (e.g. if you have 6 tubes, space out 3 groups of 2 rather than 2 groups of 3).
Try to process an even number of samples if possible for simplest centrifuging.
If you have steps you’re doing in PCR strips, try to avoid processing more than 8 samples at once if possible so you don’t have to deal with multiple strips. Regardless of tube size, label them well! – top & sides.
Remember to breathe! (I have a bad tendency to hold my breath when I concentrate).
And good luck!
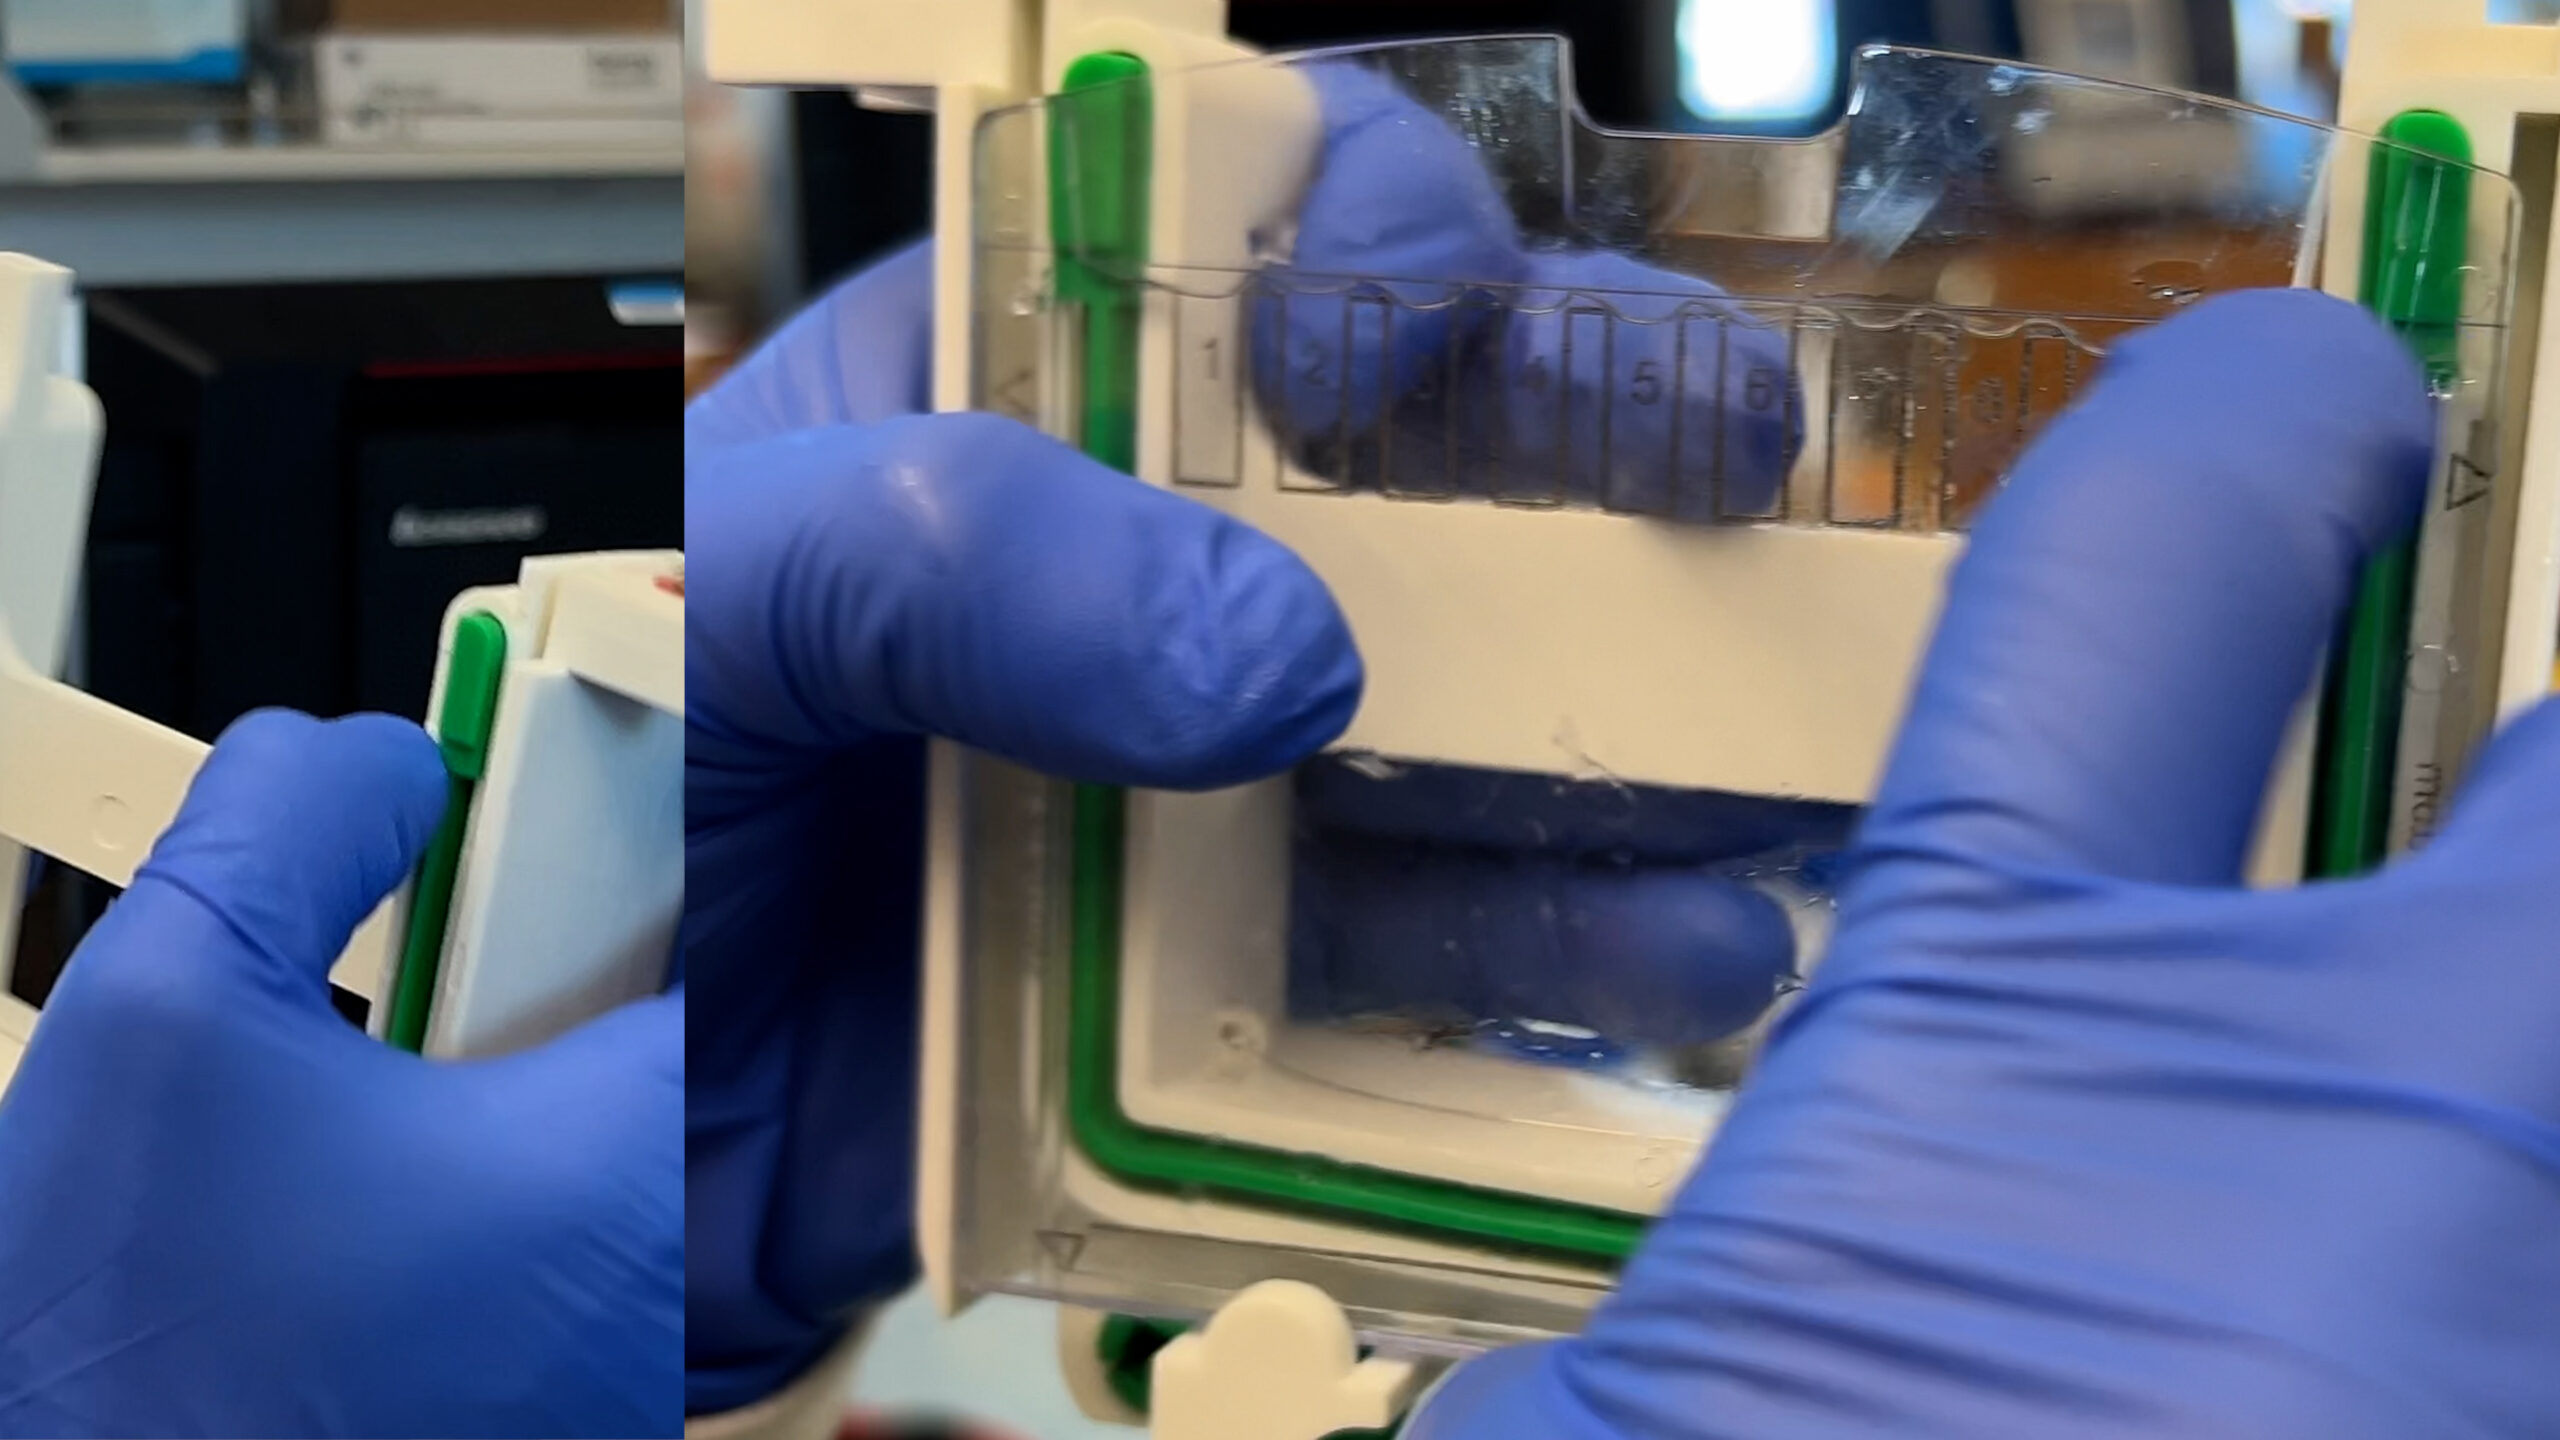
Tips for setting up a bio-rad tetra cell SDS-PAGE box without leaks
Key points:
- You will need a gel cassette or a buffer dam for both sides of the electrode assembly in order to create an inner buffer chamber.
- Ensure the short sides are facing the gasket
- Strategically place your gel(s) so your gel (not just a dam) or your hardest-to-load gel is closest to the outside for easy loading (remembering which way the assembly will need to be in order for the lid to go on red to red
- Go in with each cassette or buffer dam at an angle, then push back and up
- Ensure the top of the short sides are flush against the bottom ledge of the rubber gasket line
- Hold tightly when flipping to place the other side
- Check that you haven’t disrupted the first side
- Keep holding tightly until all is clamped
- Maintain pressure back and up, but not so strong that you push it above the rubber ledge
- After placing the assembly in the box, pour a small amount of 1X running buffer into the inner chamber and check to ensure the liquid level doesn’t go down. If it does, you need to reassemble your assembly (but at least you know before there’s sample in there!). If no leaks, fill ‘er up!
Note: this is not an endorsement of bio-rad or a video from them or anything, just a very very very frequent user. (And I will say they give great educational discounts!)
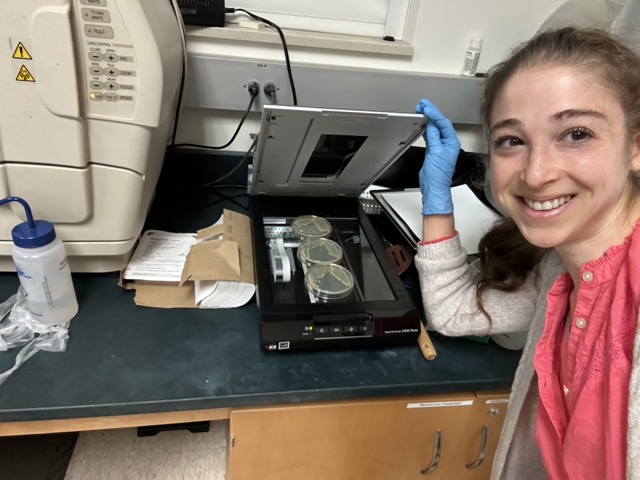
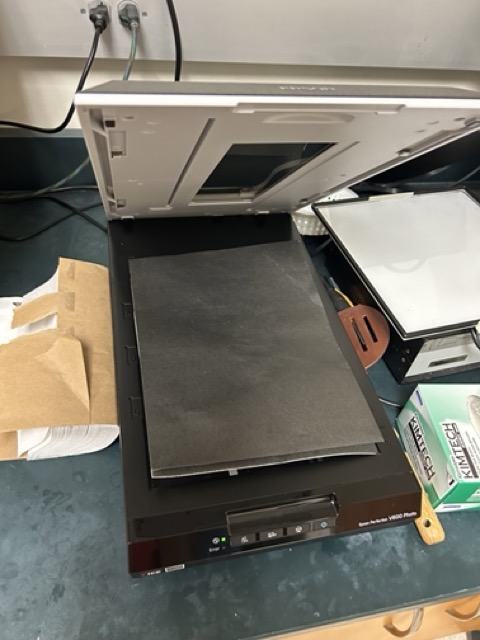
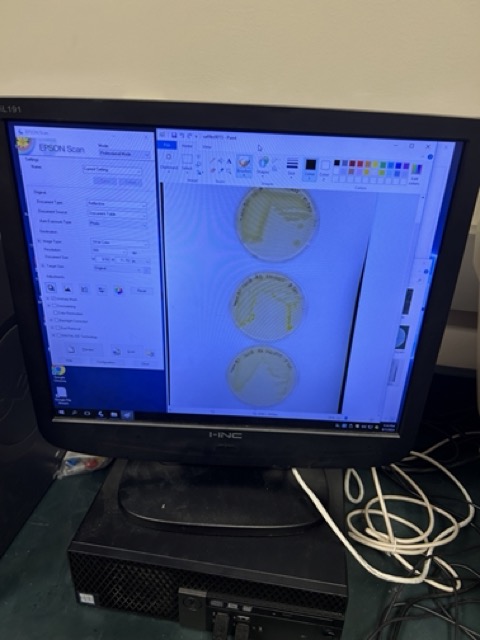
Can we take pics? Yes we scan!
You can avoid camera shadows and reflections by scanning Petri dishes on a regular old scanner. Just put a white or black piece of plastic on top for a nice background.
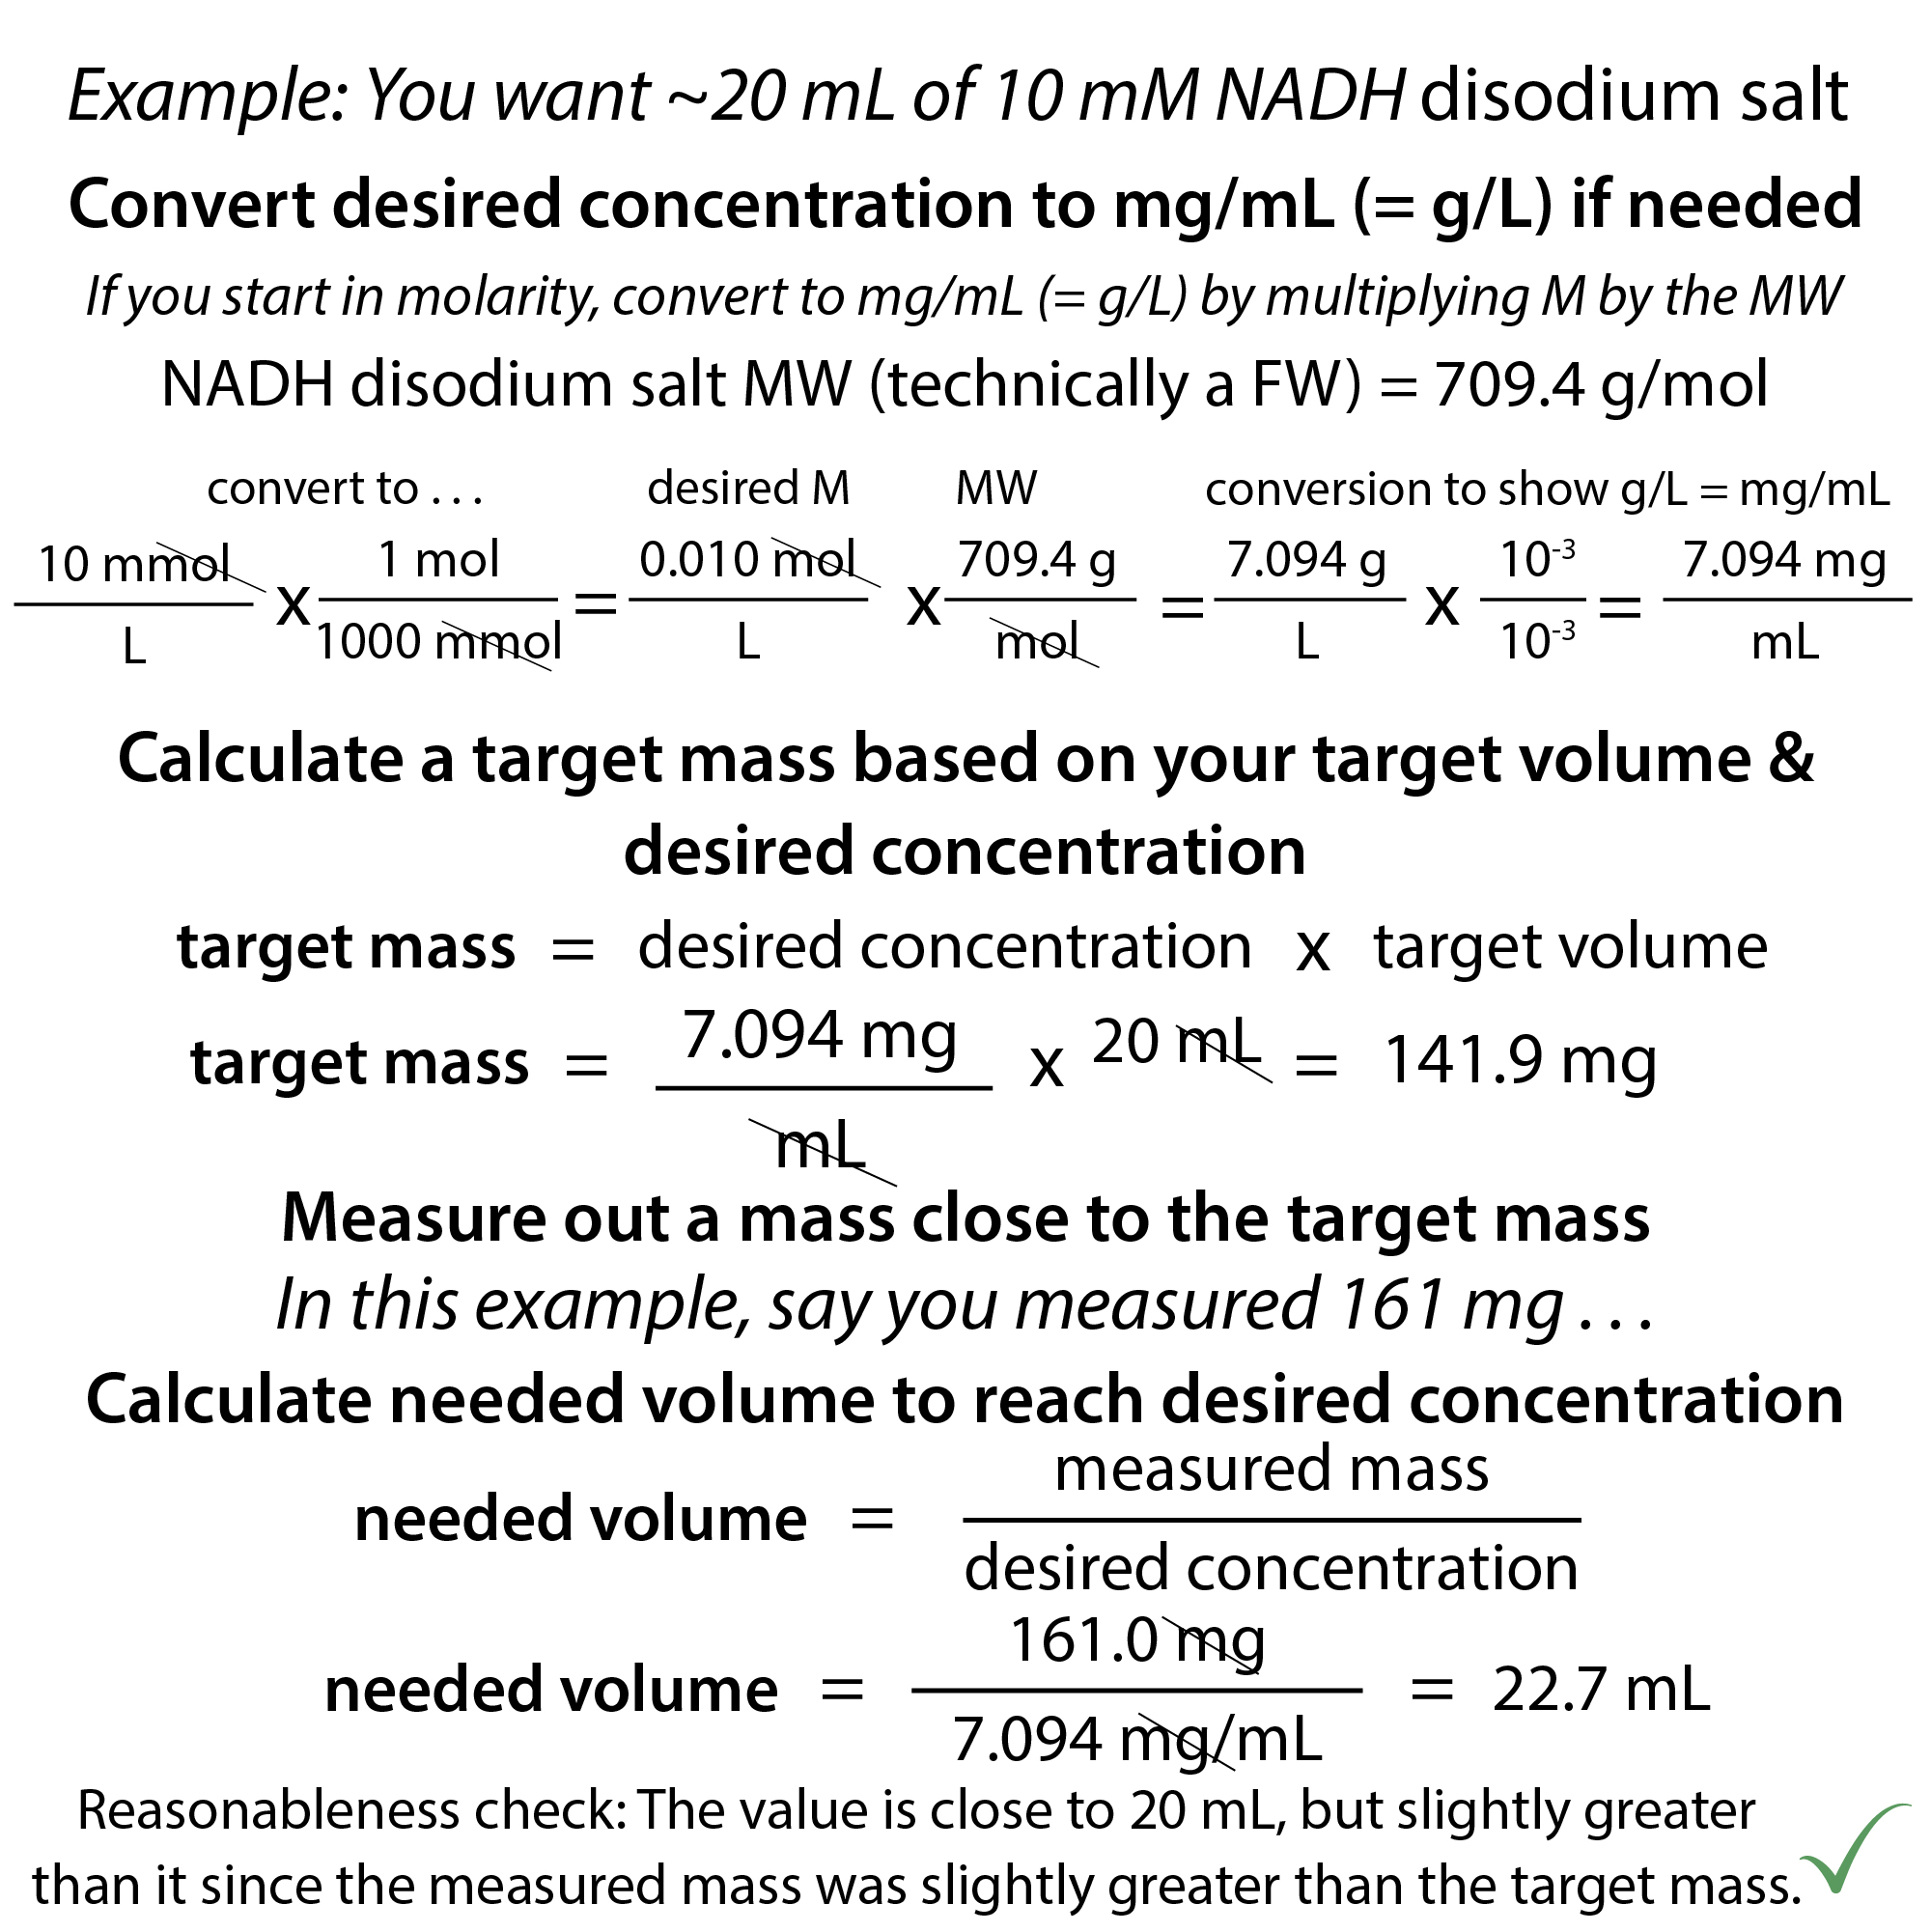
When you have a small amount to weigh out, don’t worry about being exact. Instead, it’s easier to change the volume to match what you weigh to get your desired concentration.
If you start with a desired weight/volume concentration, divide your actual measured weight by that desired concentration. Taking any unit conversions into account, the weights cancel out, leaving you with volume
If you start with molarity, just add a step to convert to weight/volume by multiplying the molarity by the molecular weight.
It can also be helpful to do the weighing in the tube so you don’t have to worry about loss during transfer.

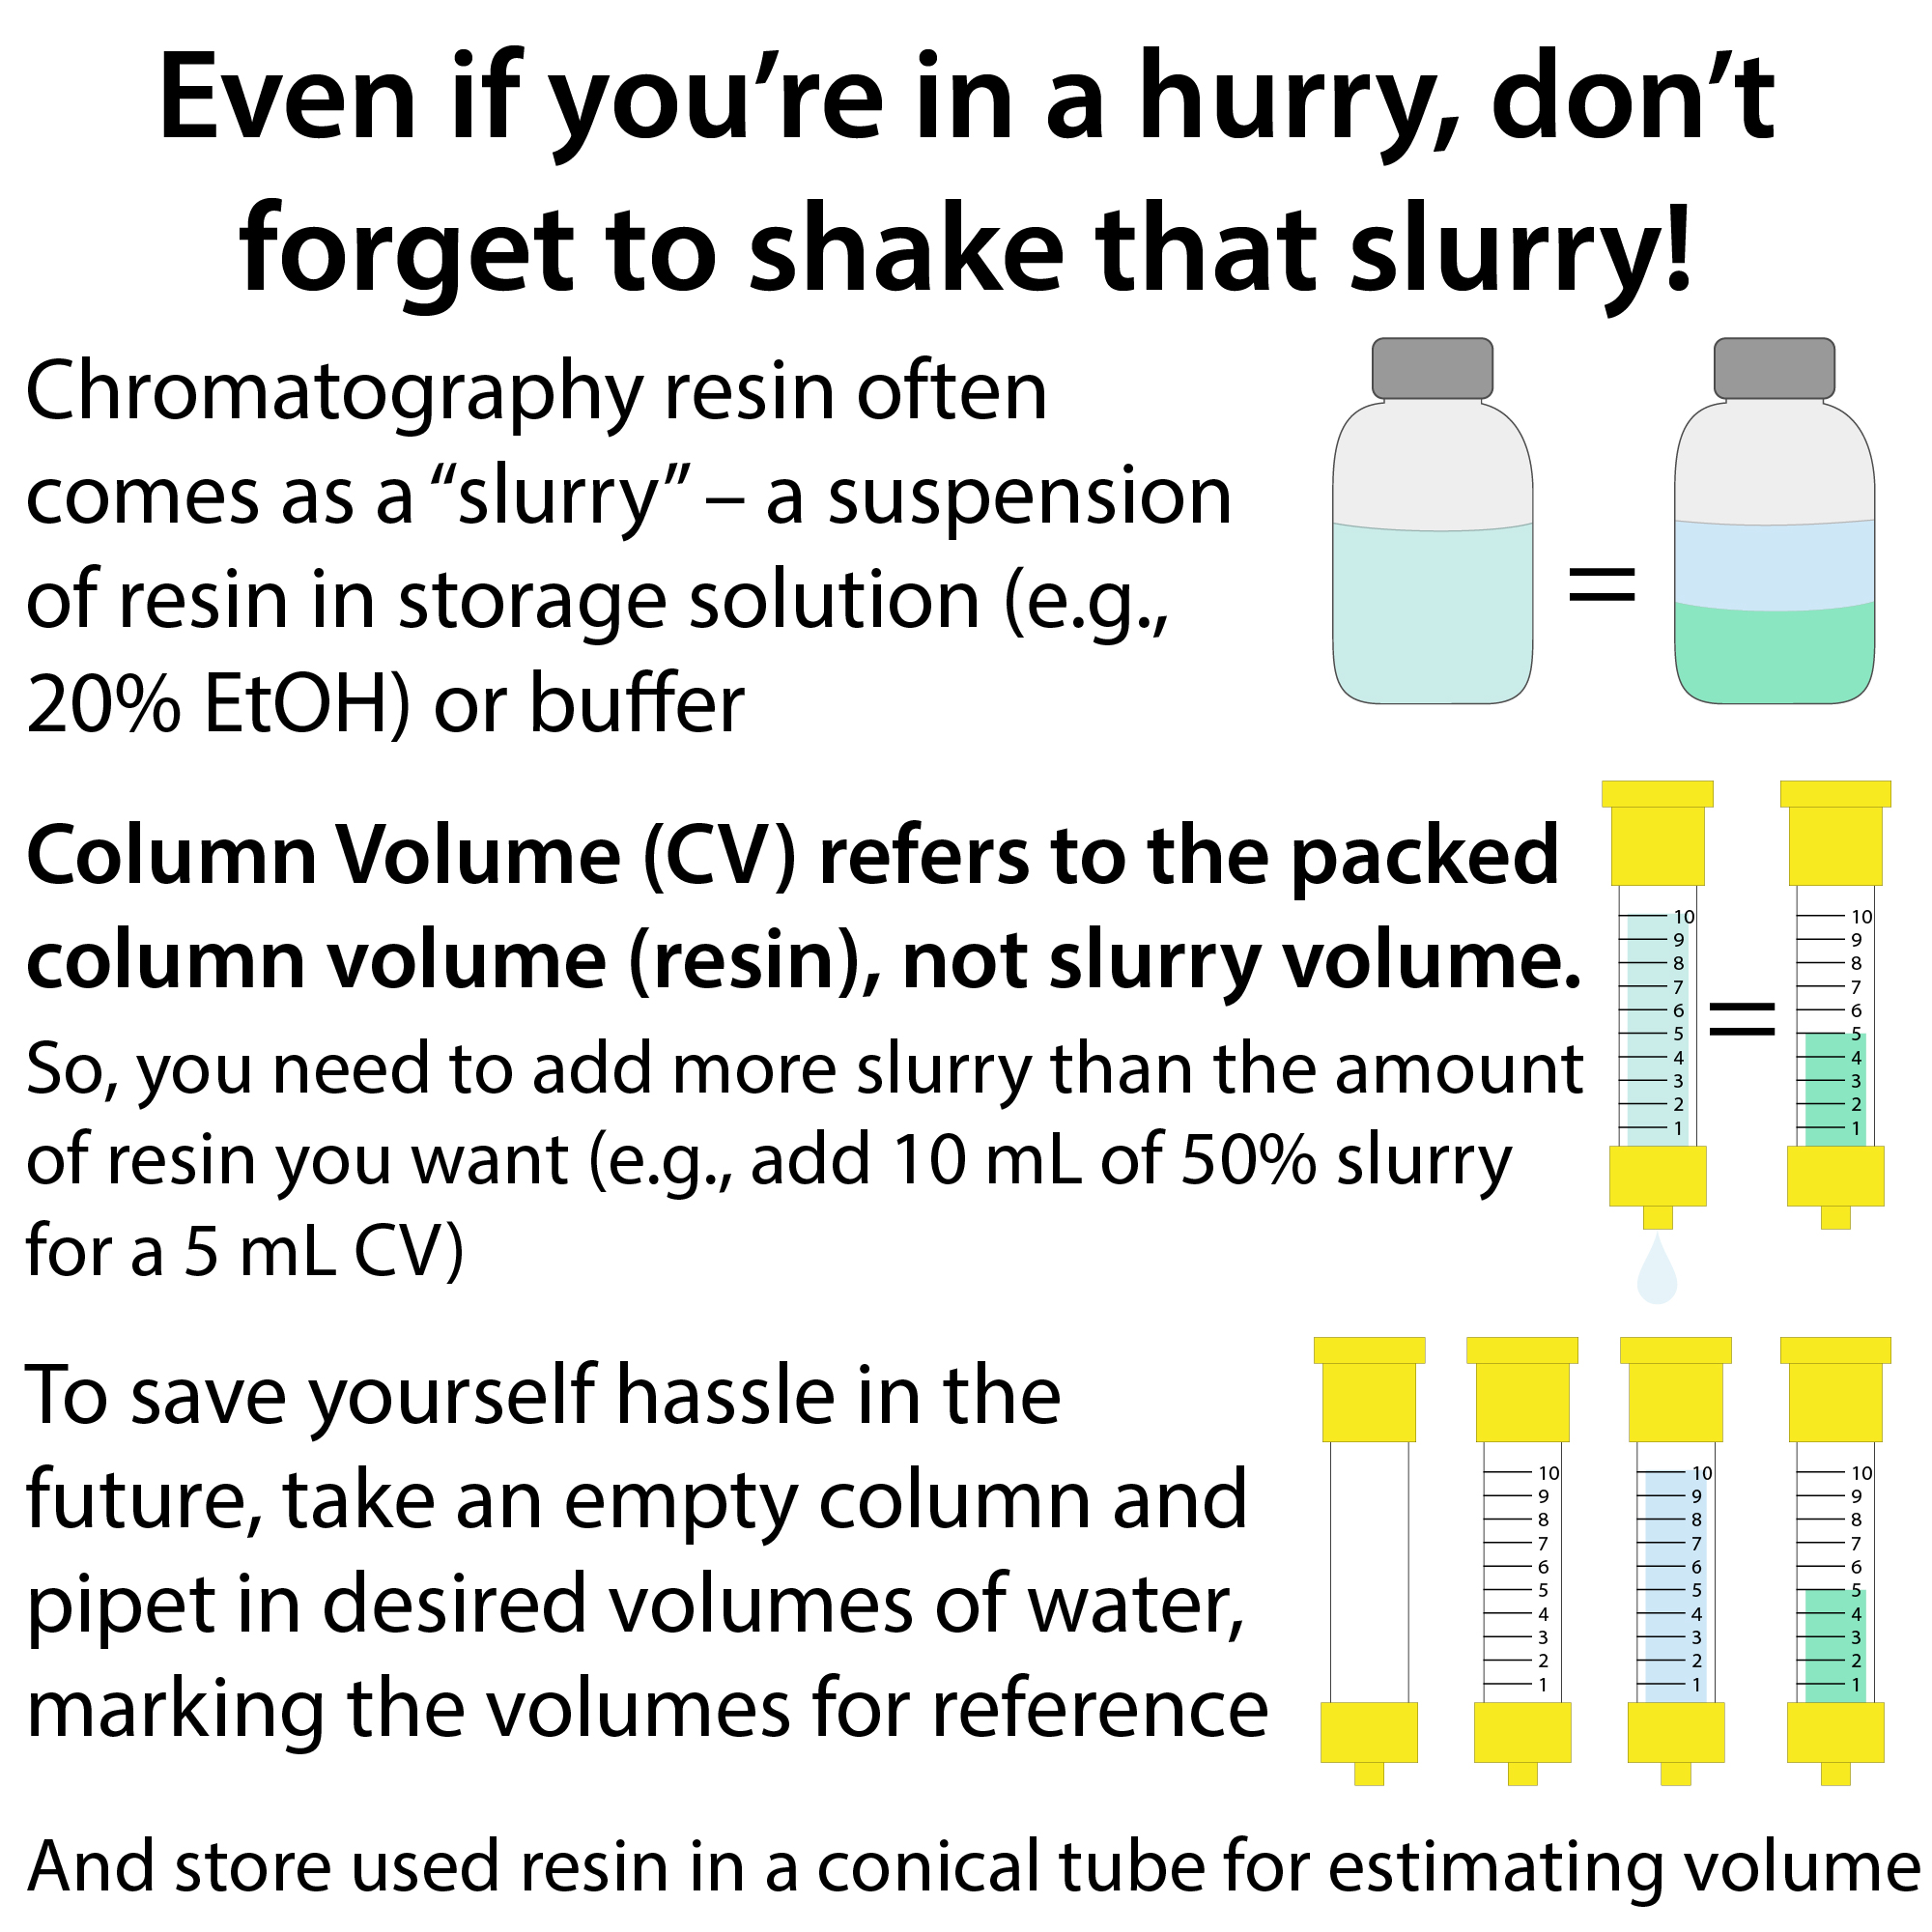
Even if you’re in a hurry, don’t forget to shake that slurry!
Chromatography resin often comes as a “slurry” – a suspension of resin in storage solution (e.g., 20% EtOH) or buffer. Column Volume (CV) refers to the packed column volume (resin), not slurry volume. So, you need to add more slurry than the amount of resin you want (e.g., add 10 mL of 50% slurry for a 5 mL CV).
To save yourself hassle in the future, take an empty column and pipet in desired volumes of water, marking the volumes for reference
And store used resin in a conical tube for estimating volume